


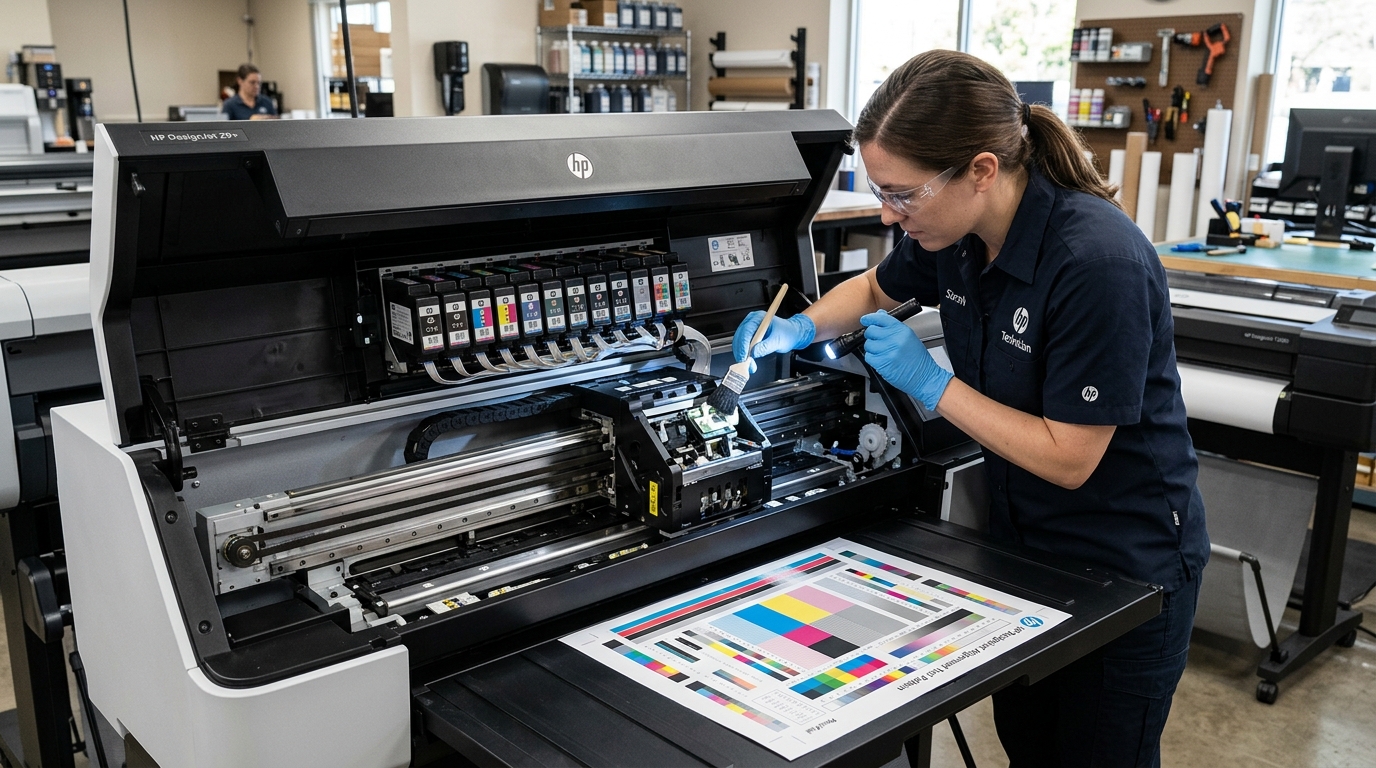
Why DesignJet Printhead Alignment Fails
Unlike desktop printers that scan an alignment page on glass, an HP DesignJet uses an optical sensor mounted under the printhead carriage to read printed test patches in real time.
If ink nozzles are missing, if the wrong paper type is loaded, or if the carriage optical sensor lens is dirty, the printer cannot calculate alignment offsets and aborts with an error.
Step 1: Verify Correct Paper Type for Alignment
Optical sensors require specific media reflectivity to register calibration marks:
- Do not use transparent or colored paper: Never attempt alignment on vellum, tracing paper, canvas, or colored craft roll.
- Do not use high-gloss photographic paper: Specular glare from high-gloss paper blinds the optical line sensor during scanning.
- Load white opaque bond paper: Use standard 20lb to 24lb bright white bond paper with a minimum width of 24 inches.
- Check roll width: The alignment pattern requires at least 24 inches of width to print the complete diagnostic color array.
Step 2: Inspect Ink Cartridge Levels and Drop Detector
The printer will fail alignment if any individual color channel cannot lay down continuous lines:
- Check all ink levels: Tap the Ink icon on the touchscreen. Ensure all cartridges have at least 20% ink remaining.
- Run a Nozzle Health Check: Navigate to Setup > Print Quality Maintenance > Print Diagnostic Image.
- Replace severely depleted printheads: If an entire color bar is completely blank, clean the printhead once. If nozzles do not return, replace that printhead module before attempting alignment.
Step 3: Clean the Carriage Line Sensor Lens
Aerosol ink mist coats the underside optical sensor over months of high-volume plotting:
- Turn off the printer: Power down using the front button, then flip the rear rocker switch.
- Open the main window: Slide the carriage assembly gently toward the center of the platen track.
- Locate the optical line sensor: Look at the lower-left underside of the printhead carriage. You will see a small rectangular lens.
- Wipe the lens clean: Use a dry, lint-free cotton swab. Wipe gently to remove ink haze and paper dust. Do not apply liquid solvent.
- Slide carriage back: Return the carriage to the right-hand service station cap position.
Step 4: Trigger Printhead Alignment from the Front Panel
With clean optics and bond paper loaded, restart the calibration cycle:
- Power on the plotter: Let the printer complete its initial boot and carriage home check.
- Navigate to Alignment: Tap Settings > Image Quality Maintenance > Align Printhead.
- Select Auto Alignment: Choose Align Printhead (Auto). The printer will print a two-phase color patch array.
- Allow the carriage sensor to scan: The carriage will sweep back and forth over the wet ink patches with an illuminated blue/green optical LED.
- Confirm completion: The screen will display "Printhead alignment successful." The plotter automatically cuts and drops the test sheet.
Frequently Asked Questions
Can I bypass printhead alignment and continue printing?
Yes. If you need urgent CAD line drawings, cancel the prompt. Vector line drawings print legibly without alignment, but full-color rendering will show color registration shifts.
What does error code "Alignment aborted: Nozzle check failed" mean?
This means one of the printhead nozzles is completely blocked and cannot print the reference line required by the optical sensor. Perform a Level 2 printhead clean and retest.
Why does the printer fail alignment right after installing a brand new printhead?
New printheads require an ink priming charge. If ink tubes contain air pockets, ink cannot reach the thermal chamber. Run the "Prime Printhead" utility from the Service Menu.
