


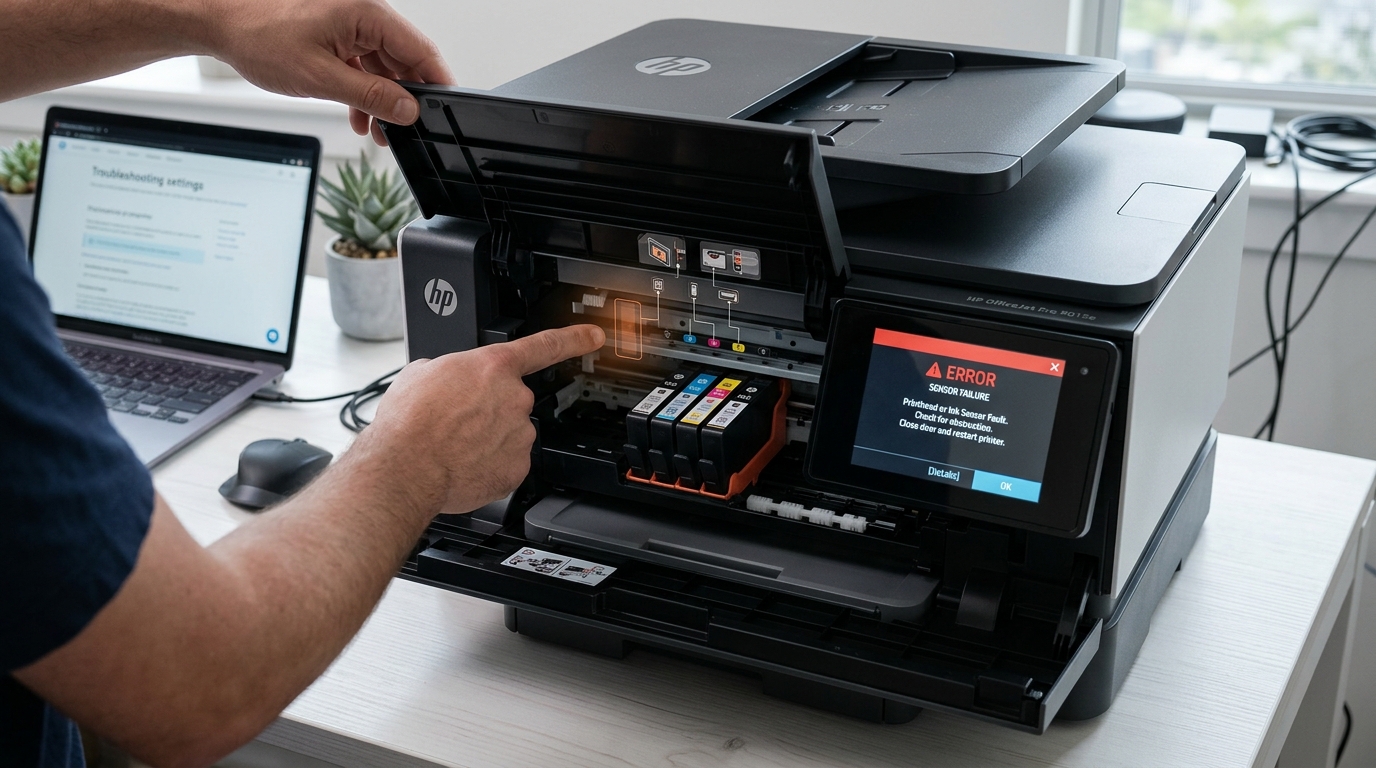
The Quick Answer
HP printer cartridge sensor failure error? A repair tech explains the printer-side optical sensor almost every guide forgets to mention.
Nearly every guide for a cartridge-related error walks you through the same steps: remove the cartridge. Clean its contacts, reseat it firmly.
Reasonable advice, and it resolves plenty of cases. But when a cartridge sensor failure error survives all of that — clean contacts, firm seating, a cartridge you're confident is genuine.
Healthy — there's a piece of the sensing system almost every guide leaves out entirely, because it's not on the cartridge at all. It's built into the printer.
Quick-Fix Summary
Fast version:
- Reseat the cartridge firmly, confirming a full click into place.
- Clean the cartridge's own contacts with a dry or lightly dampened lint-free cloth.
- Try a different cartridge, if you have one available, as a diagnostic test.
- Clean the printer's own sensor window — my uncommon tip, and the piece almost every guide skips.
- Power cycle after any physical cleaning or reseating.
Fix 1: Reseat the Cartridge Firmly
Remove the affected cartridge, and reinstall it with firm, deliberate pressure, confirming you feel (and often hear) a. Distinct click as it locks into its seated position — not just resting in the bay.
Why this works:a cartridge that isn't fully seated can fail to make reliable contact with the printer's reading systems. And a sensor failure error is often the printer's accurate report that it genuinely can't confirm what's installed, because the physical connection never fully completed.
Fix 2: Clean the Cartridge's Own Contacts
Wipe the cartridge's copper or gold-colored contact points gently with a dry. Lint-free cloth, or one lightly dampened with distilled water if there's visible residue.
Why this works:dust, dried ink, or a faint film from handling can interrupt the electrical communication these contacts are responsible for. And this is the most commonly cited fix for exactly this kind of error, because it resolves a genuinely large share of cases on its own.
Fix 3: Try a Different Cartridge
If you have access to a second, known-working cartridge (even temporarily. From another printer or a spare), install it in place of the one currently triggering the error.
Why this works:this is a clean diagnostic split — if a different cartridge clears the error immediately. The original cartridge itself is the likely problem.
If the error persists even with a different cartridge installed. The fault lives somewhere else in the system entirely, which points you directly toward the fix that follows.
Fix 4: Clean the Printer's Own Sensor Window (My Uncommon Tip)
Here's the piece of this puzzle that almost never makes it into a general troubleshooting guide. And it's precisely the fix for cases that survive every cartridge-side fix above without improvement.
Many printers detect cartridge presence, type, or ink level using more than just the electrical contacts most guides focus on — some models also use a small optical sensor, essentially a tiny light-and-lens system built into the printer's own cartridge bay. That reads a corresponding small window or reflective surface on the cartridge to help confirm details about what's installed.
This optical sensor sits on the printer's sideof the connection, not the cartridge's side, which means it's a completely different physical component from the electrical contacts every standard fix targets —. It's just as capable of getting dusty, smudged, or coated with a light residue of ink mist over time as any other internal surface exposed repeatedly to the printing process.
This explains precisely why cartridge-focused fixes sometimes don't work:you can have a perfectly clean, perfectly genuine, perfectly well-seated cartridge, and still get a persistent sensor failure error. Because the actual obstruction is sitting on the printer's own internal lens, not on anything you've been cleaning at all.
Guides that only tell you to clean or replace the cartridge are addressing exactly half of a two-part sensing system.
To check and clean this: power off the printer and unplug it. Remove the cartridge to get a clear, unobstructed view into the empty cartridge bay.
Look carefully along the inside walls and floor of the bay for a small lens, window, or reflective surface — separate. Distinct from the electrical contact pins — that doesn't look like it's meant to physically touch the cartridge the way the contacts do.
Gently clean this area with a dry cotton swab, or one very lightly dampened with distilled water for a stubborn residue. Being careful and gentle rather than pressing hard on what may be a small, somewhat delicate optical component.
Let everything dry fully before reinstalling the cartridge.
Why this works:you're addressing the printer-side half of a two-part detection system that most troubleshooting entirely overlooks. Precisely because it's genuinely easy to assume "cartridge sensor" means something built into the cartridge alone.
Once you understand that some printers detect cartridges partly through an optical read happening on the printer's own internal surface. A persistent error despite a flawless cartridge stops being mysterious — you've simply been cleaning the wrong half of the connection.
Fix 5: Power Cycle
After any cleaning or reseating, power the printer off. Unplug it from the wall for about 30 seconds, then reconnect and power back on.
Why this works:this forces the printer to freshly reinitialize its cartridge detection systems from scratch. Rather than continuing to display a stale error reading that predates whatever you just cleaned or adjusted.
When to Call a Professional
If you've reseated and cleaned the cartridge's own contacts, tested with a different cartridge to rule out a cartridge-specific fault, cleaned the printer's internal optical sensor area if your model has one. And power cycled — and the error still persists — a genuine hardware fault in the printer's detection system is the more likely remaining explanation, since you've now addressed both halves of the typical sensing setup.
Contact HP support with your printer's serial number and describe that you've tested with a different cartridge specifically. Since ruling out the cartridge itself is useful diagnostic information that helps direct their support toward the printer's internal hardware.
FAQ
I've cleaned my cartridge thoroughly and the sensor error won't go away. What am I missing?
Check the printer's own cartridge bay for a small optical sensor window, separate from the electrical contact pins. Many guides only address the cartridge side of this connection,. Some printers also read cartridge information optically from the printer's own internal lens, which can get dusty or smudged independently.
How do I know if it's the cartridge or the printer causing the sensor failure?
Try a different cartridge if you have one available. If the error clears with a different cartridge installed, the original cartridge was likely the issue. If it persists regardless of which cartridge you use, the problem lives in the printer itself.
Is it safe to clean an optical sensor inside the printer myself?
Yes, with care — use a dry cotton swab or one very lightly dampened with distilled water. And clean gently rather than pressing firmly, since this is typically a small, somewhat delicate component built into the cartridge bay.
Does every HP printer have this kind of optical sensor?
Not necessarily every model, but many do use some combination of electrical contact reading and optical sensing to identify cartridges. If contact cleaning alone hasn't resolved a persistent sensor error, checking for an additional optical component. In the bay is worth the few extra minutes regardless of your specific model.
An HP printer cartridge sensor failure error that survives cleaning contacts and reseating the cartridge is often pointing you toward a piece of. The system almost every guide forgets exists: a small optical sensor built into the printer's own cartridge bay, not the cartridge itself.
Clean that internal lens gently, and a problem that looked like it needed a new cartridge often clears completely.
Additional Resources
If you are still experiencing issues after trying the steps above. You may need to consult the official documentation or download the latest firmware (internal software) for your specific printer model. We recommend checking the following official resources:
