


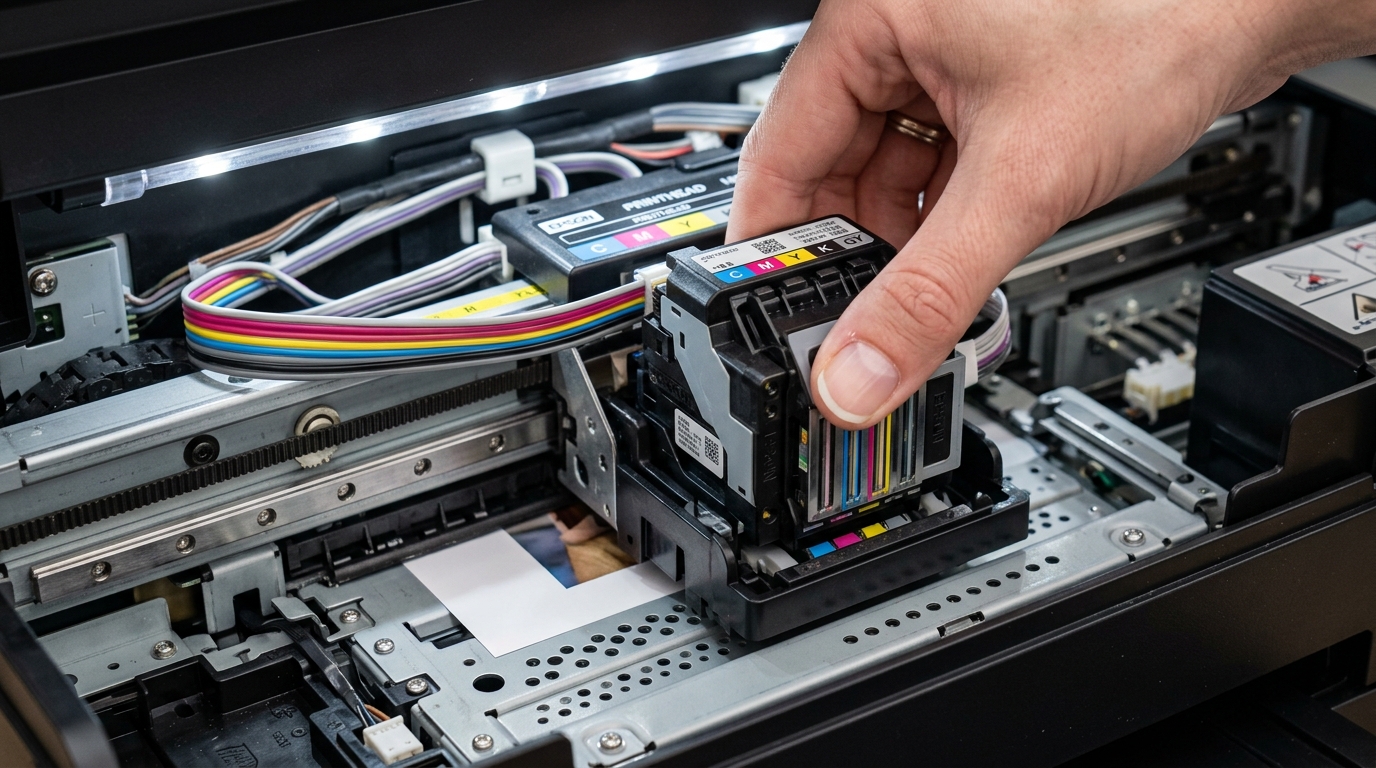
Understanding the HP OfficeJet Pro 9015e "Printhead Missing or Failed" Error
The HP OfficeJet Pro 9015e uses a single, integrated full-width printhead — a large assembly that houses all four ink channels (black, cyan, magenta, yellow) in one removable unit. Unlike cheaper consumer printers where the printhead is part of the disposable cartridge, the 9015e's printhead is a standalone hardware component that is separate from the four ink tanks.
When the printer shows "Printhead Missing or Failed," it means the logic board has lost communication with this printhead module — either because of a bad connection, dirty contacts, or an electrical failure in the head itself.
Step 1: Trigger the Carriage Center Position (Critical First Step)
You cannot safely access the printhead unless the carriage is in the center position. Here is the correct procedure:
- Turn the printer ON and wait for it to complete its startup cycle.
- While the printer is still completing startup (within the first 30 seconds, when you see the carriage moving), open the printer's front access door.
- The carriage will stop in the center position when the door is opened.
- Do not turn the printer off first and then open the door — the carriage parks at the far right when powered down, making printhead access impossible without damage.
Step 2: Remove and Clean the Printhead
- With the carriage centered, press the blue printhead latch lever to the left to unlock it. Lift the lever upward until it is fully open.
- Grip the printhead by its grey plastic handle and pull it straight up and out of the carriage. Place it on a paper towel with the ink nozzle plate facing up.
- Clean the copper contacts on the printhead: Dampen a lint-free foam swab or cloth with 99% isopropyl alcohol (IPA). Wipe the copper rectangular contact pads on the back of the printhead in a single direction. IPA is critical — it evaporates cleanly without leaving mineral residue.
- Clean the carriage contact pads: Look inside the carriage where the printhead sits. You will see a vertical strip of gold-colored spring pins. Gently wipe these pins with a fresh IPA-dampened cloth. This step is often skipped and is frequently the actual cause of the error.
- Allow both the printhead contacts and carriage pins to dry for 5 full minutes before reinserting.
Step 3: Reinstall and Prime the Printhead
- Lower the printhead back into the carriage. Ensure it is fully seated — it should sit flush, with no gap between the printhead and the top of the carriage frame.
- Push the blue latch lever forward and down until it clicks locked. If the latch does not close easily, the printhead is not fully seated — remove it and try again.
- Close the front access door.
- The printer will automatically begin a printhead priming sequence — it will prime the ink channels for 3–5 minutes. Do not interrupt this process.
- After priming completes, the printer will print an alignment page automatically. Allow it to finish.
Diagnosing: Dirty Contacts vs Dead Printhead
The timing of when the error appears tells you a lot about the root cause:
- Error appears within 2–3 seconds of turning on: The printhead has an electrical failure (short or open circuit). Cleaning will not fix this — the printhead needs replacement.
- Error appears after 15–30 seconds (during warmup): The printhead's electrical connection is intermittent. This is almost always dirty contacts. Clean as described above.
- Error appears only after printing a few pages: The carriage's contact pins may be slightly loose, making connection only when cold. The carriage assembly needs service.
Checking for Corroded Carriage Pins
If you notice a green or bluish-white crust on the gold pins inside the carriage, that is ink corrosion from a previous cartridge leak. Corroded pins cannot make reliable electrical contact with the printhead.
- Use a dry cotton swab to gently scrub the corroded pins. Do not use water — it will worsen the corrosion.
- If corrosion is heavy and covers multiple pins, the carriage assembly needs professional service — contact HP Support.
Replacement Information
If the printhead has failed electrically and cleaning does not resolve the error, the printhead needs to be replaced:
- HP OfficeJet Pro 9015e compatible printhead part number: 3WT90A
- Price: Approximately $25–$40 from HP Direct or authorized retailers
- Is it the same as the 9020e? Yes — the HP 9010, 9015, 9018, 9020, and 9025 series all use the same 3WT90A printhead.
Frequently Asked Questions
Can I print with just one color if one channel in the printhead is dead?
No. The 9015e's integrated printhead is an all-or-nothing component.
Is the printhead covered under HP warranty?
The printhead is considered a consumable part on HP OfficeJet Pro printers and is not covered under the standard 1-year limited warranty unless it failed due to a manufacturing defect within the first 90 days. After 90 days, printhead failures are treated as normal wear-and-tear.
Can I damage the printhead by using non-HP ink?
Yes. Third-party inks with different chemical formulations can clog the nozzle channels, cause corrosion on the copper contacts, and permanently damage the printhead within a few months.
What if I replaced the printhead and still get the 'Missing or Failed' error?
If a brand-new genuine HP printhead still triggers the error immediately, the problem has moved to the carriage assembly — specifically the spring-pin connector strip inside the carriage. This requires HP service.
When to Contact HP Support
Contact HP Support at support.hp.com if: (1) cleaning contacts twice did not resolve the error, (2) you see corrosion on the carriage pins, or (3) a new printhead still triggers the error. HP Support can run a remote diagnostic via the HP Smart app to confirm the failure location before you spend money on parts.
