


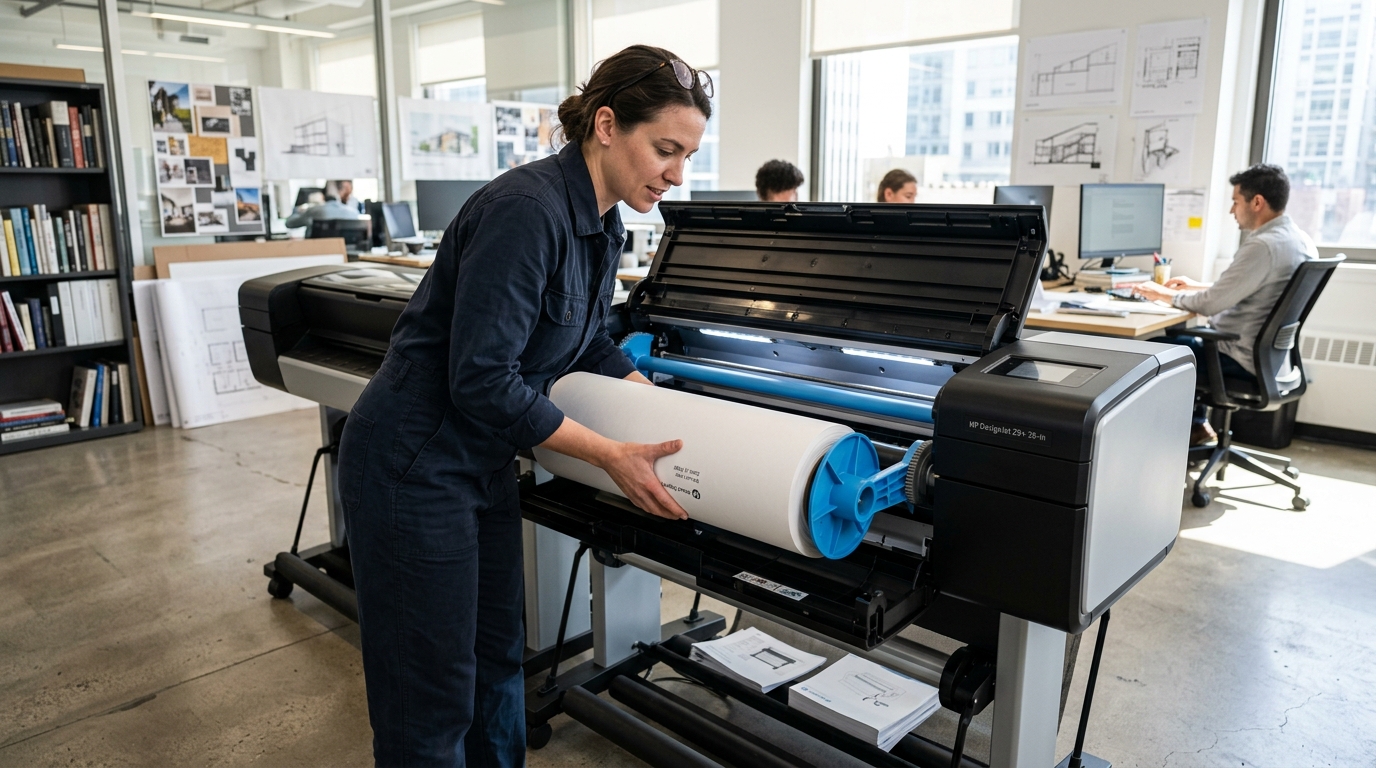
Why Your HP DesignJet Rejects Paper Rolls
HP DesignJet plotters use an automated roll-feed sequence. The printer checks roll alignment, leading edge straightness, and media width using optical line sensors.
When the roll is loaded with uneven tension or a jagged cut edge, the printer rejects the paper immediately. In our workshop, over 80% of loading rejections trace back to spindle hub misalignment or torn leading edges.
Step 1: Check the Spindle Hub and Blue Stop Collar
The roll must be correctly seated against the fixed hub stop before loading:
- Remove the spindle from the plotter: Lift both ends of the spindle out of the printer carriage brackets simultaneously.
- Inspect the blue removable stop: Slide the blue collar firmly against the paper core. Ensure there is zero gap between the collar and the roll.
- Check roll orientation: The paper must feed over the top of the roll toward the printer, not from underneath.
- Verify core diameter adapters: If using a 3-inch core roll on a 2-inch spindle, ensure both blue 3-inch core adapters are securely latched.
- Seat the spindle into the brackets: Insert the blue hub into the right-hand bracket first, then seat the black end into the left bracket.
Step 2: Trim a Perfectly Square Leading Edge
DesignJet line sensors scan the leading paper edge as it enters the platen. A crooked or frayed edge triggers an immediate skew rejection:
- Do not tear paper by hand: Never feed a hand-torn edge into the feed slot.
- Use the manual cutter guide: Pull 6 inches of paper past the cutting groove on the platen.
- Cut with a fresh blade: Use a straight edge and utility blade or the printer's built-in form-feed cut function to create a 90-degree square edge.
- Remove dog-eared corners: Ensure both left and right corners are completely flat with no wrinkles or folds.
Step 3: Feed Paper into the Roll Slot
Follow the front panel prompt carefully during insertion:
- Select Paper on the touchscreen: Tap the Paper icon, select Roll, and choose Load.
- Select your exact paper type: Choose Bond, Coated, or Heavyweight. Matching the media profile determines feed motor tension.
- Slide paper into the feed slot: Push the leading edge straight into the slot until you feel resistance and hear a beep.
- Allow the motor to grab the sheet: Keep holding the sides of the roll lightly until the feed rollers take over the paper advance.
Step 4: Clean the Carriage Optical Line Sensor
If the printer repeatedly displays "Paper not detected" or "Skew detected" with straight paper, the carriage optical sensor is coated in paper dust:
- Turn off the plotter: Power down the unit and disconnect the power cable.
- Open the top window: Slide the printhead carriage to the center of the platen manually.
- Locate the line sensor: The optical sensor is located on the underside of the carriage assembly, next to the printhead latch.
- Clean the sensor lens: Gently wipe the small optical glass window using a dry, lint-free microfiber swab. Never use alcohol or liquid cleaners on this optical sensor.
- Close the window and reboot: Reconnect power and restart the roll loading procedure.
Frequently Asked Questions
Why does my DesignJet say "Paper skew detected" even when loaded straight?
This happens when the paper roll's leading edge is not cut at a precise 90-degree angle. Recut the leading edge using a straight blade and verify the blue spindle collar is pressed tight against the core.
Can I load third-party bond paper rolls on HP DesignJets?
Yes. Ensure the paper is wound on a standard 2-inch core and select "Generic Bond Paper" or "HP Universal Bond" on the front panel.
What should I do if the roll motor makes a grinding noise during feed?
A grinding noise indicates the spindle is seated backward or the paper roll is binding against the spindle housing. Remove the spindle and ensure the blue end matches the blue carriage gear.
