


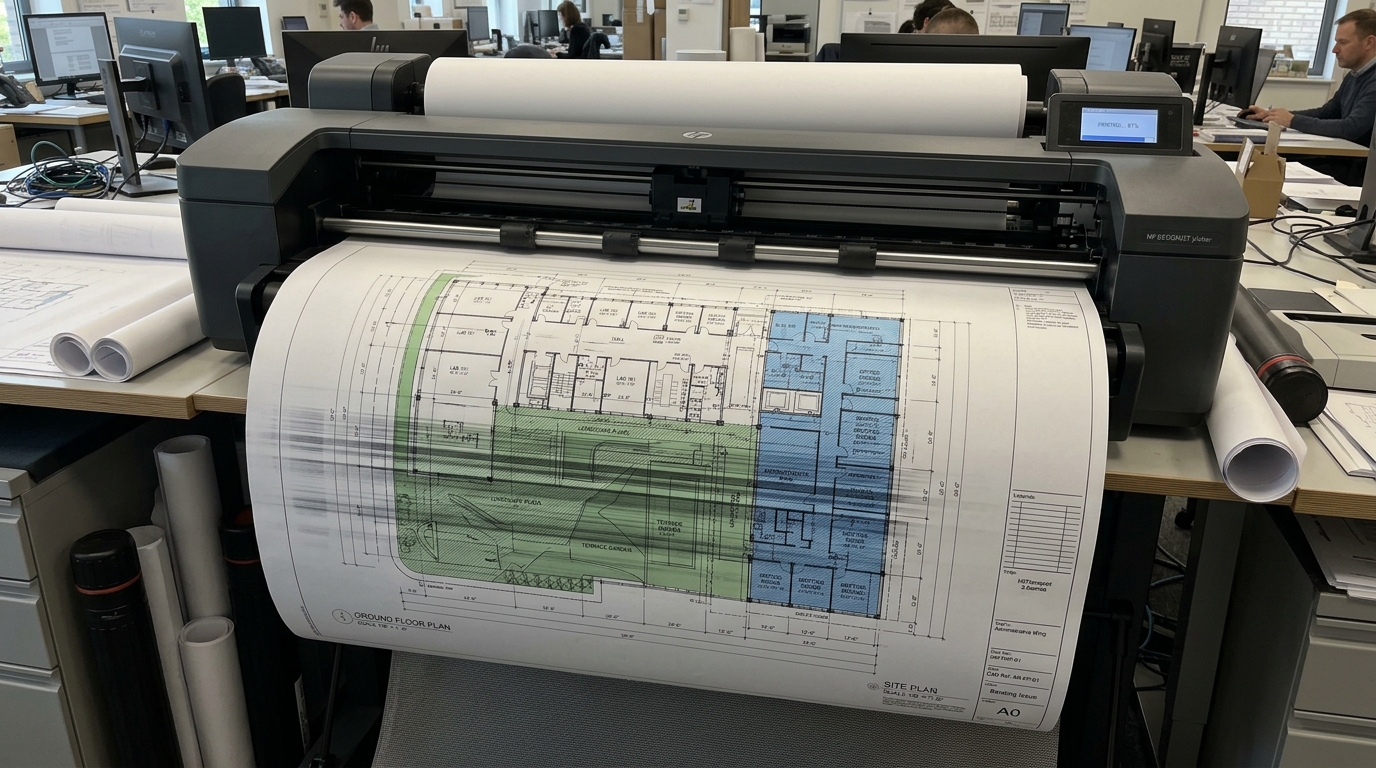
Understanding Banding on Large Format Plots
Banding appears in two distinct patterns: horizontal bands across the width of the page, or vertical streaks running down the length of the roll.
Horizontal white lines are caused by misaligned paper advance steps or clogged nozzles. Dark horizontal overlaps indicate the paper feed motor is advancing too slowly between printhead passes.
Step 1: Distinguish Between Scan and Feed Banding
Identifying the direction of the lines reveals the exact mechanical cause:
- Horizontal banding (across page width): Indicates nozzle dropouts in the printhead or incorrect paper advance step calibration.
- Vertical banding (down roll length): Caused by uneven roll drag, platen vacuum suction errors, or damaged carriage drive belt teeth.
- Periodic gaps matching roll rotation: Points to an eccentric spindle or bent core inside the paper roll.
Step 2: Run the Diagnostic Print and Clean Printheads
Check for blocked nozzles across all color channels:
- Load standard white bond paper: Ensure at least 24-inch wide roll media is loaded.
- Open the Setup Menu: Tap Setup > Image Quality Maintenance on the front panel.
- Select Print Diagnostic Image: The plotter prints test blocks for Cyan, Magenta, Yellow, and Matte Black.
- Examine the grid patterns: Look for missing horizontal lines or breaks in the color swatches.
- Execute Printhead Cleaning: If lines are missing, select Clean Printheads > Level 1. Run Level 2 only if nozzle gaps persist.
Step 3: Run Paper Advance Calibration (OMAS / Manual)
The paper advance motor must step media forward by microscopic increments between each carriage sweep:
- Access Paper Advance Calibration: From the front panel, navigate to Settings > Image Quality Maintenance > Paper Advance Calibration.
- Select Calibrate Paper Advance: The printer prints a series of numbered overlapping line patterns.
- Allow automatic optical measurement: On plotters equipped with an Optical Media Advance Sensor (OMAS), the printer measures the pattern automatically.
- Manual selection (if prompted): If prompted on older models (T120/T520), identify the numbered block with the cleanest continuous tone and enter that value on the touchscreen.
- Save and apply: Confirm the calibration. This permanently adjusts step timing for the currently loaded paper type.
Step 4: Adjust Platen Vacuum and Drying Time
Heavy ink saturation on coated or glossy media can cause paper cockle (rippling) that rubs against the printhead:
- Select correct paper profile: Never print high-density graphics with the "Plain Paper" profile. Choose "Heavyweight Coated" or "Photo Glossy".
- Increase drying time: In the driver print dialog, set Drying Time to Automatic or Optimal to prevent the cutter from dragging wet ink.
- Check room humidity: Excessive humidity softens bond paper, causing uneven expansion and feed banding during multi-meter banner runs.
Frequently Asked Questions
Why does banding only appear halfway through a long 30-foot print?
As the roll unwinds, roll weight and spindle friction decrease. Run the Paper Advance Calibration with the roll at half capacity to set a balanced tension profile.
Will increasing print quality in the driver remove banding?
Yes. Switching from "Fast/Draft" to "Best" increases the number of printhead passes from 1-pass to 4-pass, masking minor nozzle dropouts through shingling.
How often should I calibrate paper advance on my DesignJet?
Calibrate whenever switching to a new paper brand, different paper weight (e.g. from 20lb bond to 36lb coated), or after clearing a severe paper jam.
