


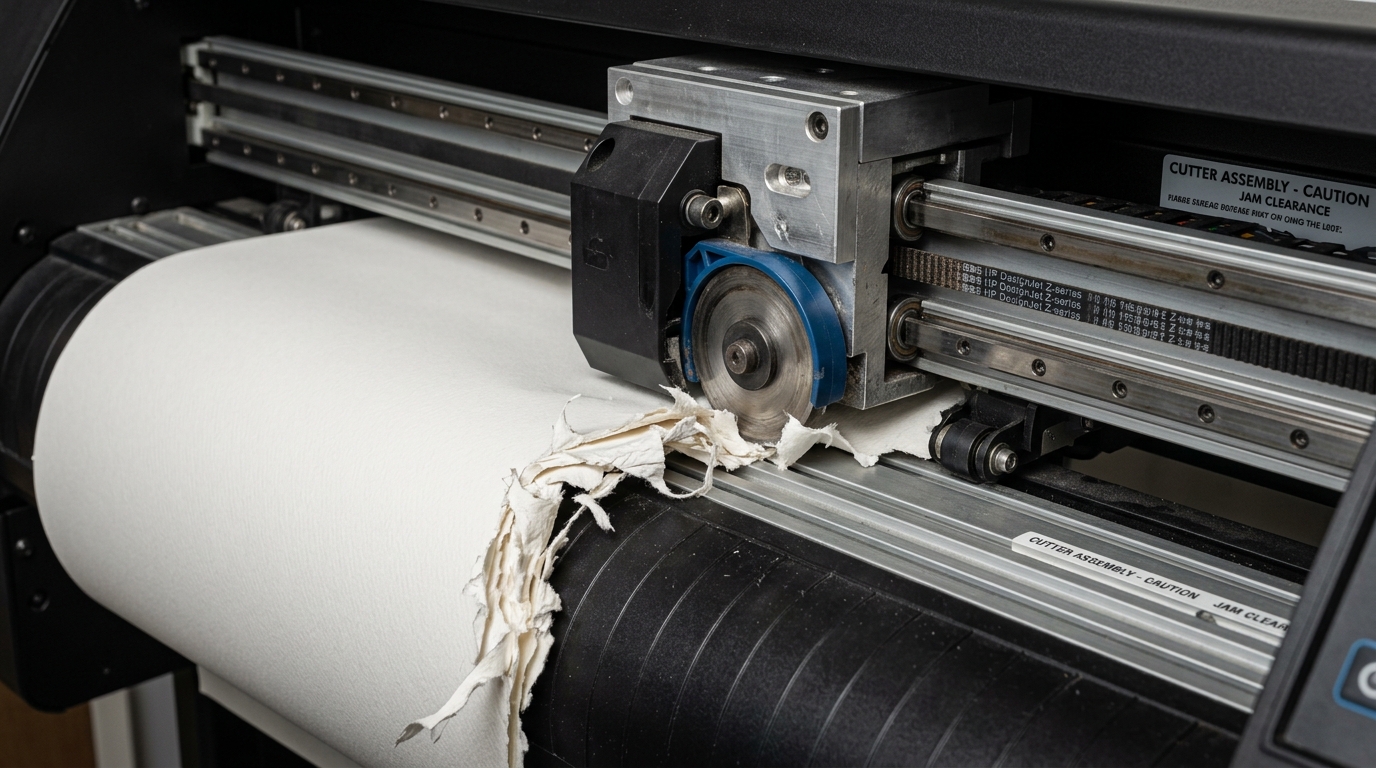
Understanding HP DesignJet Automatic Cutters
HP DesignJet plotters utilize a motorized rotary blade assembly that travels horizontally across the platen channel to cut paper rolls after each job.
When the blade becomes dull, filled with paper lint, or derailed from its drive track, the cutter tears the paper or jams completely, halting all further plotting.
Step 1: Check Media Thickness and Weight Limits
Attempting to cut unsupported media is the most frequent cause of broken cutter carriages:
- Standard cutter capacity: Built-in rotary cutters are designed for media between 60 g/m² and 280 g/m².
- Unsupported cutter media: Never use the automatic cutter on canvas, heavy banner vinyl, magnetic media, or self-adhesive film.
- Disable the cutter for heavy media: On the front panel, tap Paper > Roll > Cutter Option and select OFF.
- Cut thick media manually: Advance paper past the platen groove and use a utility knife along the integrated manual cutting track.
Step 2: Clear Paper Lint from the Cutter Track Groove
Paper dust accumulates in the aluminum cutter channel over time, preventing the rotary wheel from spinning freely:
- Turn off the printer: Power off the plotter and unplug the power cord.
- Open the top access window: Locate the cutter carriage parked on the far left or right end of the track.
- Inspect the cutting channel: Use a bright flashlight to inspect the narrow groove spanning the full width of the platen.
- Clear packed debris: Use a compressed air can and a thin plastic shim to gently clear compacted paper lint and tiny torn scraps from the groove.
- Check blade rotation: Manually rotate the circular metal blade with a gloved finger to ensure it spins without binding.
Step 3: Reseat a Derailed Cutter Carriage
A severe paper jam can force the cutter carriage off its guide rails:
- Inspect the carriage guide wheels: Look at the rear of the cutter block. It has two small plastic guide rollers that ride in a metal groove.
- Check the drive engagement pin: The cutter connects to the printhead carriage via a mechanical latch pin on select T-series models.
- Reseat onto the rail: Gently press the carriage downward and tilt backward until the rollers snap cleanly back into the metal guide channel.
- Manually test travel: Slide the cutter carriage across the width of the printer by hand. It should glide smoothly with slight rolling resistance.
- Return to park position: Park the cutter fully against the left stop bracket before powering the printer on.
Step 4: Enable or Test the Cutter from the Front Panel
Verify motor operation through the printer menu:
- Turn on the plotter: Allow the plotter to finish its startup carriage diagnostic sweep.
- Access Paper Options: Tap Paper > Roll > Form Feed and Cut on the touchscreen.
- Observe the cut motion: The paper should advance 2 inches, and the cutter carriage should cross the platen in a single smooth sweep without hesitation.
- Inspect the cut edge: The cut must be clean and straight with zero fraying, ragged burs, or partial attachments.
Frequently Asked Questions
Can the rotary blade on an HP DesignJet cutter be sharpened?
No. The cutter is a precision sealed rotary unit. If the hardened steel blade becomes dull or nicked, the modular cutter assembly must be replaced.
Why does my cutter leave the last inch of paper uncut?
This happens when the paper roll shifts rightward or the cutter carriage stops before reaching the full end of the guide rail. Clean the end-stop sensor and recalibrate carriage travel.
What error code indicates a jammed cutter on HP DesignJet?
Error code 42:10 or 42.1:10 directly indicates an electrical failure or mechanical stall in the cutter motor assembly.
