


Introduction to Pantum Print Quality Issues
Pantum laser printers are known for their affordability and compact design, making them a popular choice for home offices and small businesses. However, over time, users may begin to notice print quality degradation, specifically faded prints, light text, or distinct blank spots appearing down the page.
These visual defects are not just annoying; they render important documents unprofessional and unreadable. While the immediate assumption is that the printer is simply out of toner, the root cause often lies in the electro-photographic components within the toner cartridge, specifically the charging roller or the corona wire.
This guide will explain why this happens and how to meticulously troubleshoot and resolve the issue.
Why This Happens
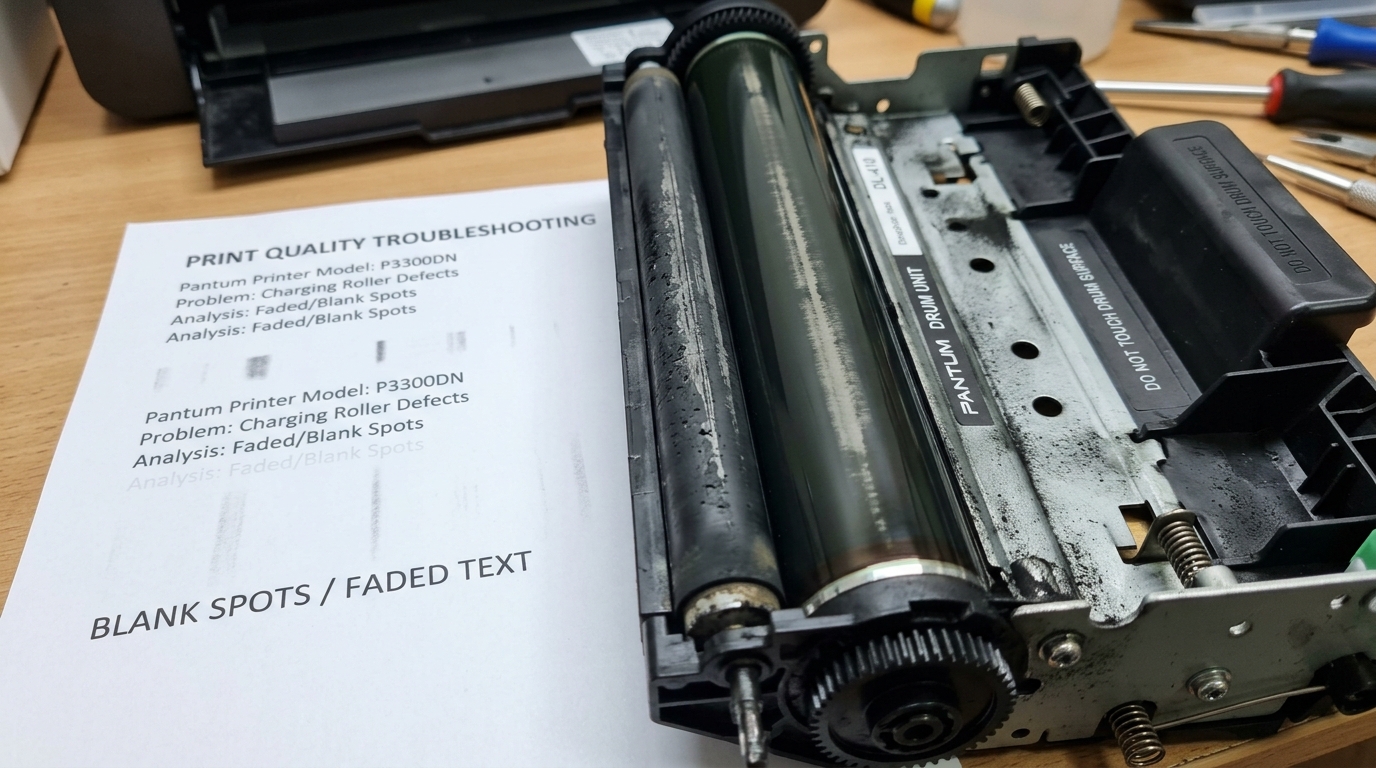
Laser printing is an intricate dance of static electricity, lasers, and fine toner powder. The Primary Charge Roller (PCR) is a critical rubber-coated cylinder inside the toner cartridge assembly.
Its job is to apply a uniform negative electrical charge to the Organic Photo-Conductor (OPC) drum. If the PCR becomes dirty, scratched, or coated in stray toner dust, it cannot apply an even charge.
The areas of the drum that don't receive the charge will not attract toner, resulting in repetitive blank spots or streaks down your printed page.
Faded prints, on the other hand, can be caused by low toner levels, but they are also frequently caused by a dirty laser scanner window or a contaminated corona wire (depending on the specific Pantum model's architecture). If the laser beam cannot clearly hit the OPC drum due to dust or toner buildup on the glass, the electrostatic image will be weak, leading to light, faded text.
Furthermore, operating the printer in high humidity environments can cause the toner powder to clump, preventing it from transferring smoothly to the paper.
Step-by-Step Fix
To fix faded prints and blank spots, we must systematically clean the internal components and assess the cartridge health.
- Perform the Shake Test: Before disassembling anything, remove the toner cartridge from the Pantum printer. Hold it horizontally and gently rock it side-to-side and front-to-back 5 or 6 times. This redistributes the toner powder inside the hopper, breaking up clumps. Reinsert and print a test page. If fading disappears, the cartridge was just unevenly packed.
- Clean the Corona Wire / Charge Roller: Depending on your Pantum model, there may be a built-in cleaning mechanism. Look for a small colored tab (usually green or blue) on top of the drum unit. Slide this tab back and forth across the length of the unit 5-10 times. Ensure the tab is clicked back into its starting "Home" position. This cleans the primary charging mechanism.
- Inspect the OPC Drum: Remove the cartridge and carefully look at the shiny, usually blue or green cylinder (the OPC drum). Do not touch it with your bare fingers, as oils will ruin it. If you see physical scratches or permanent rings worn into the drum's coating, cleaning will not help; the cartridge or drum unit must be replaced.
- Clean the Laser Scanner Window: Inside the printer cavity (where the cartridge sits), look up towards the top. You should see a narrow slit with a glass strip inside. This is the laser window. Take a dry, lint-free microfiber cloth (do not use liquids) and gently wipe the length of this glass. Dust here scatters the laser, causing faded prints.
- Check Print Density Settings: Open the Pantum printer properties on your computer. Navigate to the 'Quality' or 'Advanced' tab. Look for a setting called 'Toner Density' or 'Print Darkness'. Increase this setting by one or two notches to force the printer to lay down more toner.
- Update Firmware and Drivers: Sometimes, electrical charge timings are optimized via software. Go to the Pantum support site, download the latest firmware tool for your model, and apply the update.
Advanced Troubleshooting
If you have cleaned everything and shaken the cartridge, but you still have precise, repeating blank spots, you need to measure the distance between the spots. Print a page with full text.
Measure the distance from the top of one blank spot to the top of the next blank spot in millimeters. This measurement corresponds to the circumference of the damaged internal roller.
For example, in many Pantum models, a repeating defect every ~26mm indicates damage to the Magnetic Developer Roller. A defect every ~37mm points to the Primary Charge Roller (PCR), and a defect every ~75mm indicates damage to the OPC drum itself.
If the defect repeats, the issue is strictly contained within the cartridge assembly. Because Pantum often integrates the toner and drum into a single unit (depending on the model), the only solution for roller damage is to purchase a completely new, genuine OEM toner cartridge.
Avoid cheap third-party remanufactured cartridges, as they frequently reuse worn-out PCRs, leading to these exact print defects straight out of the box.
FAQ
Can I clean the green drum cylinder with rubbing alcohol?
No. Never use alcohol, solvents, or water on the OPC drum.
Why is the page fading only on one side?
Fading on a single side usually indicates that the toner is physically depleted on that side of the hopper. Taking the cartridge out and rocking it side-to-side will temporarily fix this, but it means you need a new cartridge soon.
Does leaving the printer in a cold room cause fading?
Yes. Laser printers rely on heat to fuse the toner to the paper.
I slid the cleaning tab, but now my prints have a huge black line. Why?
You did not return the cleaning tab to its "Home" position. There is usually an arrow indicating the resting spot.
