


Introduction
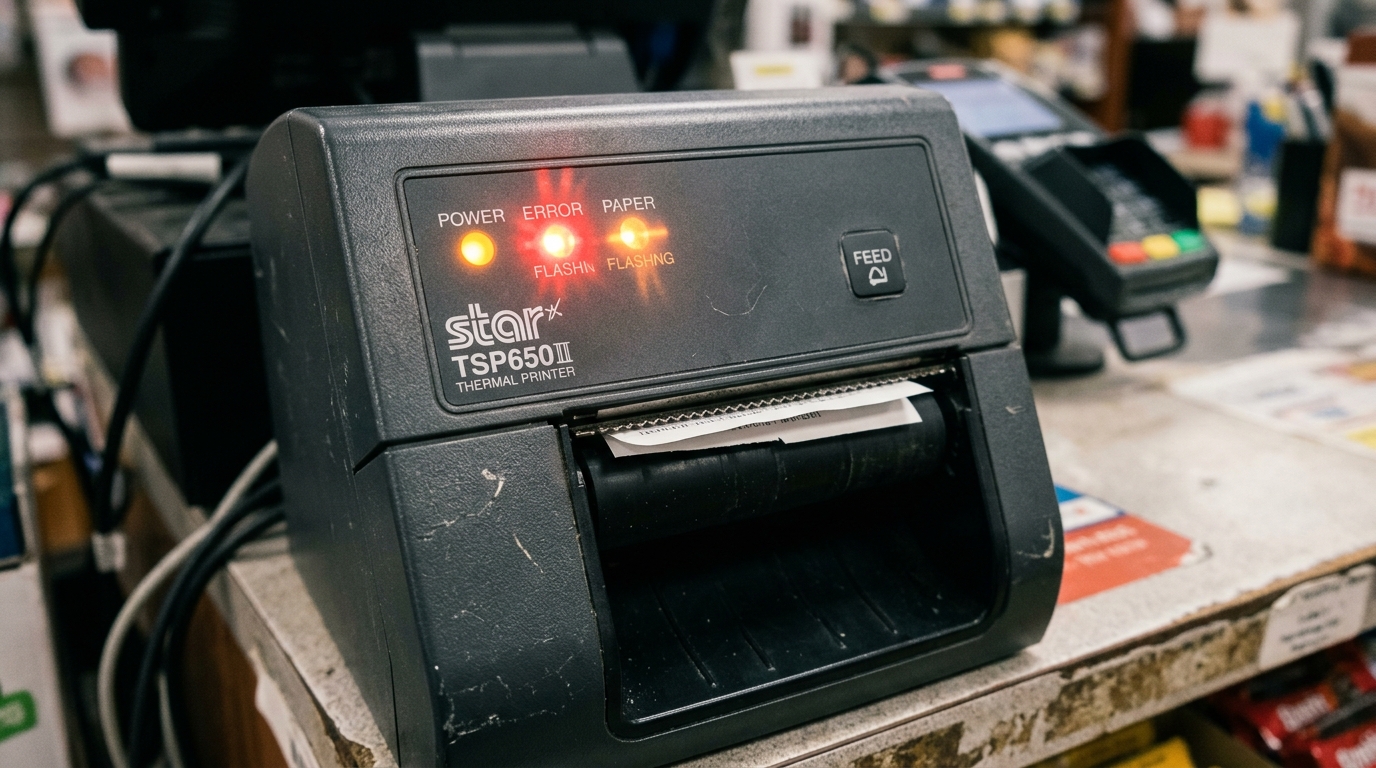
Star Micronics printers, such as the renowned TSP100, TSP650II, and mC-Print series, are the backbone of countless Point of Sale (POS) systems in retail. Hospitality worldwide.
Known for their rugged durability, they quietly print receipts day in and day out. However, when things go wrong, these printers communicate their distress through a cryptic language of flashing LED lights.
Repetitive beeping sequences. Confronting a Star Micronics printer that is aggressively beeping.
Flashing red lights can be a panic-inducing moment in a busy restaurant or retail store, instantly halting transactions. This comprehensive guide is designed to decode this visual and auditory language.
We will thoroughly explain the meaning behind the various LED error codes and beeping patterns, outline the immediate troubleshooting steps to resolve the underlying hardware or network issues. Provide a detailed walkthrough on how to perform a factory reset to recover a severely unresponsive device.
Understanding these error codes is crucial because they pinpoint the exact point of failure within the printer's complex mechanisms. A printer might flash due to a simple paper out scenario, a more complex network IP conflict, a severed thermal head connection, or a catastrophic logic board failure.
We will break down the diagnostic process into clear, actionable steps, moving from the most common and easily fixable user errors to advanced hardware. Firmware (internal software) resets.
By mastering this troubleshooting framework, store managers and IT support personnel can minimize downtime, prevent unnecessary service calls. Maintain the smooth operation of their critical POS infrastructure.
Why This Happens
The LED flashing and beeping on a Star Micronics printer serve as an integrated hardware diagnostic system. The most frequent cause for a solid or flashing red "Error" LED is related to the paper path.
This includes the printer being out of paper, the paper roll cover being open or loosely latched, or a physical paper jam where receipt paper has crumpled around the platen roller or the auto-cutter mechanism. The sensors within the printer immediately halt operation to prevent damage to the thermal head or gears.
Trigger the visual/auditory alarms to alert the user.
Network connectivity issues represent another massive category of errors, particularly for Ethernet and Wi-Fi models. If a printer is configured for a static IP address.
The network router assigns that IP to another device (an IP conflict), or if the Ethernet cable is damaged, the printer loses communication with the POS terminal. In these scenarios, specific flashing patterns on the network interface card (often located at the back of the printer near the port) or specific beeping sequences indicate a loss of network link or failure to acquire an IP address from the DHCP server.
More severe hardware failures will trigger unique and persistent error codes. If the thermal print head overheats due to continuous heavy printing or poor ventilation, the printer will flash an error.
Pause until the internal thermistor registers a safe temperature. Similarly, if the auto-cutter blade gets stuck mid-cycle and cannot retract, a specific error code is generated.
The printer locks up. Finally, corrupted internal firmware (internal software) or a failure on the main logic board can result in continuous, rapid flashing of all LEDs or a solid error light that refuses to clear regardless of physical interventions.
Step-by-Step Fix
- Decode the LED/Beep Pattern: Observe the specific pattern. A steady red light usually means the cover is open. A fast flashing red light (e.g., once per second) typically indicates paper out or a paper jam. A specific sequence (e.g., two flashes, pause, two flashes) often points to a cutter error. Check the manufacturer's manual for your specific model to cross-reference the exact pattern.
- Resolve Paper and Cover Issues: This solves 80% of problems. Open the printer cover completely. Remove the paper roll. Check inside for any scraps of torn paper, especially around the serrated tear bar and the auto-cutter slot. Blow out any paper dust. Insert a fresh roll of paper ensuring it feeds from the bottom of the roll, pull a little bit of paper out. Firmly close the lid until it clicks securely on both sides.
- Clear Auto-Cutter Jams: If you suspect a cutter jam, DO NOT force the lid open. Look for a small plastic cover on the front or top of the printer above the cutter mechanism. Remove this cover to expose a manual cutter knob or gear. Turn this knob carefully (usually in the direction of the arrow) to manually retract the cutter blade to its home position. Once retracted, the lid will open easily, allowing you to clear the jammed paper.
- Check Network Connections (Ethernet/LAN Models): Look at the lights on the Ethernet port at the back of the printer. You should see a solid green light (link) and a flashing amber/yellow light (activity). If both are off, the cable is dead, unplugged, or the network switch is down. Replace the Ethernet cable and verify the network port on the wall is active.
- Power Cycle the Printer: Turn off the printer using the physical power switch. Unplug the power cable from the back of the unit and from the wall outlet. Wait 60 seconds to allow internal capacitors to discharge fully. Plug everything back in securely and power the printer on. This clears temporary memory glitches and forces a hardware re-setup.
- Print a Self-Test Page: To isolate hardware from POS software issues, perform a hardware self-test. Turn the printer OFF. Hold down the "FEED" button on the front panel. While continuing to hold FEED, turn the printer ON. Keep holding FEED until the printer begins to print, then release. The printer will print a long diagnostics strip detailing its firmware (internal software) version, interface settings. Network settings (IP address). If this prints successfully, the printer hardware is fine, and the issue lies with the network or POS software.
Advanced Troubleshooting: Factory Reset
If the printer remains unresponsive, possesses corrupt network settings, or if you are moving the printer to a completely new network environment, a factory reset is necessary. A factory reset wipes all custom configurations, static IP addresses, and pairing data, returning the printer to its out-of-the-box state.
To perform a Factory Reset (Network setup) on most Star Micronics Ethernet/Wi-Fi models: First, ensure the printer is turned OFF. Locate the small "SW" (Switch) or "Reset" button on the network interface card at the rear of the printer (you may need a pen or paperclip to press it).
Turn the printer ON while simultaneously holding down the Reset button. Continue holding the button until both the network LED lights (usually green and red) on the rear panel begin to flash simultaneously.
You hear a specific beep or see the front panel lights flash. Release the button.
The printer will reset and reboot. After rebooting, it will default to DHCP, meaning it will attempt to automatically grab a new IP address from your router.
You must then reconfigure the printer in your POS system using its new IP address (which can be found by printing a self-test page as described above).
For Bluetooth models (like the mC-Print or portable series), resetting the Bluetooth pairing history might be required. This often involves holding the Bluetooth pairing button on the back of the printer for 10-15 seconds until the blue indicator LED flashes rapidly or turns off, signaling that previous device pairings have been wiped from memory.
You will then need to 'forget' the printer in your iPad or tablet's Bluetooth settings and re-pair it from scratch.
FAQ
Why is my Star Micronics printer printing gibberish characters?
Printing random, unintelligible characters is almost always a baud rate mismatch or a corrupted driver issue. If using a serial connection, the baud rate on the printer dip switches must match the POS software setting.
The power light is on, but there are no error lights, and it won't print. What's wrong?
This usually indicates a communication breakdown where the printer is healthy but not receiving data. Verify the IP address hasn't changed.
Can I turn off the beeping sound?
On many models, yes. The volume.
What does a blinking green light mean?
A blinking green power light usually indicates the printer is in standby or sleep mode to conserve power. Sending a print job should automatically wake the printer up.
