


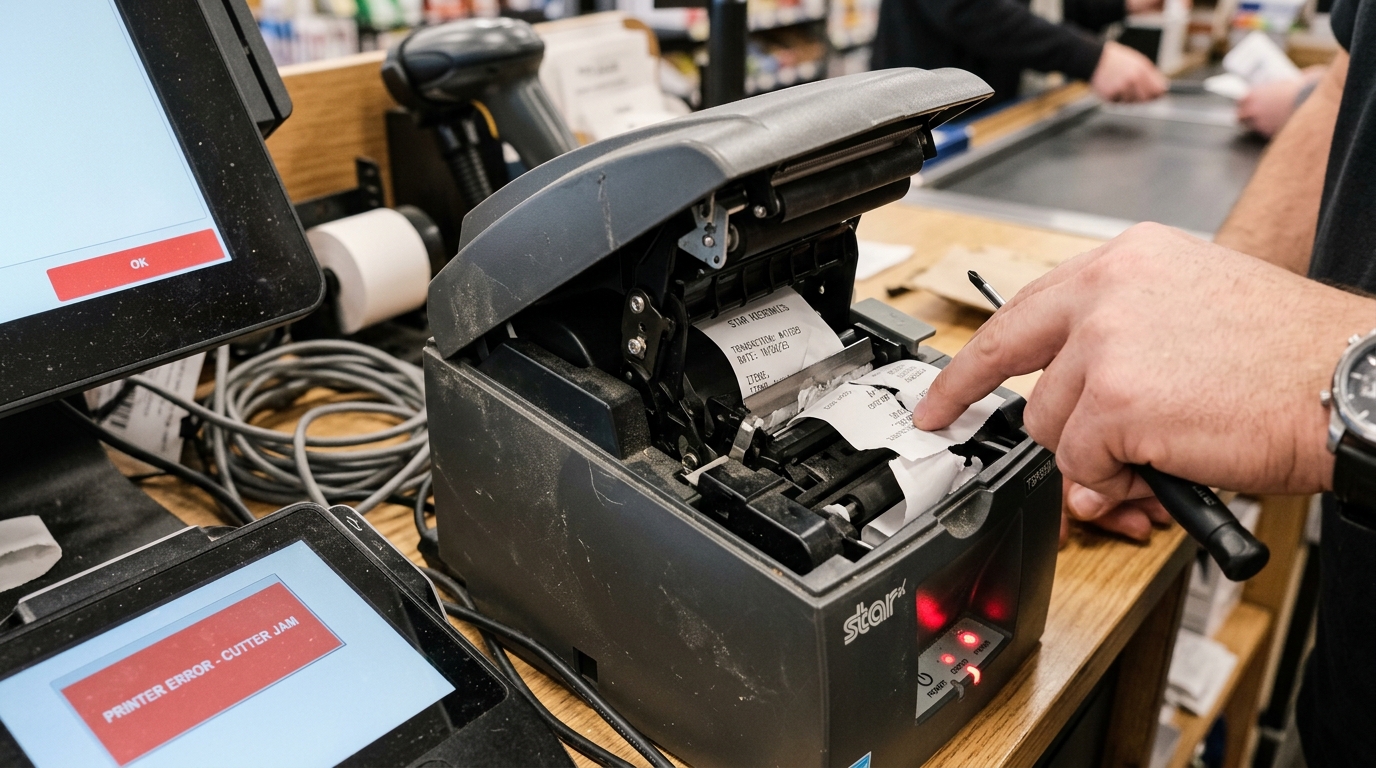
Star Micronics receipt printers, such as the TSP100, TSP650. MC-Print series, are the backbone of countless point-of-sale (POS) systems in restaurants, retail stores, and hospitality venues.
While engineered for high reliability in demanding environments, one of the most stressful failures occurs when the internal guillotine cutter jams, locking the front cover shut. Bringing the checkout process to a grinding halt.
A flashing red error LED usually accompanies this mechanical failure, indicating a severe paper jam or a cutter blade that has failed to retract. Forcing the cover open with a screwdriver or brute force will permanently destroy the locking mechanism.
The delicate ceramic print head. This comprehensive technical guide details the safe, vendor-approved procedures to manually retract a locked cutter blade, clear complex paper jams.
Perform preventative maintenance to keep your Star Micronics printer operating smoothly.
Why This Happens
Why This Happens: The Mechanics of Auto-Cutter Failures
The auto-cutter mechanism in a Star Micronics printer consists of a stationary lower blade. A motorized upper blade that slides horizontally or pivots to shear the thermal receipt paper.
Cutter locks and severe jams are typically caused by one or a combination of the following issues:
1. Paper Debris Accumulation: Every time the cutter fires, microscopic paper dust and tiny slivers of thermal paper are created.
Over months of heavy use, this dust mixes with ambient humidity. Cooking grease (in kitchen environments) to form a dense paste that clogs the gear tracks, preventing the blade from returning to its home position.
2.
Crinkled or Wet Paper: If the thermal paper roll is damaged, warped by moisture, or loaded unevenly, it will not feed straight. When the cutter attempts to slice a folded or bunched section of paper, the required cutting force exceeds the motor's torque limit, causing it to stall mid-cut.
Lock the cover.
3. Foreign Objects: Staples, paperclips, or coins dropped into the printer's feed slot will instantly jam the cutter blade.
The hardened steel of a staple will wedge between the blades, locking them together. Triggering a motor over-current protection fault on the logic board.
4.
Using the Wrong Paper Thickness: Star printers are calibrated for standard thermal receipt paper (usually around 50-80 GSM). Using excessively thick cardstock, label paper with adhesive backing, or multi-part carbonless paper in a standard thermal printer will quickly dull the blade.
Over-stress the cutter motor, leading to frequent lockups.
5. Power Surges During Cutting: A brief brownout or power dip precisely at the moment the cutter is actuated can cause the microprocessor to lose track of the blade's position.
The motor loses power mid-stroke, leaving the blade extended and locking the printer closed.
Step-by-Step Fix and Setup Guide
- Power Cycle the Printer: First, attempt a soft reset. Turn off the printer using the physical power switch on the side or front. Wait 10 seconds, then turn it back on. Star printers run an setup sequence on boot. The firmware (internal software) will detect an out-of-position cutter. Attempt to pulse the motor backward to retract the blade automatically. If you hear grinding or the red error light persists, proceed to the manual override.
- DO NOT FORCE THE COVER: If the cover is locked, the cutter blade is currently extended across the paper path, interlocking the lid with the base. Forcing it open will shatter the plastic chassis and bend the metal blade guides, requiring a complete printer replacement.
- Access the Manual Retraction Gear: Locate the front cover panel of the printer (the small plastic faceplate below the paper exit slot). On models like the TSP100/TSP650, this panel can be removed. Grip the sides of the front panel. Pull it gently straight out towards you, or press the specific release tabs located on the bottom edge.
- Locate the Adjustment Knob: Once the front bezel is removed, you will expose the metallic cutter assembly. Look for a small, white or black plastic thumbwheel gear, usually located on the right side or the center of the assembly. Some models may require a small Phillips head screwdriver to turn a specific slotted gear.
- Manually Retract the Blade: Rotate the adjustment gear or thumbwheel. You must rotate it in the direction indicated by the arrow embossed on the metal frame (usually downwards or counter-clockwise). As you turn the gear, you will see the V-shaped metal cutter blade slowly slide backward into its housing. Continue turning until the blade is completely flush and no longer protrudes into the paper path.
- Open the Cover and Clear the Jam: Once the blade is fully retracted, the mechanical interlock is released. Press the cover release lever. The top lid should now pop open easily. Remove the thermal paper roll. Carefully extract any crumpled paper, torn scraps, or foreign objects from the cutter area and the platen roller using tweezers.
- Clean the Mechanism: Use a can of compressed air to blow out all paper dust from the cutter tracks and optical sensors. For heavy grease buildup, use a cotton swab dipped in 99% isopropyl alcohol to clean the metal blade tracks. The black rubber platen roller. Let it dry completely.
- Reassemble and Test: Snap the front bezel back into place. Reload the thermal paper roll, ensuring it feeds from the bottom (underneath the roll). Close the cover firmly. Power on the printer. Hold the 'FEED' button while turning it on to run a self-test print and verify the cutter operates smoothly.
Advanced Troubleshooting
Advanced Troubleshooting If you manually retract the blade. It jams again immediately upon the next print job, the cutter assembly has likely reached the end of its mechanical lifespan.
The blade may be chipped, or the internal gears are stripped. The auto-cutter unit on most Star TSP series printers is a modular component.
You can purchase a replacement cutter assembly (e.g., part number 39569110 for certain models), remove the two mounting screws holding the old cutter to the chassis, disconnect the small ribbon cable. Install the new unit.
This is significantly cheaper than replacing the entire printer. Furthermore, check the POS software settings.
Some web-based POS systems send multiple, rapid "cut" commands via ESC/POS codes, causing the cutter to fire before it has fully retracted from the previous cut. Ensure your POS terminal is configured to send only a single partial or full cut command at the end of the receipt footer.
Finally, if the printer is located in a high-static environment, electrostatic discharge can scramble the logic board, causing erratic cutter behavior; ensure the printer is plugged into a properly grounded AC outlet.
FAQ
Why does the red error light keep flashing even after clearing the jam?
A flashing red light after clearing a jam usually indicates that the cover is not closed entirely. Press down firmly on both the left and right corners of the lid until you hear two distinct clicks. It can also indicate that the printer is completely out of paper, or the optical paper sensor is dirty. Failing to detect the new roll.Can I disable the auto-cutter and just tear the paper manually?
Yes. You can disable the cutter via the Star Micronics settings Utility on a Windows PC, or by modifying the dip switches on the bottom of older models. You can also configure your POS software to stop sending the ESC/POS cut command (usually 'ESC i' or 'ESC m'). You will then rely on the serrated tear bar.What type of paper should I use to prevent jams?
Always use high-quality, BPA-free thermal receipt paper. Avoid paper that feels excessively rough or leaves a lot of white dust on your hands. Ensure the roll width matches your printer exactly (typically 80mm or 3 1/8 inches for standard POS printers).Is it safe to use WD-40 to lubricate the cutter blades?
Absolutely not. WD-40 is a solvent, not a long-term lubricant. It will attract massive amounts of paper dust, turning it into a thick sludge that will permanently ruin the printer. It can also degrade the rubber platen roller. If lubrication is strictly necessary on metal rails, use a tiny amount of dry PTFE (Teflon) spray applied with a precision applicator. Generally, keeping the mechanism clean and dry is the recommended approach.Disclaimer: Before proceeding with any hardware modifications, firmware (internal software) flashes, or deep driver configurations, it is absolutely essential to ensure that your operating system is fully up to date. That you have backed up any critical print spooler configurations.
Thermal. Dot matrix printers, along with modern network enterprise printers, frequently interact with low-level system APIs (such as the Windows Print Spooler service, CUPS on macOS/Linux, or built-in vendor port monitors).
Modifying these parameters without a solid understanding of your network topology, USB root hub power management settings. Driver signing enforcement can lead to system instability, unrecoverable printing queues, or degraded print head lifespans.
Additionally, if your device is under an active manufacturer warranty or an extended service contract, opening the chassis, breaking warranty seals, or installing unsigned third-party drivers might void your support agreement. Always consult your IT department or the official vendor documentation if you are operating within a strict compliance framework (such.
HIPAA, PCI-DSS, or SOX), as misconfigured network printers can expose internal subnets to unauthorized access or lead to data leakage through unencrypted print streams. Use extreme caution when handling thermal print heads or physical cutter blades, as they can cause burns or lacerations.
Allow the device to cool down completely for at least 15 to 30 minutes after extensive use before attempting any physical clearing of jams, roller maintenance with isopropyl alcohol, or ribbon replacements. Always use a grounded anti-static wrist strap when interacting with internal logic boards to prevent electrostatic discharge (ESD) from permanently damaging sensitive microcontroller units or NVRAM chips.
This comprehensive guide is designed for system administrators, advanced power users. IT technicians who need to resolve persistent hardware or software issues that standard troubleshooting steps have failed to address.
It is provided 'as is' without warranties of any kind.
