


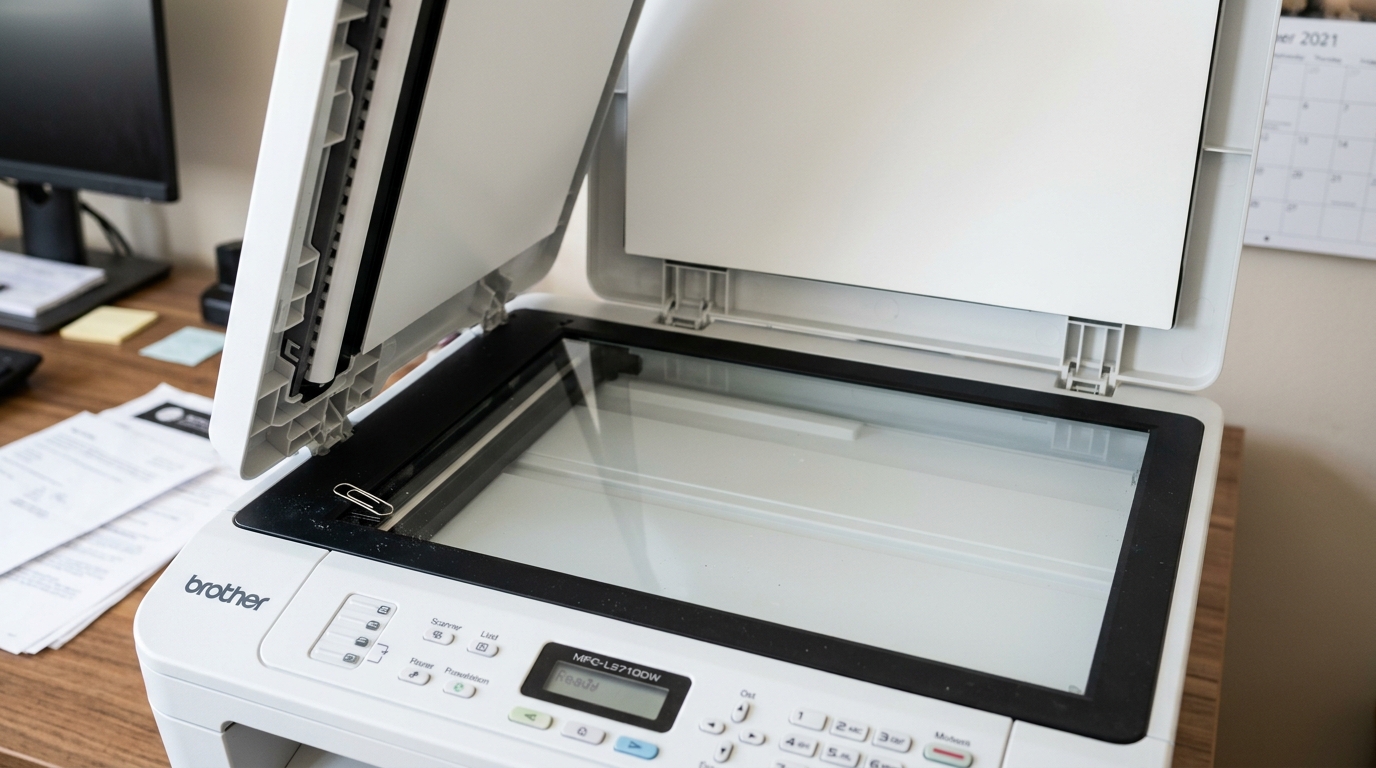
Brother printer error 30, shown as "Unable to Print," is a mechanical stop sign — something is physically preventing normal movement inside the machine, and in nearly every case it's smaller and simpler than the alarming message makes it sound.
What Error 30 Actually Means
This error signals a mechanical malfunction somewhere in the printer's normal operation, most commonly caused by something physically stuck where it shouldn't be — a paper clip, a torn scrap of paper, a stray label, or any small foreign object interfering with internal movement. It's rarely a sign of a genuinely broken part on its own.
Why this matters: the fix is almost always a physical search, not a settings change or a reset.
Fix 1: Lift the Scanner Cover Fully
Using both hands, lift the scanner cover into its fully open position until it locks and stays open on its own support, rather than just tilting it partway. This gives you clear access to look down into the internal mechanism beneath, which a partially raised cover won't expose.
Why this works: most people check the obvious paper path — trays, output area — and miss the internal area only visible with the scanner cover fully raised and supported. A lot of what triggers error 30 is hiding exactly there, out of sight during a quick glance.
Fix 2: Search Thoroughly for Foreign Objects
With the cover fully open, look carefully along the visible mechanism for anything that doesn't belong — a paper clip, staple, torn label backing, or paper scrap. Check corners and edges specifically, not just the center of your view, since small objects tend to end up pushed to one side rather than sitting in plain sight.
Why this works: even something as small as a paper clip can physically block a moving part enough to trigger this error, and it's often small enough to miss on a fast look. A deliberate, corner-to-corner search is what actually finds it.
Fix 3: Power Cycle After Clearing Anything
Once you've removed any object you find, close the scanner cover fully until it clicks, then power the printer off and back on.
Why this works: this gives the printer a fresh start to confirm its internal path is genuinely clear, rather than continuing to display an error state that was set before you removed the obstruction.
When to Call a Professional
If you've thoroughly checked with the scanner cover fully raised and found nothing, and error 30 persists after a power cycle, this points toward a genuine mechanical fault rather than an obstruction — worth professional diagnosis rather than continued searching.
Mechanical Analysis of Brother Error 30
Error 30 ("Unable to Print 30") is a mechanical movement fault. The main DC drive motor or the carriage motor is attempting to rotate, but the internal optical rotation sensor (encoder wheel or tachometer) is reporting zero movement or abnormal drag.
Something is physically blocking the gear train, the paper feed rollers, or the printhead carriage.
Systematic Inspection & Clearing Guide
- The Flashlight Inspection (The "Torn Paper Corner" Check):
90% of Error 30 occurrences are caused by a scrap of paper no larger than a postage stamp jammed beneath the paper feed roller or inside the purge unit (the ink cleaning station on the far right). Turn off the printer, lift the scanner or cover, and use a bright flashlight to inspect both the extreme left and right corners of the printhead track.
- Check the Clear Plastic Encoder Strip:
Behind the printhead carriage runs a thin, clear plastic ribbon marked with microscopic vertical lines (the encoder strip). If grease from the carriage guide rail or ink mist has smudged this strip, the optical sensor cannot read carriage position, stalls out, and triggers Error 30.
Gently clean the strip using a dry microfiber cloth (or very lightly moistened with water — never use alcohol as it strips the printed timing marks).
- Inspect the Purge Unit / Maintenance Station:
On inkjet models, look at the far right side where the printhead parks. The wiper blade and rubber suction caps can get stuck in the raised position if dried ink forms a hardened crust. Gently push the rubber cap assembly downward to confirm it springs back smoothly.
- Manually Check Carriage Movement:
With power completely disconnected, gently slide the printhead carriage back and forth across its metal rail by hand. It should glide with smooth, uniform resistance. If it hits a hard stop before reaching either wall, locate and remove the obstruction.
Frequently Asked Questions
What should I do if the carriage is locked on the right side and won't move?
The carriage is locked by a mechanical cam to prevent drying. Turn the large white plastic gear on the left side of the paper path clockwise by hand.
Can Error 30 be caused by foreign objects like paperclips?
Yes. Staples, paper clips, and label backing paper frequently fall into the top paper feed slot.
