


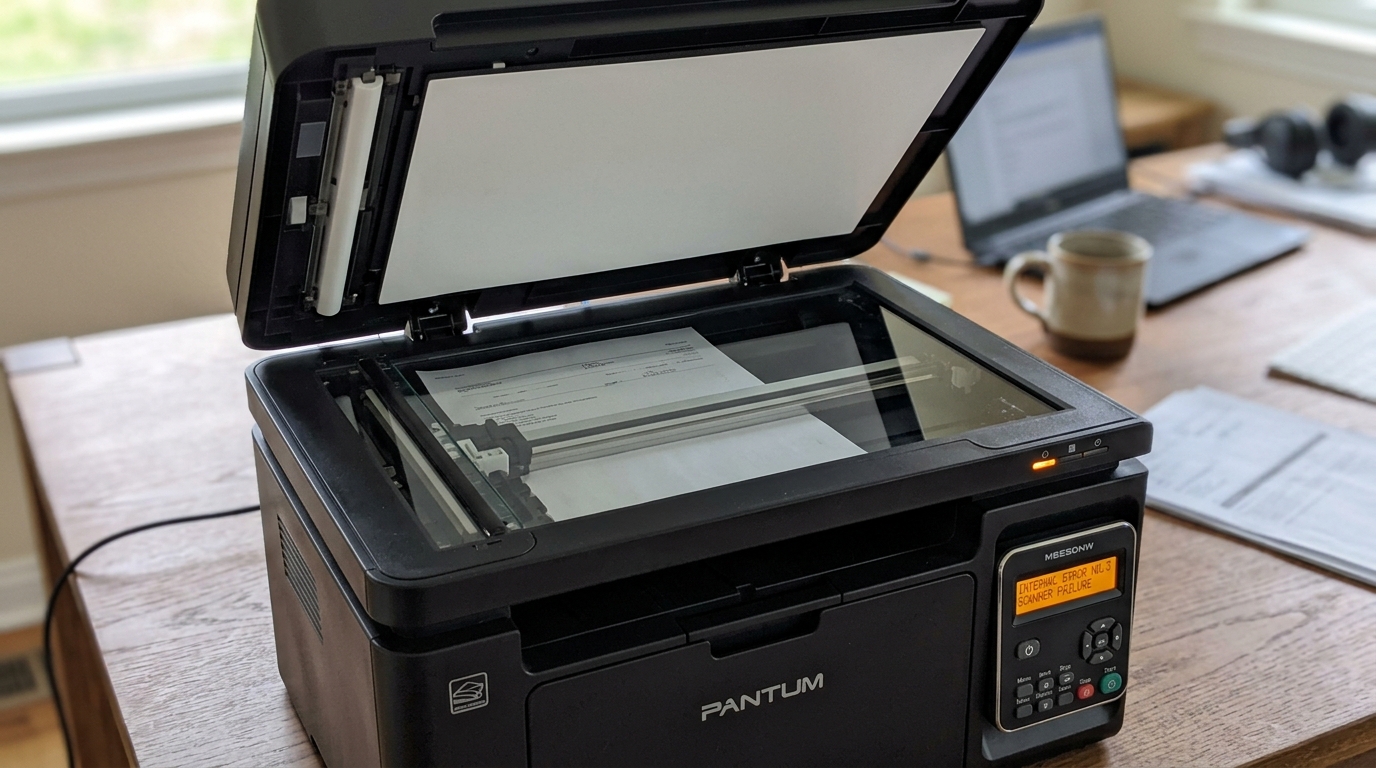
Pantum printers are excellent budget-friendly laser printers, but users may occasionally encounter cryptic internal error codes on the display, such as Error No.1, Error No.3, or Scanner Error 05. These codes can bring your workflow to a sudden halt, as they usually indicate a hardware communication failure, a mechanical jam, or a malfunctioning sensor within the device.
Error No.1 often points to a main motor or laser unit synchronization problem, while Error No.3 is frequently associated with fuser temperature anomalies. Scanner Error 05 clearly signifies that the scanner carriage cannot initialize or find its home position.
This guide will provide a deep dive into diagnosing these specific Pantum internal errors, offering practical steps to clear them and restore your printer's functionality without necessarily needing to contact a service technician immediately.
Why This Happens
Internal errors in Pantum printers are generated by the engine control board when it detects that a component is not behaving as expected during the startup self-test or during a print job. For instance, Scanner Error 05 happens when the scanner lamp carriage attempts to move to the edge of the glass to read the white calibration strip but is physically blocked, or if the CIS (Contact Image Sensor) cable is loose or damaged, preventing the sensor from reporting its position.
Error No.3 (fuser error) is triggered if the thermistor detects that the heating roller is not reaching the target temperature within a specific timeframe, which could be due to a blown thermal fuse, a bad power supply, or even a sudden drop in ambient room temperature. Error No.1 is a general engine failure often linked to the polygonal motor in the laser scanner unit failing to reach its target RPM, or the main drive motor experiencing excessive torque due to gear binding.
Step-by-Step Fix
- Perform a Hard Reset: Turn off the Pantum printer and disconnect the power cord from the wall outlet and the printer. Wait for at least 10 minutes to allow all capacitors on the main board to discharge completely.
- Check for Physical Obstructions: Open the toner cartridge door and remove the toner and drum unit. Inspect the paper path meticulously for any torn scraps of paper, paper clips, or debris that might be binding the gears.
- For Scanner Error 05: Lift the scanner lid. While the printer is off, check if the scanner carriage (the bar with the light) is stuck in the middle. Gently try to slide it manually. Clean the glass strip on the left side, as this is used for calibration.
- Inspect the CIS Ribbon Cable: If you are comfortable opening the scanner assembly, check the wide, flat, white ribbon cable connecting the scanner carriage to the main board. Ensure it is seated firmly and not crimped or torn.
- For Error No .3 (Fuser): Ensure the printer is plugged directly into a wall outlet, not a power strip or UPS. Laser printers draw significant peak current to heat the fuser, and power strips can restrict this current, causing under-temperature errors.
- Reinstall Consumables: Place the toner and drum unit back into the printer, ensuring they click securely into place. Sometimes, poorly seated contacts can cause false motor errors (Error No.1).
- Power On and Initialize: Reconnect the power cord and turn the printer on. Listen closely to the sounds it makes. You should hear the main motor spinning and the scanner carriage moving briefly to find its home position.
- Firmware Update: If the printer boots up to a ready state but throws the error again when you try to print, connect it to your computer via USB and check the Pantum website for a firmware update tool, which may resolve false sensor readings.
Advanced Troubleshooting
If the errors persist after basic troubleshooting, you may be dealing with failed hardware components. For Error No.1, the laser scanner unit (LSU) or the main drive motor assembly might need replacement.
The polygonal mirror motor in the LSU can seize due to lack of lubrication on its bearings. For Error No.3, you will need a multimeter to test the fuser unit.
Disconnect the fuser and measure the resistance across the heater terminals; an open circuit means the halogen lamp or thermal fuse is blown. For Scanner Error 05, if the carriage moves but the error remains, the CIS module itself has likely failed and cannot detect light, requiring a full scanner assembly replacement.
Always ensure you are working in a static-free environment when handling the main controller boards.
General Maintenance and Best Practices
Maintaining your printing equipment goes beyond troubleshooting immediate errors. Establishing a routine maintenance schedule is critical for ensuring the longevity and reliability of your hardware.
Printers, whether laser, thermal, or inkjet, contain numerous moving parts, sensitive electronic sensors, and components that degrade over time through standard wear and tear. Dust, paper fibers, and toner particles accumulate internally, eventually obstructing optical sensors and binding gears, leading to premature failure.
For laser printers, the accumulation of toner dust is a primary concern. Even with high-quality cartridges, microscopic toner particles escape into the chassis.
Periodically utilizing a specialized toner vacuum (which contains a HEPA filter designed to trap fine particulates) to clean the interior can prevent short circuits on the controller boards and prevent sensors from reporting false paper jams. Never use a standard household vacuum or compressed air, as compressed air simply drives the toner deeper into the sensitive laser scanner unit, and household vacuums can create static electricity that damages the motherboard.
Thermal printers require a different approach. Because they rely on direct contact between the thermal printhead and the label paper, any residue on the labels (such as adhesive or dust) transfers directly to the printhead.
Over time, this residue creates a thermal barrier, resulting in faded prints, missing barcode lines, and poor scan rates. Cleaning the thermal printhead regularly—ideally every time you change a roll of labels—with a lint-free cloth or cotton swab lightly moistened with 99% isopropyl alcohol is essential.
Allow the printhead to dry completely before resuming printing.
Environmental factors also play a significant role in printer performance. Printers operate best in climate-controlled environments with moderate humidity.
High humidity can cause paper to absorb moisture, leading to severe curling and frequent paper jams, especially in laser printers where the fuser applies intense heat to the paper. Conversely, extremely low humidity increases static electricity, which can cause multiple sheets of paper to stick together and feed simultaneously, or disrupt the electrostatic transfer of toner to the drum.
Storing your paper and labels in their original packaging until needed helps mitigate these environmental effects.
Furthermore, keeping your printer's firmware updated is a vital, yet often overlooked, maintenance step. Manufacturers regularly release firmware patches that not only fix bugs but also optimize the device's internal algorithms, improving energy efficiency, adjusting thermal control profiles to extend component life, and enhancing compatibility with the latest operating systems and network security protocols.
Always check the official manufacturer's website for updates, and never interrupt the printer during the firmware flashing process to avoid bricking the main controller board.
Implementing these preventative maintenance strategies will significantly reduce the frequency of errors, minimize frustrating downtime, and ensure that your printing infrastructure remains a reliable asset for your business operations for years to come. Consistency is key; a few minutes of proactive care can save hours of troubleshooting and costly repairs in the future.
FAQ
Can I fix a broken scanner ribbon cable?
No, if the flat flexible cable (FFC) is torn or deeply creased, it must be replaced. Attempting to repair it can short circuit the main board.
Why does Error No.3 only happen in the morning?
If your office is very cold overnight, the fuser takes longer to heat up. The printer's software has a strict timeout limit; if it doesn't reach operating temperature fast enough, it assumes a hardware failure.
Is it worth repairing an Error No.1 on a cheap Pantum printer?
Often, replacing the laser scanner unit or main motor costs as much as the printer itself. If it is out of warranty, replacement of the entire printer might be more economical.
What does CIS stand for in the scanner?
CIS stands for Contact Image Sensor. It is the component in the scanner carriage that shines an LED light and reads the reflected light to digitize the document.
Will resetting the NVRAM clear these codes?
Sometimes a factory reset or NVRAM initialization can clear latent error codes that are stuck in memory, but if a hardware fault is present, the code will return immediately upon reboot.
