


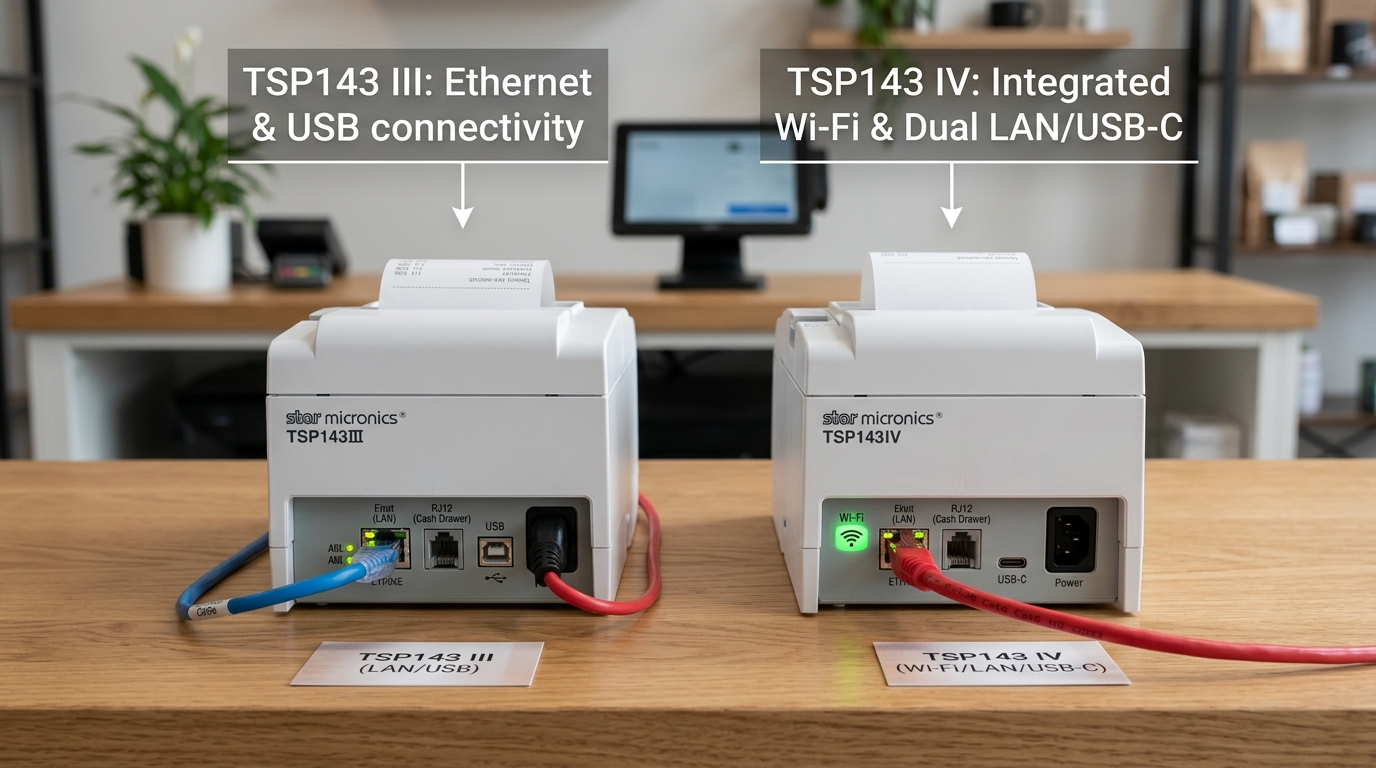
The Star Micronics TSP143 series has long been the industry standard for Point of Sale (POS) receipt printing, renowned for its reliability and ease of integration with major POS software platforms like Square, Shopify, and Toast. With the transition from the legacy Series III to the modern Series IV, Star Micronics introduced significant architectural changes regarding network connectivity, specifically concerning Wi-Fi and Ethernet configurations.
Understanding the hardware differences, the shift in network setup paradigms, and the nuances of dual-interface capabilities is critical for IT installers and merchants attempting to deploy or upgrade their POS hardware ecosystems successfully.
Why This Happens
The confusion surrounding the setup of the Star Micronics TSP143 Series III versus the Series IV primarily stems from a fundamental change in how Star designed the network interfaces. In the legacy TSP143III series, merchants had to purchase specific, distinct models based on their networking needs: the TSP143IIILAN (for hardwired Ethernet), the TSP143IIIWLAN (for Wi-Fi), or the TSP143IIIBi (for Bluetooth).
The Wi-Fi version relied heavily on WPS (Wi-Fi Protected Setup) or a somewhat clunky Ad-Hoc AP mode for initial configuration, which frequently failed in modern enterprise network environments that disable WPS for security reasons or use complex WPA3 security protocols.
In contrast, the newer TSP143IV series (specifically the TSP143IVUE) introduces a more unified, modern approach by standardizing on dual interfaces and improved configuration utilities. The Series IV models often feature Android Open Accessory (AOA) support over USB-C, allowing a tablet to simultaneously charge and transmit print data via a single cable, while also maintaining an Ethernet port for network backup.
For Wi-Fi setups, the Series IV leans heavily on the Star Quick Setup Utility app (available on iOS and Android) communicating via Bluetooth Low Energy (BLE) or a direct USB connection to push the SSID and password to the printer, drastically reducing the reliance on outdated WPS push-button methods.
Setup failures occur when merchants attempt to apply Series III configuration workflows to Series IV hardware, or vice versa. For example, a technician might search for the reset pinhole on a Series IV to trigger AP mode—a common Series III troubleshooting step—only to find the procedure has changed.
Furthermore, the handling of static IP addresses has evolved. The Series IV's modern network card handles DHCP leases more aggressively, meaning that manual IP assignments require specific MAC address reservations on the router to prevent IP conflicts, whereas older POS setups often relied on manually hardcoding the IP address directly into the printer's ROM via a Windows-based configuration tool.
Step-by-Step Fix
- Identify Your Printer Model: Turn the printer upside down and look at the silver sticker. Note whether it says TSP143III (followed by LAN, WLAN, or Bi) or TSP143IV (followed by UE or similar). This dictates your entire setup path.
- Series III Ethernet (LAN) Setup: Plug the Ethernet cable directly from your router to the printer. Turn the printer on. Wait 60 seconds. Turn the printer off. Hold down the "FEED" button while turning the power back on. Release the FEED button after the first test receipt prints. A second receipt will print containing the assigned IP address. Enter this IP into your POS software.
- Series III Wi-Fi (WLAN) Setup (AP Mode): If WPS is unavailable, turn the printer on. Use a pen to press the "Reset" button on the back for 5 seconds until the Network LED flashes. The printer will broadcast its own Wi-Fi network (e.g., TSP143IIIWLAN). Connect your tablet to this network, open a browser, and navigate to
192.168.10.1to enter your store's Wi-Fi credentials. - Series IV Ethernet Setup: The Series IV handles Ethernet similarly via DHCP. Connect the cable and power on. Hold FEED while powering on to print the network configuration sheet. The Series IV network card initializes faster, so the IP address will populate almost immediately on the second receipt.
- Series IV Wi-Fi Setup (via Star Utility App): Download the "Star Quick Setup Utility" on your smartphone or tablet. Connect your device to the printer using a compatible USB cable (USB-C to Lightning, or USB-C to USB-C). Open the app, select the recognized printer, and navigate to the Network Settings menu to easily push your Wi-Fi SSID and password directly to the printer.
- Configure Static IP via DHCP Reservation: Regardless of the series, hardcoding an IP address on the printer is no longer recommended. Instead, print the network configuration sheet to find the printer's MAC address. Log into your store's router (e.g., 192.168.1.1), find the DHCP Reservation or Static Lease section, and assign a permanent IP address to that MAC address.
- Configure POS Software: Open your POS application (Square, TouchBistro, etc.). Navigate to Hardware > Printers. Select "Create Printer Station" or similar. Choose "Star Micronics" and select the model (TSP100/TSP143). Enter the IP address obtained in the previous steps.
- Test the Connection: Tap "Test Print" within the POS application. If the drawer kicks (if connected) and a small slip prints, the network configuration is successful.
- Troubleshooting Series IV USB/LAN Conflict: If using the Series IV with an iPad via the direct USB-C connection (AOA mode), ensure the POS software is configured to look for a USB printer, not a LAN printer, even if an Ethernet cable is plugged in. The USB connection takes priority in most POS ecosystems.
- Update Printer Firmware (Crucial for Series IV): Use the Star Quick Setup Utility app to check for firmware updates. Series IV printers frequently receive updates to improve compatibility with modern mesh Wi-Fi systems (like Eero or Google Nest Wi-Fi) which often cause discovery issues with older firmware.
Advanced Troubleshooting
When deploying Star Micronics printers in complex enterprise environments, network segmentation is a frequent hurdle. Many retail environments utilize a secure VLAN for the POS terminals and a separate VLAN for employee Wi-Fi or back-office computers.
If the POS tablet is on the Wi-Fi VLAN (e.g., 10.0.2.x) and the printer is hardwired to the Ethernet VLAN (e.g., 10.0.3.x), the POS software will fail to discover the printer using standard multicast mDNS/Bonjour broadcasts, even if pinging the IP address works. Network administrators must configure mDNS reflection or explicitly open TCP ports 9100 and 80 between the POS VLAN and the Printer VLAN to allow the proprietary StarPRNT protocol to communicate across subnets.
For Wi-Fi setups, specifically with the TSP143IIIWLAN, older wireless chipsets struggle with band steering. Modern routers combine 2.4 GHz and 5 GHz networks under a single SSID, intelligently steering devices to the best band.
The Series III Wi-Fi module is 2.4 GHz only. If the router attempts to force the printer onto the 5 GHz band, the printer will drop off the network randomly.
To resolve this, log into the router and separate the SSIDs (e.g., "StoreNetwork_2.4" and "StoreNetwork_5G") and force the printer to connect exclusively to the 2.4 GHz network. The Series IV has improved radio hardware that handles band steering much more gracefully.
Additionally, for merchants using the Series IV's direct USB communication with iOS devices, power delivery is a critical, often overlooked variable. The TSP143IV provides up to 15W of power to keep the iPad charged while printing.
However, if using a third-party, non-MFi certified USB hub or a degraded charging cable, data communication will drop out even if the iPad shows a charging icon. The proprietary handshakes required by Apple's External Accessory protocol mandate high-quality cables.
Always use the official Apple USB-C to Lightning cable or a verified Star Micronics cable to ensure stable data transmission alongside power delivery.
Finally, regarding the CloudPRNT technology integrated into newer models. CloudPRNT allows the printer to poll a remote server (like an online ordering platform) directly for print jobs, bypassing the local POS tablet entirely.
If CloudPRNT is failing, the issue is almost never the local network, provided the printer has basic internet access. Instead, the troubleshooting focus must shift to verifying the Polling Interval settings, the MAC address registration on the remote server platform, and ensuring the network's outbound firewall rules allow HTTPS (TCP 443) traffic from the printer to the internet.
Checking the server-side logs for the printer's MAC address is the only definitive way to troubleshoot CloudPRNT failures.
FAQ
Can I convert my TSP143III USB printer into a Wi-Fi printer?
No, the hardware interfaces on the Series III are fixed. A USB model (TSP143IIIU) cannot be upgraded to Wi-Fi.
Why is my printer printing a long string of random characters?
This happens when the POS software sends data using the wrong emulation mode (e.g., sending Epson ESC/POS commands to a Star printer). Ensure your POS software is explicitly set to use the "StarPRNT" or "Star Line Mode" driver, not a generic receipt printer driver.
How do I know if my TSP143IV is connected to the internet?
Turn the printer off, hold the FEED button, and turn it back on. Release FEED after the first sheet.
Do I need ink or a ribbon for this printer?
No. The entire TSP100/TSP143 series utilizes direct thermal printing.
Can I connect my Star printer to two different iPads at the same time?
If the printer is configured via Ethernet or Wi-Fi on the network, yes, multiple iPads on the same network can send print jobs to it. The printer will queue the jobs.
