


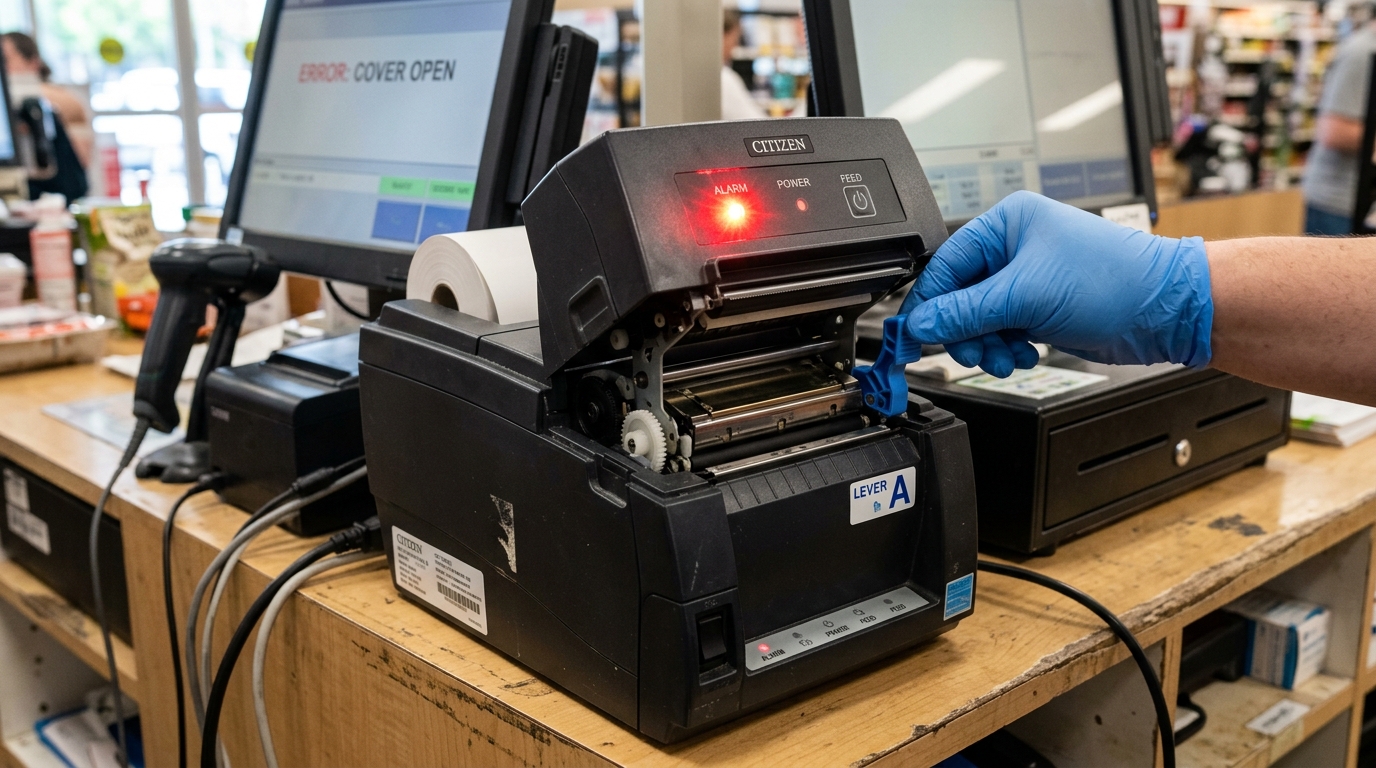
Fix Citizen Paper Cover Open and Print Head Alarm Lever Issues
Citizen industrial and desktop barcode printers are engineered for heavy-duty performance, relying on robust mechanical components to ensure precise media handling and high-quality thermal transfer. A critical safety and operational feature on these machines is the sensor system that monitors the physical state of the printer.
Specifically, the printer must know that the main housing (the paper cover) is securely closed and that the printhead is properly engaged (lowered) before it will attempt to feed labels or heat the printing elements. When these sensors fail to register the correct state, the printer enters a hard fault condition.
This typically manifests as a flashing red alarm light, a complete cessation of printing. And error messages in the driver software citing "Paper Cover Open" or "Print Head Open" (often related to the printhead locking lever).
These errors are frustrating because the printer physically appears ready to operate, yet refuses to process jobs. Resolving these issues requires moving beyond software settings and focusing on the mechanical switches, latches.
And sensors that communicate the printer's physical status to its internal logic board. This guide will detail the causes of these specific mechanical errors in Citizen printers and provide a step-by-step troubleshooting methodology to diagnose and fix them.
Why This Happens: Microswitches and Mechanical Linkages
To understand the "Cover Open" and "Print Head Open" errors, it is necessary to examine how the printer detects these states. Citizen printers do not use complex optical sensors for these specific tasks. Rather, they rely on simple, highly reliable mechanical microswitches.
The Paper Cover Open Error: This error is triggered by a switch located near the hinge or along the locking rim of the main printer cover (the dome that encloses the label roll). When you close the cover, a plastic protrusion or a metal tab on the cover pushes down on a small lever attached to the microswitch, closing the electrical circuit and signaling to the logic board that the printer is closed and safe to operate.
If the cover is warped, if the latching mechanism is broken, or if the microswitch itself is damaged or stuck, the circuit remains open. And the printer reports a "Cover Open" error, even if the lid appears shut to the naked eye.
The Print Head Alarm / Lever Error: Citizen printers use a robust, often metallic, lever mechanism to lock the printhead assembly down onto the platen roller. This lever applies the necessary pressure for thermal transfer.
Attached to this linkage is another microswitch. When you push the lever down until it clicks into the locked position, it actuates this switch, confirming the printhead is engaged.
If you attempt to print while the lever is up (the open position for loading ribbon or media), the printer protects itself from damaging the printhead elements by immediately throwing an error. Issues arise when the mechanical linkage becomes bent, worn, or misaligned, meaning that even when the lever is physically pressed down, it fails to make contact with the microswitch.
Alternatively, accumulated dust or debris can physically block the microswitch lever from moving.
Step-by-Step Fix: Diagnosing and Correcting Sensor Faults
Troubleshooting these errors requires a hands-on examination of the printer's mechanical latches and switches. Ensure the printer is powered off before beginning any mechanical inspection.
- Verify the Printhead Lever is Fully Locked: This is the most common user error. Open the main cover. Locate the printhead locking lever (usually a prominent metal or colored plastic handle). Push it down firmly. You should feel a distinct mechanical click or resistance as it locks into place. Do not just rest it in the down position; it must be fully engaged. Power the printer on and observe if the error clears.
- Inspect the Main Cover Latches: Close the main paper cover. Press down firmly on both the left and right front corners of the cover. Listen for the latches clicking into place. Sometimes, if a printer is placed on an uneven surface, the chassis can torque slightly, preventing one side of the cover from seating deeply enough to actuate the sensor switch. Ensure the printer is on a flat, stable desk.
- Locate and Manually Test the Cover Sensor Switch: Open the main cover and examine the rim of the lower chassis. Look for a small slit or a tiny recessed button—this is the cover microswitch. Taking a non-conductive tool (like the plastic end of a pen or a wooden toothpick), gently press down on the switch. While holding it down, power the printer on. If the printer initializes normally without the "Cover Open" error, you have confirmed the switch works. But the cover is failing to press it.
- Inspect for Physical Obstructions: Check the area around both the cover switch and the printhead lever switch for debris. In industrial environments, small pieces of label backing, adhesive buildup, or heavy dust can pack into the crevices around the microswitches, preventing them from being depressed. Use compressed air and tweezers to clear any foreign objects.
- Check for Misaligned Actuator Tabs: Examine the plastic tab on the inside of the main cover that is supposed to strike the cover microswitch. Is it bent, worn down, or broken off completely? If the tab is damaged, the cover will close, but the switch will never be pressed. Similarly, inspect the metal linkage connected to the printhead lever. Has it been bent out of alignment, preventing it from making contact with its respective switch?
- Check the Ribbon Path (Print Head Error): Sometimes, an improperly loaded ribbon can interfere with the printhead assembly closing completely. Ensure the ribbon is routed exactly according to the diagram printed inside the machine. And that there is no slack bunching up under the printhead mechanism, preventing the lever from locking fully.
Advanced Troubleshooting: Sensor Replacement and Chassis Alignment
If you have manually actuated the microswitches (as described in step 3) and the printer still reports an error, the microswitch itself has likely failed internally. Microswitches are mechanical components subject to wear and tear.
Over thousands of cycles, the internal spring can break, or the electrical contacts can become oxidized or pitted. Replacing a microswitch is a technical repair that requires disassembling parts of the printer casing and potentially desoldering and soldering wires.
If the printer is under warranty, this should be handled by an authorized Citizen repair center. If it is out of warranty and you are comfortable with electronics repair, replacement switches can be sourced from electronics distributors.
If the microswitch works when pressed manually, but the cover fails to actuate it, the issue is mechanical alignment. Over time, heavy use or rough handling can slightly warp the plastic casing or bend the hinges of the main cover.
You may need to carefully shim the cover hinges or adjust the latching hooks (if adjustable on your specific model) to ensure the cover pulls down tightly enough to engage the sensor.
If the printhead lever is locked down. But the error persists.
And you have confirmed the switch is not blocked by debris, the metal linkage may be bent. This requires removing the side casing of the printer to access the lever assembly and carefully bending the actuator arm back into alignment so it properly strikes the microswitch when the lever is lowered.
This requires a delicate touch to avoid breaking the linkage or the switch.
FAQ
Why does the printer say 'Cover Open' when it's clearly closed?
The printer relies on a tiny microswitch to detect the cover. Even if the cover looks closed, if the plastic tab that presses the switch is broken, or if the cover is slightly warped and not pressing down hard enough, the switch remains unactuated.
How hard do I need to press the printhead lever down?
You should apply firm, steady pressure until you feel a definitive mechanical 'click' or the lever hits a hard stop. It requires a bit of force to compress the springs that provide the printhead pressure.
Can I bypass the cover sensor to make it print?
Technically, a technician could wire the microswitch closed, but this is highly discouraged. The cover sensor is a safety feature to prevent moving parts from operating while exposed and to ensure dust doesn't ruin the printhead during operation.
What should I use to clean around the sensors?
Use dry compressed air to blow out dust. If there is sticky adhesive residue near the mechanical switches, use a cotton swab very lightly dampened with 99% isopropyl alcohol, ensuring no liquid drips into the switch mechanism.
Is a broken microswitch expensive to fix?
The microswitch component itself is usually very cheap (a few dollars). However, the labor required to disassemble the printer, diagnose the faulty switch, solder a new one.
