


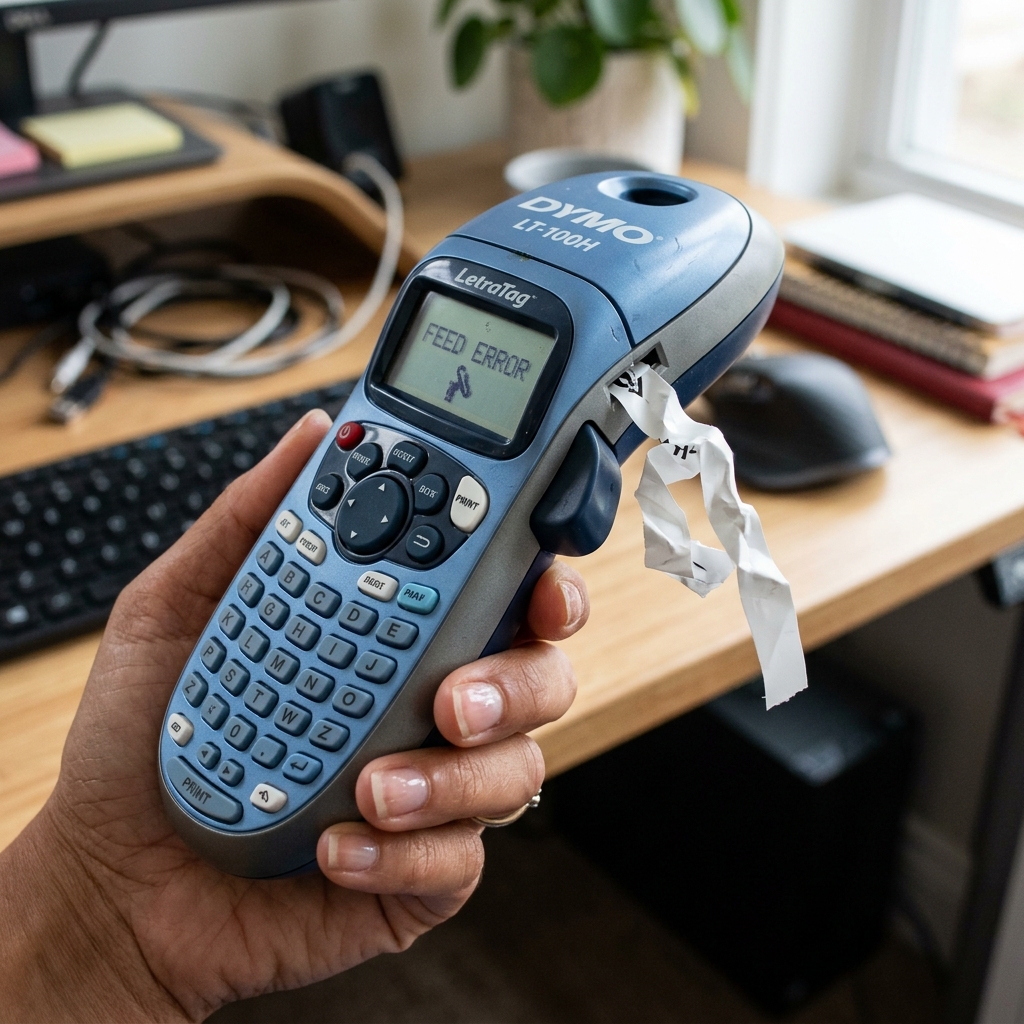
The Dymo LetraTag series has been a staple of home. Office organization for decades, renowned for its simplicity, affordability, and tactile keyboard interface.
Despite their durable design, these handheld electronic label makers frequently fall victim to a highly frustrating set of mechanical malfunctions: refusing to print, producing severely faded text,. Suffering from catastrophic internal tape jams that wrap the label ribbon tightly around the internal gears.
When a LetraTag fails, it brings organizational workflows to an immediate halt. This extensive technical guide is dedicated to dismantling the complexities of the Dymo LetraTag printing mechanism.
We will explore the friction-based feed system, the intricacies of thermal transfer technology used in LetraTag cassettes,. The common points of failure that cause these devices to jam.
Furthermore, we provide a rigorous, step-by-step diagnostic and repair protocol to help you clear stubborn jams, restore crisp print quality,. Extend the lifespan of your Dymo LetraTag.
Why This Happens: The Mechanics of Dymo LetraTag Printing
To effectively troubleshoot a LetraTag, one must understand how it operates. Unlike direct thermal printers (like shipping label printers) that apply heat directly to chemically treated.
Paper, the Dymo LetraTag utilizes a thermal transfer process. Inside every LetraTag cassette, there are two distinct ribbons: a clear.
Colored plastic label tape, and a thin, carbon-based ink ribbon. When you press print, the internal stepper motor drives a rubberized platen roller.
This roller pulls both the label tape and the ink ribbon simultaneously across a ceramic thermal print head. The print head rapidly heats up, melting the carbon ink off the ribbon.
Permanently fusing it onto the plastic label tape. After the print head, the spent ink ribbon is spooled up onto a take-up core.
Inside the cassette, while the finished label is pushed out through the cutter mechanism.
Tape jams and printing failures almost always occur when the precise synchronization of this complex process breaks down. The most common culprit is a loss of tension on the ink ribbon.
If the take-up core inside the cassette binds or fails to rotate smoothly, the ink ribbon becomes slack. As the platen roller continues to push the label forward, this slack ink ribbon gets.
Dragged along, eventually folding over itself, adhering to the print head, and wrapping tightly around the rubber roller, creating a solid, impenetrable jam. Another primary cause of failure is insufficient power.
The LetraTag relies heavily on its four AA batteries. If the batteries lack sufficient amperage (even if they have enough voltage to turn the.
LCD screen on), the thermal print head cannot reach the necessary temperature to melt the carbon ink, resulting in blank or severely faded labels, even though the tape feeds perfectly. Lastly, adhesive residue from cheap, third-party tapes can build up on the cutter blade.
Platen roller, acting like a glue that catches the leading edge of the tape and forces it to accordion backward into the machine.
Step-by-Step Fix: Clearing Jams and Restoring Print Quality
If your Dymo LetraTag is making grinding noises, outputting blank tape,. Displaying a persistent error message, follow this comprehensive, sequential repair procedure to restore its functionality.
- Perform a Complete Power Cycle and Battery Audit: Remove all four AA batteries immediately. The LetraTag is notorious for behaving erratically with low power. Discard any mixed brands or partially depleted batteries. Insert four brand new, high-quality alkaline batteries (like Duracell or Energizer). 5V) often fails to provide the peak heat required for dark, crisp printing.
- Extract the Cassette and Clear the Jam: Open the rear cassette door. If the tape is jammed, DO NOT forcefully rip the cassette out. This will break the plastic drive gears inside the printer. Using fine-tipped tweezers, carefully reach into the mechanism. Pull the jammed tape backward away from the rubber roller and cutter blade. Once the tape is free from the printer's internals, gently lift the cassette straight up and out.
- Re-Tension the Ink Ribbon (Crucial Step): Inspect the cassette you just removed. Look at the two small, circular spools visible through the plastic casing. If you see a loose, crinkled black ribbon (the ink ribbon) hanging out alongside the. Label tape, the cassette is the problem. Take a pencil, insert it into the center hole of the take-up spool (usually the top. Right-side spool), and turn it clockwise. You must wind the spool until the black ink ribbon is completely taut and flat against the tape. A slack ribbon guarantees a jam.
- Clean the Thermal Print Head and Platen Roller: The heart of the printer needs maintenance. Take a cotton swab dipped in highly concentrated isopropyl alcohol (90% or higher). Gently scrub the vertical green. Brown ceramic bar (the print head) to remove any microscopic carbon dust or melted plastic. Next, scrub the black rubber platen roller while manually spinning it. Any sticky adhesive residue here will cause the tape to wrap around the roller. Allow 5 minutes to completely dry.
- Inspect and Clean the Cutter Blade Mechanism:A dull or sticky cutter blade will snag the tape instead of cutting it cleanly,. Causing the next label to jam immediately. Locate the cutter blade (usually a small metal guillotine near the exit slot). Carefully clean it with an alcohol swab. If you see severe adhesive buildup, a tiny drop of lighter fluid (naphtha) on a swab can dissolve the glue. Actuate the cutter button several times to ensure smooth operation.
- Verify Proper Cassette Installation:When inserting a re-tensioned or new cassette, ensure the leading edge of the label tape. Is protruding through the slot in the cassette itself. Press the cassette down firmly until it audibly clicks into place. The internal plastic pins must perfectly align with the holes in the cassette spools. If it feels spongy or sits unevenly, the drive gears will not engage.
- Execute a Test Print and Adjust Contrast: Turn the device on and type a test string containing bold text and symbols. Press print. If the text is present. Slightly faint, navigate to the LetraTag's internal settings menu and locate the "Contrast" or "Print Density" option. Increase this setting to force the printer to send more power to the print head, darkening the resulting text.
Advanced Troubleshooting: Diagnosing Motor Failure and Gear Stripping
When basic maintenance and new batteries fail to resolve a LetraTag's issues, you may be facing severe mechanical degradation. If the printer screen turns on and accepts typing, but pressing the print button results.
In absolute silence—no motor whine, no movement—the internal DC stepper motor has likely burned out or a solder joint connecting it to the motherboard has fractured. This can occur if a user repeatedly holds down the print button while a severe,.
Immovable jam is present in the machine, causing the motor to overheat and short circuit. Repairing this requires a complete teardown of the plastic housing, testing the motor with a bench power supply,.
Potentially micro-soldering, which is generally uneconomical for a device of this price point.
Another advanced mechanical failure is stripped planetary gears. The motor drives a series of small, nylon reduction gears to increase torque and turn the platen roller.
If the printer makes a loud, rapid clicking. Grinding noise when trying to print, but the tape does not advance, these internal gears have sheared their teeth.
This is almost exclusively caused by users violently yanking jammed cassettes out of the machine while the gears are engaged. Unfortunately, Dymo does not sell replacement gear assemblies.
A printer with stripped gears is permanently damaged. Must be replaced; the best preventative measure is extreme patience and gentle handling when clearing tape jams.
FAQ: Frequently Asked Questions
Why is the LetraTag printing a completely blank label?
Blank labels are almost always caused by a broken ink ribbon inside the cassette. If the thin black ribbon snaps, only the clear or colored plastic tape feeds out, receiving no ink.
Can I use generic, third-party tapes in my Dymo LetraTag?
While generic tapes are widely available and cheaper, they are the leading cause of LetraTag jams. Third-party tapes often use inferior adhesives that bleed onto the rollers,.
How do I clean the inside of the printer safely?
Never use water, household cleaners, or compressed air (which can blast dust deeper into the optical sensors). Use only 90%+ isopropyl alcohol on a lint-free swab.
Why does the screen dim or turn off when I press print?
This is a classic voltage drop symptom. The thermal print head draws significant amperage.
Why does the LetraTag waste so much tape at the beginning of a label?
This is a mechanical necessity, not a flaw. 5 centimeters.
