


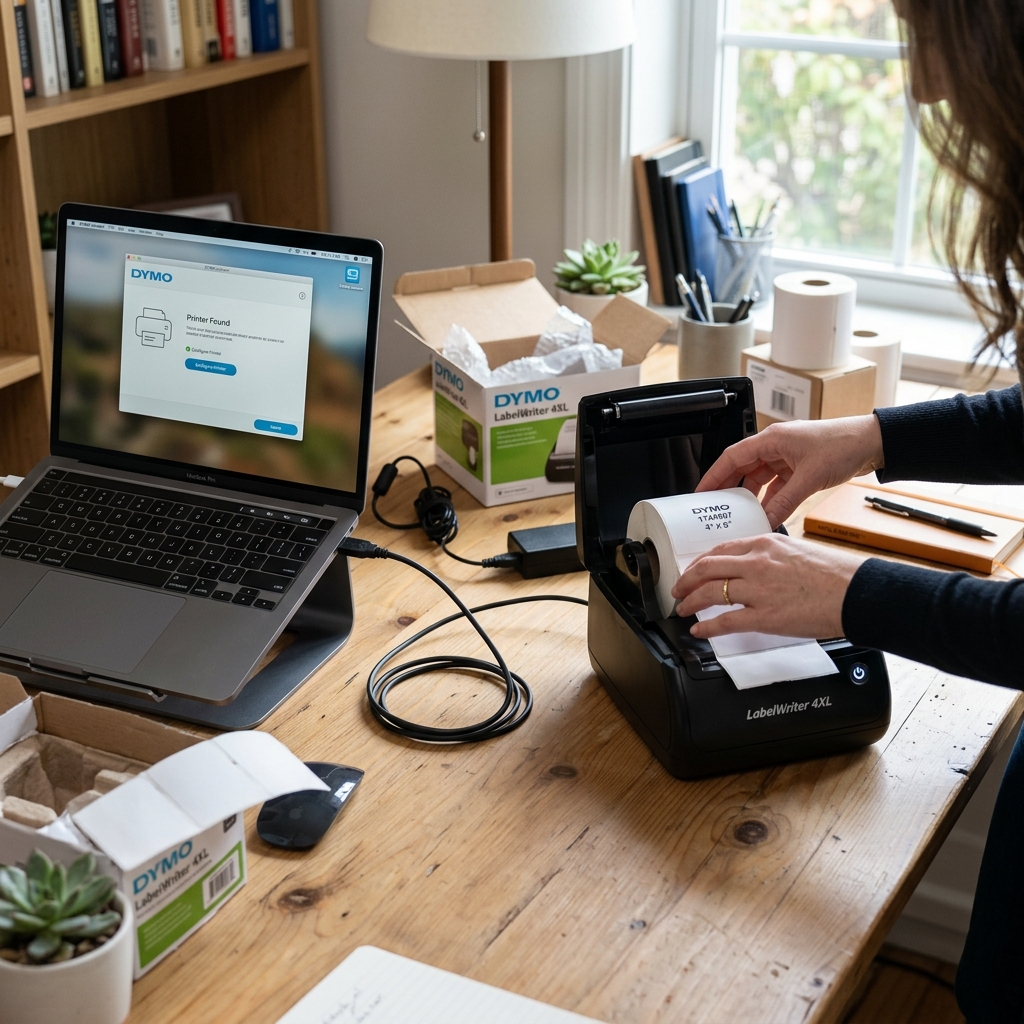
Introduction to High-Volume Labeling with DYMO
Regarding high-volume e-commerce shipping, inventory management,. Professional logistics, few tools are as highly regarded as the DYMO LabelWriter 4XL and its modernized successor, the LabelWriter 5XL.
These wide-format thermal printers have revolutionized small business operations by providing a fast, reliable,. Cost-effective method for generating 4x6 inch shipping labels directly from standard desktop computers.
Unlike traditional inkjet or laser printers, DYMO LabelWriters utilize direct thermal. Technology, meaning they require absolutely no ink, toner, or ribbons to operate.
The printer applies localized heat directly to specially coated thermal paper, creating crisp, dark text. Easily scannable barcodes that resist fading during transit.
The transition from a standard document printer to a dedicated label writer is a significant upgrade for any shipping operation. Saving immense amounts of time previously spent cutting.
Taping paper labels to packages. However, harnessing the full potential of these machines requires a proper initial setup.
A thorough understanding of the associated software drivers. Installing a DYMO printer is not always as simple as plug-and-play.
Operating systems, particularly Windows and macOS, interact with thermal printers differently than they do with standard document printers. Incorrect driver installation or misconfigured page sizes can lead to frustrating issues such.
As labels printing sideways, shrinking to unreadable sizes, or skipping blank labels between prints.
In this extensive guide, we will provide a comprehensive roadmap for setting up both the DYMO LabelWriter 4XL. The newer 5XL models.
We will walk you through the physical hardware setup. Detail the specific steps required for flawless driver installation on various operating systems,.
Explore the nuances of the DYMO Connect software. Furthermore, we will address advanced troubleshooting techniques for common alignment.
Formatting issues, ensuring that your labeling workflow operates at maximum efficiency and minimum frustration.
Why This Happens: The Importance of Correct Drivers
A common misconception among new users is that the physical connection of. The USB cable should automatically make the printer ready for commercial use.
While modern operating systems possess vast repositories of generic drivers, relying on. An auto-installed driver for a DYMO LabelWriter is a recipe for formatting disasters.
5x11 inch Letter or A4 sized paper. Thermal label printers, however, utilize continuous rolls of specific dimensions (like 4x6 inches).
Rely on physical gaps or index marks on the backing paper. To determine where one label ends and the next begins.
The specific DYMO driver is crucial. It translates the complex formatting of a shipping label generated by platforms like Shopify, Etsy,.
ShipStation into the precise heat-pulse instructions required by the thermal print head. It also contains the exact dimensional parameters of all supported DYMO label sizes, allowing the.
Operating system to format the print job correctly before it is sent to the hardware. 5x11 inch image onto a 4x6 inch label, resulting in tiny, unreadable.
Text, or it may print across the gaps, wasting expensive label stock.
Furthermore, the introduction of the LabelWriter 5XL brought a significant technological shift: Automatic Label Recognition. The 5XL features an internal RFID reader that communicates with.
A microchip embedded in the core of genuine DYMO label rolls. This chip tells the printer exactly what size and type of label is loaded, automatically updating the software to match.
This feature requires the latest DYMO Connect software and specific drivers to function correctly. Attempting to use older 4XL drivers with a 5XL,.
Attempting to use generic, third-party labels without an RFID chip in the 5XL, will result in immediate software errors. A refusal to print.
Understanding these software dependencies is fundamental to a successful setup.
Step-by-Step Fix: Comprehensive Setup and Installation
To ensure a smooth, error-free setup process for your DYMO LabelWriter 4XL or 5XL, please follow these instructions carefully. Crucially, do not connect the USB cable to your computer until instructed to do so in Step 4.
- Unbox and Connect Power:Remove the printer, power adapter, power cable, and USB cable from the packaging. Connect the power adapter to the bottom of the printer and plug it into a reliable wall outlet. The blue LED indicator on the front of the unit should illuminate, indicating power is connected.
- Load the Label Roll:Open the top cover of the printer. Remove the label spool from inside. Slide a roll of 4x6 inch DYMO shipping labels onto the spool. Ensuring the labels feed from the top of the roll (waterfall style). Slide the spool guide tightly against the side of the roll to prevent wobbling.
- Feed the Labels:Insert the spool back into the printer chassis. Take the leading edge of the first label. Gently guide it into the feed slot at the bottom of the label compartment. The printer's internal optical sensor should detect the paper. Automatically engage the motor, feeding the label forward to the correct starting position.
- Download the Official Software:Before connecting the USB cable, navigate to the official DYMO support website. If you have the 4XL, you can use the older DYMO Label Software (DLS) or the newer DYMO Connect. If you have the 5XL, you MUST download DYMO Connect. Download the version appropriate for your operating system (Windows or macOS).
- Install the Software and Drivers:Run the downloaded installer file. Follow the on-screen prompts carefully. This process installs both the design software and, more importantly, the low-level. Hardware drivers required for the printer to communicate with the operating system.
- Connect the USB Cable:Once the software installation is completely finished, plug the square end. Of the USB cable into the back of the printer. The flat rectangular end directly into a USB port on your computer. Avoid using unpowered USB hubs, as they can cause data transfer issues.
- Verify the Installation (Windows):" You should see the DYMO LabelWriter listed. Right-click the printer icon, select "Printer properties," and click "Print Test Page" to confirm successful communication.
- Verify the Installation (macOS):" The DYMO LabelWriter should appear in the list on the left.
- Configure Browser Settings:" Ensure "Fit to Page" is selected and that headers/footers are disabled.
- Calibrate the Printer (If Necessary):If labels are misaligned or skipping, you may need to force a calibration. For the 4XL, this involves holding the feed button for a few seconds until the printer cycles several labels. The 5XL generally calibrates automatically using its RFID sensor. A restart can force a fresh read of the label core.
Advanced Troubleshooting: Label Size and Formatting Issues
The most persistent issues users face with DYMO printers revolve around. Formatting—specifically, labels printing too small, printing sideways, or bleeding over the edges. These issues are almost entirely software-related and stem from a disconnect between the source document and the printer driver settings. 5x11) onto the print job.
To fix persistent sizing issues on Windows, you must explore the advanced driver settings. " Click on the "Advanced" button. , 4" x 6").
Setting this at the system level forces all applications to respect the correct dimensions. On macOS, you must ensure that the correct paper size is selected in the initial print dialog box,.
It is highly recommended to save a custom "Preset" specifically for 4x6 labels. To avoid having to reconfigure the settings for every single print job.
If a label prints sideways, look for the "Orientation" setting in the print dialog. Toggle between Portrait and Landscape until the preview image correctly fills the label area.
FAQ
What is the difference between the DYMO LabelWriter 4XL and 5XL?
The 4XL is the older generation model, compatible with a wide variety of third-party, generic thermal labels. The newer 5XL features Automatic Label Recognition using RFID technology.
Why is my printer feeding blank labels between printed ones?
This is usually caused by incorrect paper size settings in the print dialog. 5-inch long page, but the physical label is only 6 inches long, the printer.
Do I have to use the DYMO Connect software to print labels?
No, you do not have to use the DYMO design software to print shipping labels. Once the drivers are correctly installed, you can print directly from any web browser, PDF.
Can I connect the DYMO LabelWriter to my Wi-Fi network?
Neither the base 4XL nor the base 5XL models have built-in Wi-Fi or. Ethernet connectivity; they are designed for direct USB connection to a single computer.
Why is the blue light on the front of my printer flashing?
A flashing blue light typically indicates an error state. It most commonly means the printer is out of paper, the label roll is loaded incorrectly (preventing.
Furthermore, maintaining a consistent environment can significantly reduce these issues. Avoid placing your printer in direct sunlight, near strong heat sources, or in areas with excessive dust and debris.
Ensuring proper ventilation around the printer helps keep internal components cool during long print runs, preventing overheating and potential damage. Regularly inspecting the power cables.
USB connections for any signs of wear and tear can also. Prevent unexpected connectivity drops or power failures during critical operations.
In addition to hardware maintenance, always keep your software drivers and firmware (internal software) (internal software) up to date. Manufacturers frequently release updates that address known bugs, improve compatibility with the latest operating systems, and enhance overall performance.
Subscribe to newsletters or check the manufacturer's support website periodically for any crucial updates related to your specific model. Implementing these best practices will not only resolve immediate errors.
Also provide a stable, long-term printing solution for your business needs.
When dealing with technical support, always have your exact model number, serial number,. A detailed description of the error code or issue ready.
This information allows support technicians to quickly identify potential causes and provide accurate solutions. Keeping a log of when errors occur, any changes made to the system prior to the issue,.
The exact steps taken during troubleshooting can also be immensely helpful. In diagnosing complex, intermittent problems that may require advanced intervention.
