


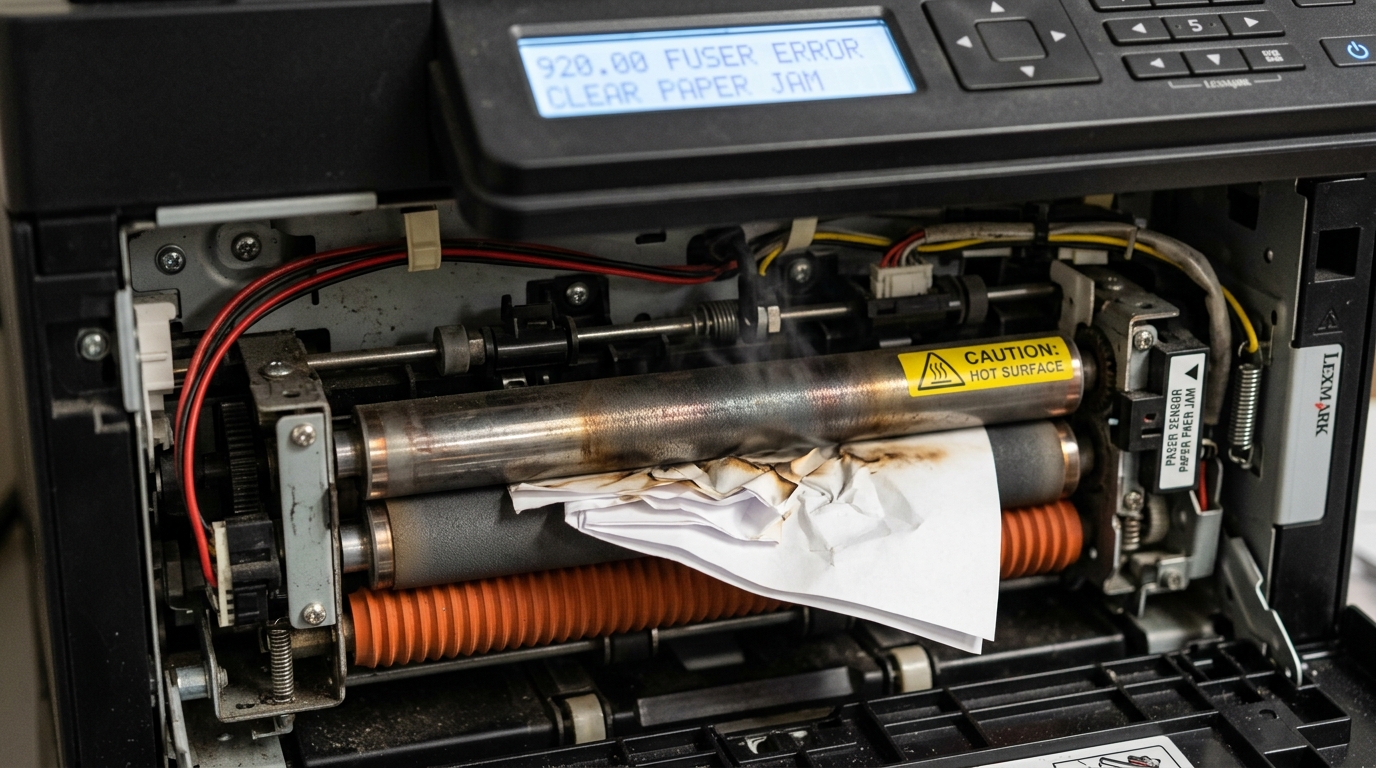
Lexmark enterprise laser printers are designed for high-volume, heavy-duty document production. Central to their operation is the fuser assembly, a critical thermal component responsible for melting the toner powder and pressing it permanently into the paper fibers.
Given the extreme heat and pressure involved, the fuser is subject to intense mechanical and thermal stress. When the printer's internal diagnostic sensors detect anomalies in the fuser's temperature curve or physical rotation, the machine will immediately halt operation and display a 92x series error code, specifically 920, 921, 922, 923, or 925.
Understanding the precise meaning of these codes and executing safe, methodological troubleshooting is essential to prevent further hardware damage and restore printing capabilities safely.
Why This Happens
The 92x series of errors all relate directly to the fuser unit, but each specific code points to a different mode of failure within the thermal control loop. The printer monitors the fuser using thermistors (temperature sensors) that rest against the fuser's heating roller.
A 920 Error (Fuser Under Temperature) indicates that the fuser did not reach the required standby or operating temperature within the specified time limit. This is often caused by a failed halogen heater lamp inside the roller, a tripped thermal fuse (designed to blow if the printer overheats), or exceptionally cold environmental conditions where the printer is placed near an AC vent or in an unheated warehouse, making it mathematically impossible for the heater to overcome the ambient cold fast enough.
Conversely, a 921 Error (Fuser Under Temperature while printing) or a 922 Error (Fuser Over Temperature) points to dynamic failures. A 922 error is particularly dangerous, meaning the triac on the engine control board—which acts as a high-speed switch to turn the fuser lamp on and off—has shorted closed.
If the lamp stays on continuously, the fuser will rapidly overheat, potentially melting the internal plastic gears or even causing a fire hazard, which is why the printer shuts down immediately and locks the engine. The 923 Error (Fuser Over Temperature on standby) is similar but occurs when the printer is idling, often indicating a faulty thermistor that is misreporting a high temperature back to the control board.
Finally, a 925 Error (Wrong Fuser Installed) is a hardware mismatch error. Lexmark printers use different fuser units depending on the regional voltage (110V in North America vs.
220V in Europe/Asia). Installing a 220V fuser into a 110V printer will result in the fuser never reaching the proper temperature, while installing a 110V fuser in a 220V printer would cause a catastrophic overload.
The printer reads a small identification resistor on the fuser's connector to verify compatibility. If the resistor is wrong, or if the connector pins are bent or dirty, the 925 error is thrown to protect the machine.
Step-by-Step Fix
- Turn Off and Unplug the Printer: Because fuser errors involve high voltage and extreme heat (exceeding 200°C / 392°F), immediately turn off the printer and disconnect the power cord from the wall outlet. Wait at least 30 to 45 minutes before proceeding to allow the fuser assembly to cool down safely.
- Check Environmental Conditions (For 920/921 Errors): Ensure the printer is operating in an environment within Lexmark's recommended specifications (usually 60°F to 90°F). If the printer was recently moved from a cold environment, allow it to acclimate to room temperature for several hours before powering it on.
- Bypass Surge Protectors and Power Strips: Fusers draw significant amperage when heating up (often 10-12 Amps). Power strips, UPS battery backups, or damaged wall receptacles can throttle this power draw, causing under-temperature errors. Plug the printer directly into a dedicated wall outlet to rule out power supply issues.
- Access the Fuser Compartment: Open the rear door or top cover of the Lexmark printer to access the fuser unit. Refer to your specific model's service manual for the exact location. The fuser is usually marked with yellow "CAUTION: HOT" warning labels.
- Inspect the Fuser Connectors: Carefully remove the fuser by loosening the two thumbscrews or releasing the locking levers on either side. Pull the unit straight out. Inspect the electrical connector plug on the back of the fuser and the corresponding socket inside the printer. Look for bent pins, burnt plastic, or debris.
- Verify Fuser Voltage (For 925 Errors): Check the label on the top of the fuser unit. Ensure it matches your local voltage. A 110V fuser typically has a part number ending in '1' or '0', while 220V fusers differ. If you purchased a replacement fuser from a third-party vendor online, verify they sent the correct regional version.
- Check for Paper Jams: A severe paper jam tightly wrapped around the fuser roller can insulate the thermistor, causing erratic temperature readings (921 or 922 errors). Carefully clear any jammed paper, ensuring you do not use sharp metal tools that could scratch the delicate non-stick coating of the fuser roller.
- Reinstall the Fuser Properly: Push the fuser firmly back into the printer. Ensure it seats completely and evenly. Tighten the thumbscrews or lock the levers securely. A loose connection will cause high resistance and trigger false temperature readings.
- Power On and Monitor: Plug the printer back directly into the wall and power it on. The printer will go through a warm-up cycle. Listen for the click of the power supply relays and watch the display. If the error clears, run a few test pages.
- Replace the Fuser Maintenance Kit: If the error returns immediately upon power-up, the internal lamps, thermistors, or thermal fuses have definitively failed. The fuser cannot typically be repaired at the component level by an end-user. You must order and install a complete Lexmark Fuser Maintenance Kit corresponding to your printer model.
Advanced Troubleshooting
If installing a brand new, confirmed-compatible fuser unit does not resolve the 92x series error, the diagnostic focus must shift from the fuser assembly itself to the printer's main internal electronics. The most likely culprit is the Low-Voltage Power Supply (LVPS) or the Engine Control Board (ECB).
The LVPS handles the AC line voltage and utilizes large relays and triacs to send raw AC power directly to the fuser lamps. If a triac on the LVPS has failed in an open state (preventing power from reaching the fuser) or a closed state (sending constant power), the printer will continue to throw 920 or 922 errors regardless of how many new fusers are installed.
To diagnose this, a certified technician will use a digital multimeter to test the continuity of the fuser's heating element (which should typically measure between 5 and 15 ohms depending on the model) and test the resistance of the thermistors at room temperature (usually reading several hundred kilo-ohms). If the fuser tests perfectly fine out of the machine, the technician will examine the LVPS for blown fuses, bulging capacitors, or visibly burnt components near the heavy AC traces.
Additionally, firmware glitches can occasionally cause false thermal readings. In rare instances, an older firmware revision might have overly sensitive timing parameters for the fuser warmup cycle.
If the printer takes one second longer than expected to reach target temperature due to minor voltage sags in the building's wiring, it throws a 920 error. Updating the Engine Code and System Firmware via the Lexmark Embedded Web Server (EWS) can apply updated parameters that are more tolerant of real-world electrical environments, resolving intermittent, nuisance 920 errors without requiring hardware replacement.
It is also crucial to verify the media settings in the printer configuration. Printing heavily on thick cardstock or labels requires the fuser to run at a significantly higher temperature to drive heat through the thicker media.
If a user sends a 500-page job of thick cardstock but fails to specify the correct media type in the print driver, the fuser will attempt to print using standard paper temperature profiles. This rapid thermal drain into the thick paper can cause the fuser temperature to plummet mid-job, triggering a 921 error.
Properly configuring the media types in the tray settings ensures the printer adjusts its motor speed and thermal profile accordingly.
FAQ
Is it safe to clear a 922 Over Temperature error by just turning the printer off and on?
No. A 922 error often indicates a runaway thermal event.
Can I just replace the halogen lamp inside the fuser instead of buying a whole new unit?
While technically possible for highly trained technicians, it is strongly advised against. Reassembling a fuser requires precise tensioning of the pressure rollers and careful routing of high-voltage wires.
How long does a typical Lexmark fuser last before needing replacement?
Fuser life varies drastically by model and usage, but typical enterprise fusers are rated for between 150,000 and 300,000 pages. Printing heavily on thick media, labels, or envelopes will significantly reduce the lifespan of the fuser rollers.
My printer gave a 920 error, but the room isn't cold. What else could cause it?
If the room temperature is normal, a 920 error means the fuser lamp has likely burnt out, the thermal fuse has tripped, or the printer is plugged into a weak power source (like a cheap extension cord) that restricts current.
Does installing a third-party or refurbished fuser void my Lexmark warranty?
Using third-party parts does not automatically void the entire warranty, but if the third-party fuser is proven to have caused damage to other parts of the printer (like shorting out the power supply), Lexmark will not cover the repair of the damaged components under warranty.
