


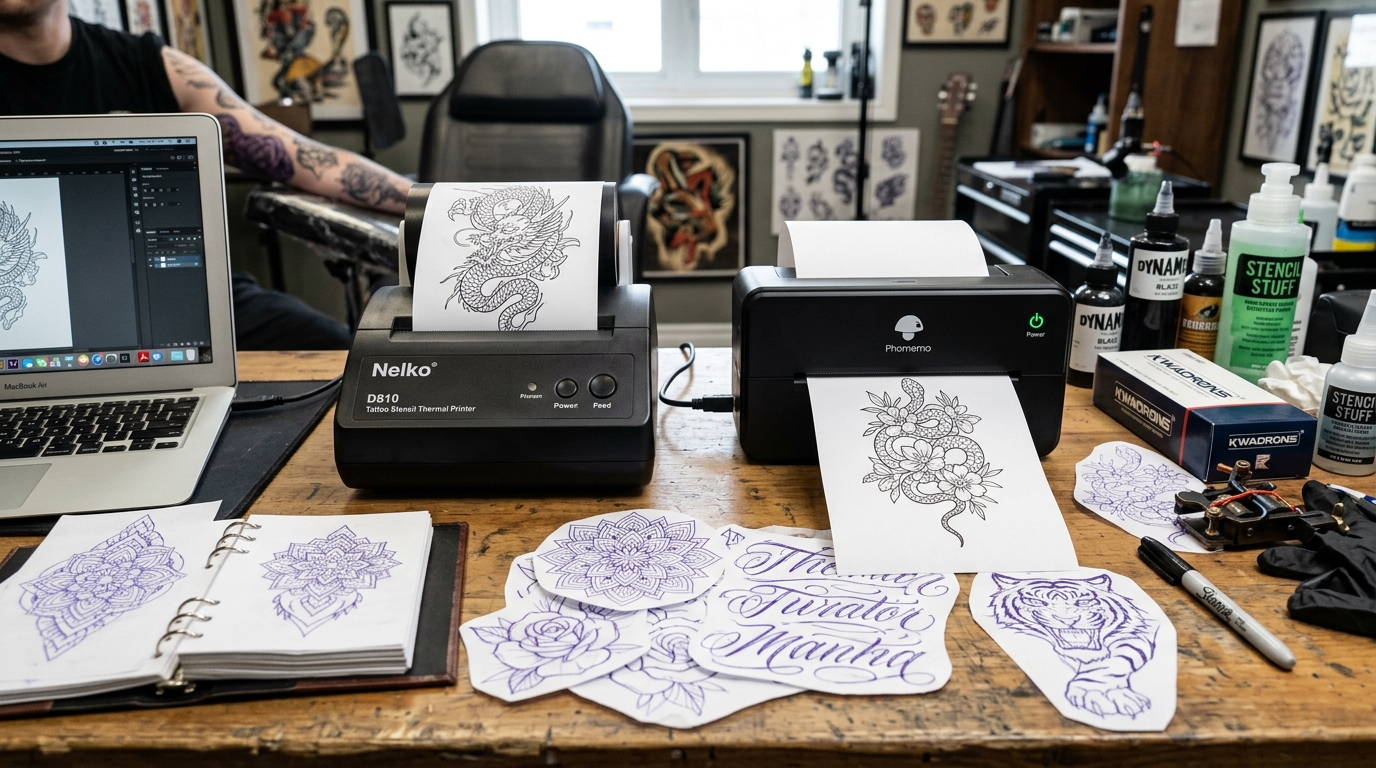
When selecting a thermal tattoo stencil printer, artists frequently narrow their choices down to the Nelko D810. The Phomemo M08F.
Both devices offer portability, high-resolution thermal transfer capabilities, and Bluetooth connectivity for modern mobile workflows. However, achieving a flawless, smudge-free stencil transfer requires precise understanding of their respective hardware capabilities, paper compatibility, and driver configurations.A poorly configured thermal printer will result in uneven line weights, skipped details in complex shading areas.
Ultimately, a compromised tattoo outcome.This guide provides an in-depth comparison of the Nelko D810 and Phomemo M08F, focusing on firmware (internal software) stability, thermal print head density, app ecosystem. Advanced setup procedures for professional tattoo artists.
Why This Happens
Why This Happens: Poor Print Quality and Setup Failures
Tattoo stencil paper consists of four layers: the backing sheet, the carbon transfer sheet, a protective tissue. The master sheet.
Thermal printers like the Nelko D810 and Phomemo M08F apply localized heat to melt the carbon layer onto the master sheet. Setup failures and poor print quality usually stem from three primary causes:
1.Incorrect Thermal Density Settings: If the print head does not reach the optimal temperature.
The carbon will not melt properly, leading to faint lines. Conversely, excessive heat will cause the carbon to bleed, resulting in thick, blurry lines that lack precision.
2.
Driver and App Incompatibilities: Many artists attempt to print directly from generic image viewers rather than using the dedicated vendor apps (Nelko App or Phomemo App).These apps contain specialized image processing algorithms designed to convert continuous-tone images into dithered. High-contrast monochrome formats optimized for thermal transfer.
3.
Media Feeding Mechanisms: The platen roller and feed sensors must precisely grip the multilayered stencil paper.If the protective tissue layer is not removed prior to printing.
Or if the paper is loaded backwards, the thermal energy will not reach the carbon layer, or the paper will slip, causing distorted aspect ratios.
4.Bluetooth Interference: In busy studio environments with multiple active wireless devices.
Bluetooth Low Energy (BLE) interference can cause packet loss during the image transmission, resulting in horizontal bands or incomplete prints.
5. Battery Voltage Drop: Thermal printing requires significant instantaneous current.If the internal lithium-ion battery is below 30% capacity.
The voltage drop during heavy continuous printing can cause the thermal head controller to throttle power, leading to fading towards the end of a long stencil.
Step-by-Step Fix and Setup Guide
- Prepare the Stencil Paper: Obtain high-quality thermal stencil paper (e.g., Spirit Thermal).Carefully peel away and discard the protective tissue layer (usually brown or translucent) located between the carbon layer. The master sheet. Failure to remove this layer will completely block the thermal transfer process.
- Charge the Printer: Connect the Nelko D810 or Phomemo M08F to a dedicated 5V/2A USB wall charger using the provided USB-C cable. Do not rely on standard computer USB ports, as they may only provide 0.5A, which is insufficient for a rapid charge. Wait until the LED indicator turns solid green, indicating a 100% state of charge.
- Install the Official Application: Navigate to the Apple App Store or Google Play Store and download the official application corresponding to your device. Avoid third-party Bluetooth printing apps. Ensure you grant the app necessary permissions, including Bluetooth and local network access.
- Pair via the App (Not OS Settings): Turn on the printer. Open the dedicated app.Do NOT pair the printer through the iOS or Android standard Bluetooth settings menu. As this often assigns the wrong generic profile. Use the "Add Device" or "Connect" button within the app itself to establish a specialized BLE connection.
- Configure Image Processing: Import your design into the app. Select the "Tattoo Stencil" or "High Contrast" mode. Adjust the brightness and threshold sliders until the image consists only of solid black lines with no gray anti-aliasing. If the app supports dithering, use it only for shading, not for line work.
- Load the Paper: Insert the prepared stencil paper into the feed slot. The yellow backing paper should be facing downwards, and the white master sheet should face upwards towards the print head.Push the paper in gently until the internal optical sensor detects it. The platen roller automatically grips and aligns the leading edge.
- Execute a Test Print: Send a small, simple design to the printer. Monitor the output.If the print is too light, navigate to the device settings within the app. Increase the "Print Density" or "Concentration" to a higher level (e.g., Level 3 or Medium-High).
- Clean the Print Head (Routine Maintenance): After printing approximately 20-30 stencils, carbon residue will build up on the ceramic thermal element.Power off the device, open the lid (if applicable) or access the feed path. Gently wipe the thermal print head with a lint-free swab lightly dampened with 99% isopropyl alcohol. Allow it to dry completely before resuming operation.
Advanced Troubleshooting
Advanced Troubleshooting If you continue to experience connectivity drops or poor output after the initial setup. You may need to explore advanced diagnostics.
For the Nelko D810, clearing the internal NVRAM cache can resolve persistent Bluetooth pairing loops.To perform a hard reset, press and hold the power button for exactly 15 seconds. The device is turned on, until the status LED flashes red and blue rapidly.
For the Phomemo M08F, firmware (internal software) updates are occasionally released to address compatibility issues with newer iOS or Android operating systems.Connect the printer to a Windows PC via USB, download the official firmware (internal software) flashing utility from the Phomemo support portal. Carefully follow the flashing instructions.
Never disconnect the USB cable during a firmware (internal software) update, or you risk bricking the main logic board. Furthermore, inspect the platen roller for any adhesive residue or deep scratches.A compromised roller will not apply even pressure against the thermal head.
Resulting in faded patches on one side of the stencil. Replacement rollers can often be sourced directly from the manufacturer for high-volume studio environments.
FAQ
Can I print from a desktop computer instead of a phone?
Yes, both the Nelko D810 and Phomemo M08F support USB connections to Windows and macOS computers. You must download and install the specific VCP (Virtual COM Port) and raster drivers from the manufacturer's website.Printing via desktop allows for finer control over DPI. Halftone patterns using professional software like Photoshop, though it requires more advanced driver settings.Why is the stencil transferring too dark and smudging on the skin?
This is usually caused by excessive thermal density settings during printing, or applying too much stencil transfer solution (e.g., Stencil Stuff) to the skin. Lower the darkness setting in the app.Ensure the skin is properly prepped with alcohol, apply a very thin, even layer of transfer gel, allow it to become slightly tacky. Press the stencil firmly without sliding.Is the Phomemo M08F compatible with standard A4 thermal paper?
Yes, the M08F is designed to accept standard A4 width (210mm) thermal paper. However, for tattoos, you MUST use thermal stencil transfer paper. Standard thermal receipt or document paper will not transfer onto skin and is intended only for document archiving.What should I do if the paper jams inside the printer?
Do not pull the paper forcefully. Power off the printer immediately. Gently press the release latches on the sides (if available) to open the print head cover. Slowly pull the jammed paper out in the direction of the paper path. If the paper is tightly stuck, use tweezers to carefully remove small fragments without scratching the delicate thermal elements.Disclaimer: Before proceeding with any hardware modifications, firmware (internal software) flashes, or deep driver configurations, it is absolutely essential to ensure that your operating system is fully up to date. That you have backed up any critical print spooler configurations.Thermal and dot matrix printers, along with modern network enterprise printers.
Frequently interact with low-level system APIs (such as the Windows Print Spooler service, CUPS on macOS/Linux, or built-in vendor port monitors).Modifying these parameters without a solid understanding of your network topology, USB root hub power management settings. Driver signing enforcement can lead to system instability, unrecoverable printing queues, or degraded print head lifespans.Additionally, if your device is under an active manufacturer warranty or an extended service contract.
Opening the chassis, breaking warranty seals, or installing unsigned third-party drivers might void your support agreement.Always consult your IT department or the official vendor documentation if you are operating within a strict compliance framework (such as HIPAA. PCI-DSS, or SOX), as misconfigured network printers can expose internal subnets to unauthorized access or lead to data leakage through unencrypted print streams.
Use extreme caution when handling thermal print heads or physical cutter blades, as they can cause burns or lacerations.Allow the device to cool down completely for at least 15 to 30 minutes after extensive use before attempting any physical clearing of jams. Roller maintenance with isopropyl alcohol, or ribbon replacements.
Always use a grounded anti-static wrist strap when interacting with internal logic boards to prevent electrostatic discharge (ESD) from permanently damaging sensitive microcontroller units or NVRAM chips.This comprehensive guide is designed for system administrators, advanced power users. IT technicians who need to resolve persistent hardware or software issues that standard troubleshooting steps have failed to address.
It is provided 'as is' without warranties of any kind.
