


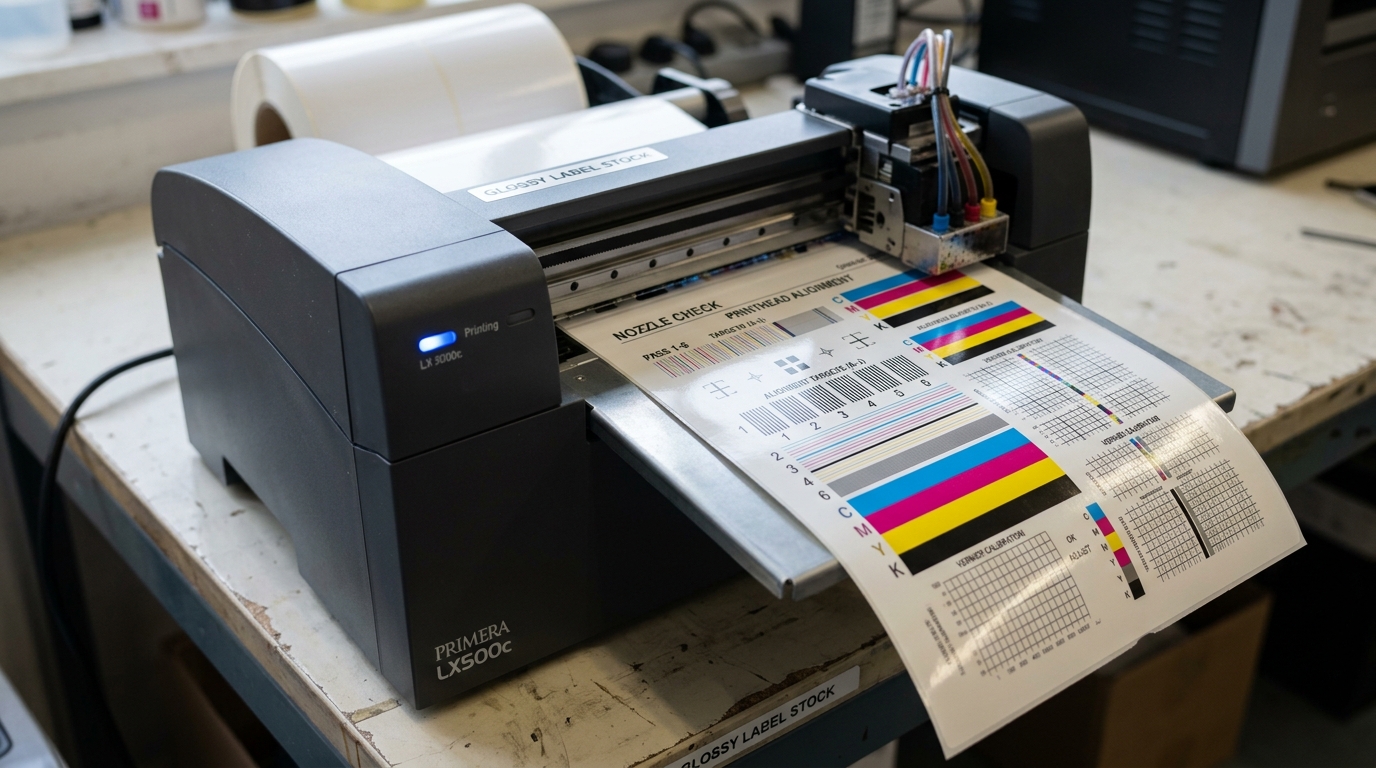
The Importance of Nozzle Checks
A Nozzle Check Pattern is a diagnostic printout that tests every single microscopic nozzle on the thermal inkjet printhead. It is the only definitive way to prove whether a print quality issue is caused by a hardware clog or a software setting.
How to Read the Nozzle Check
- Open PTStatus . Navigate to the maintenance tab and click Print Nozzle Check.
- The printer will print a diagonal "stair-step" grid of lines for each of the four colors (C, M, Y, K).
- Examine the grid closely under bright light.
- Perfect: The grid looks like a continuous, unbroken staircase.
- Clogged: There are missing rungs in the staircase, or entire sections are blank. You must perform a manual hot-water flush on the printhead.
How to Align the Printhead
If your labels are printing with "ghosting", fuzzy/blurry small text, or colors bleeding outside the lines (e.g., the red ink prints slightly to the left of the black outline), the printhead is physically misaligned. This must be done every time you install a brand-new printhead.
- Load standard 4x6 or continuous label stock.
- In PTStatus, click Align Printhead.
- The printer will output a calibration sheet featuring several rows of lines or boxes labeled with letters and numbers.
- Look at the printed sheet. Find the specific box in each row where the lines align perfectly, with no overlap and no white gaps between them.
- Enter the corresponding letter/number into the PTStatus prompt and click Apply. The printer's firmware will now compensate for the microscopic manufacturing tolerances of that specific printhead.
Color Calibration vs Paper Type
If your colors look perfectly sharp but the shades are wrong (e.g., Coca-Cola red looks slightly orange), you need to calibrate the color profile in the Windows driver, not the hardware. Open the Primera Printing Preferences and change the Media Type.
Changing from "Glossy" to "Matte" drastically alters how the driver mixes cyan and magenta to achieve reds.
Precision Calibration Guide for Primera LX-Series Color Label Printers
High-resolution prime label printing requires sub-millimeter precision. When printed barcodes fail optical verification scans, text edges look blurry, or horizontal banding lines appear across solid backgrounds, executing systematic nozzle checks and printhead alignments restores laboratory-grade output.
Exhaustive 3-Step Calibration & Alignment Protocol
- Print and Evaluate a Nozzle Diagnostic Pattern:
- Open PTStatus on your host PC.
- Go to the Maintenance / Diagnostic tab and click Print Nozzle Test.
- The printer feeds a label and prints stepped diagonal staircase lines for Black, Cyan, Magenta, and Yellow.
- If staircases have gaps or deflected lines, click Clean Printhead in PTStatus. Run up to 2 cleaning cycles.
- Perform Bidirectional Printhead Alignment:
- In PTStatus > Alignment tab, click Align Printhead.
- The printer prints numbered test columns (A through H).
- Examine each column with a magnifying loupe and enter the number corresponding to the straightest, least blurry vertical line.
- This synchronizes the microsecond firing timing between forward and reverse carriage passes.
- Fine-Tune Image Offset Calibration (X/Y Margins):
If your printed graphic is slightly clipped on the left or top edge of the die-cut label, open Printer Preferences > Alignment / Offsets. Adjust Left Margin Offset and Top Margin Offset in 0.1mm increments until the image centers perfectly with full bleed.
Frequently Asked Questions
Why do barcodes fail to scan on retail POS scanners?
Barcodes printed with bidirectional alignment drift have jagged edges that scatter laser beams. In your design software, orient 1D barcodes vertically (in the direction of label feed) or print in "Best Quality" mode.
How often should I align the printhead on an LX900 or LX2000?
Run a Printhead Alignment whenever you replace the printhead assembly, change label media thickness, or notice blurry text edges.
