


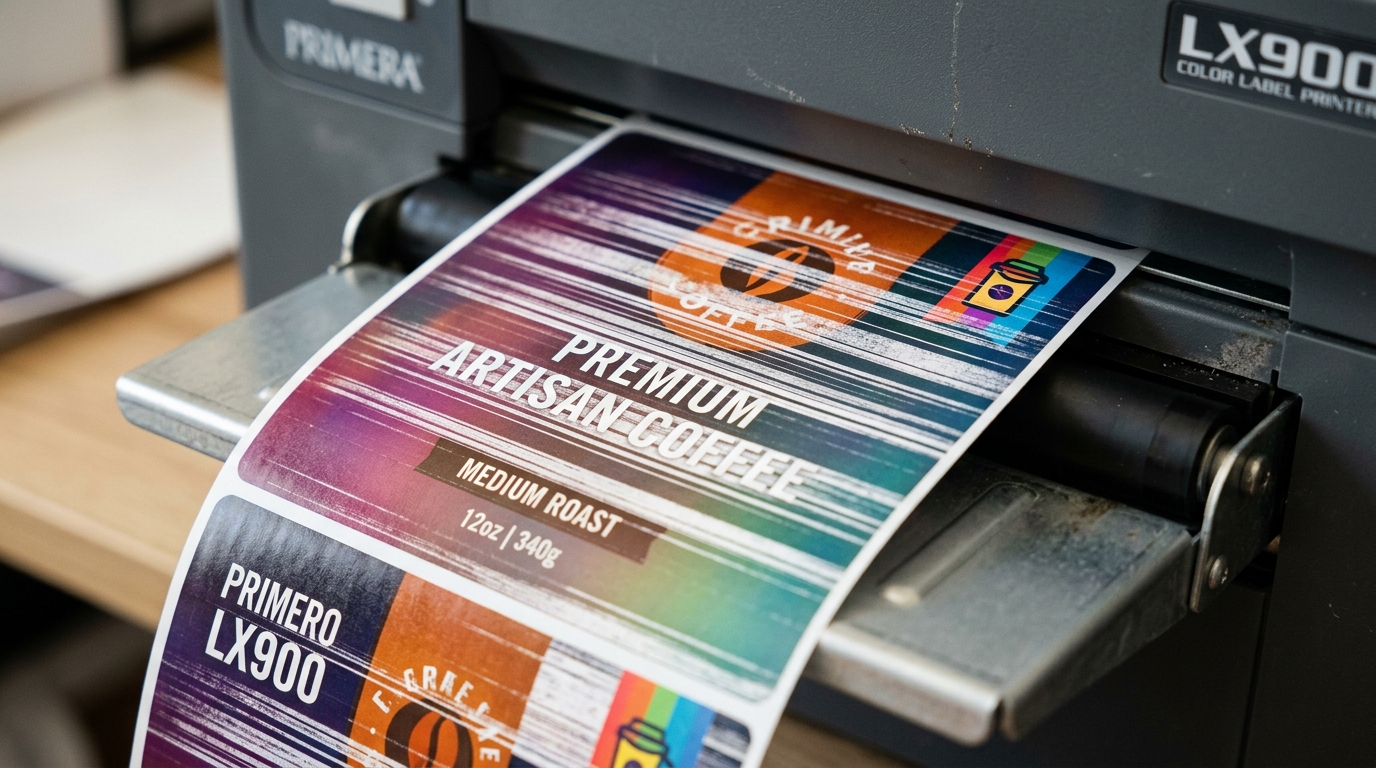
Diagnosing Poor Print Quality on Primera Printers
Primera LX-series color label printers utilize high-resolution thermal inkjet technology. While they produce stunning, photo-quality product labels, they are susceptible to clogged nozzles if the printer sits idle for several weeks.
Problem 1: Missing Colors (e.g., Only Printing Black and Yellow)
If your full-color label design prints, but the blue sky is missing (no Cyan) or the red apples look orange/yellow (no Magenta), an entire ink channel is failing to flow.
- The Vent Hole Seal: When installing a new ink cartridge, you must pull off the yellow/orange tape tab. This uncovers a microscopic vent hole at the top of the cartridge. If this hole is blocked, a vacuum forms inside the tank, preventing ink from flowing down to the printhead. Double-check that the tape is completely removed and no adhesive residue is blocking the hole.
- Empty Cartridge False Reading: Occasionally, the RFID chip will tell PTStatus the cartridge is 30% full, but the tank is actually bone dry. If a color is entirely missing, replace that specific cartridge to test.
Problem 2: Banding Streaks (Horizontal White Lines)
If you see perfectly straight, horizontal white lines cutting through solid blocks of color, individual microscopic nozzles are clogged with dried ink.
Step 1: Software Cleaning
Open PTStatus and click Clean Printhead. Run this utility up to 3 times. Do not run it more than 3 times back-to-back, as you will waste a massive amount of ink.
Step 2: The Manual "Hot Towel" Flush
If software cleaning fails, you must manually unclog the printhead plate.
- Remove the printhead from the printer.
- Fold a thick, lint-free paper towel (or a coffee filter) into a square.
- Soak the center of the towel with Hot Distilled Water. Do not use tap water (minerals will clog the nozzles) and do not use rubbing alcohol on the bottom nozzle plate (it degrades the sealants).
- Press the bottom nozzle plate of the printhead firmly against the wet, hot towel. Hold it there for 30 to 60 seconds.
- You should see four distinct stripes of ink (Cyan, Magenta, Yellow, Black) wick out onto the towel. If a color is missing from the towel stripe, that channel is severely clogged. Repeat until all 4 colors wick freely.
Problem 3: Faded Print & Poor Saturation
If the entire label looks washed out or pastel, you are printing on the wrong media type. Primera dye-based inks require an inkjet-coated top layer.
If you try to print on standard untreated glossy paper or thermal transfer paper, the ink will puddle on the surface and appear incredibly faded. Ensure your driver settings match the paper type (e.g., High Gloss vs.
Matte).
Diagnosing Print Quality Failures on the Primera LX900 Label Printer
The Primera LX900 utilizes four individual dye ink cartridges (Cyan, Magenta, Yellow, Black) connected to a semi-permanent thermal printhead assembly. When labels display missing colors, horizontal white streaks, or faded graphics, dried ink clogs or air pockets in the printhead manifold are responsible.
Exhaustive 4-Step Printhead Recovery Protocol
- Print a Nozzle Diagnostic Test in PTStatus:
Open PTStatus > Diagnostic tab > Print Nozzle Test. Identify which specific color channel contains broken grid lines or missing staircase bars.
- Execute Staged Printhead Cleanings:
In PTStatus, run a Standard Cleaning. If gaps remain, run a Strong Cleaning. Allow the printer to sit idle for 30 minutes after cleaning to let fresh ink dissolve hardened nozzle crusts.
- The Warm Distilled Water Nozzle Plate Soak:
- Remove the LX900 printhead assembly from the carriage.
- Pour 1/4 inch of warm distilled water (120°F / 50°C) into a shallow dish.
- Submerge only the bottom metal nozzle plate for 15 minutes. (Keep the rear electrical contact board completely dry).
- Blot the nozzle plate on a clean paper towel to draw out congealed pigment.
- Dry thoroughly and reinstall.
- Perform Bidirectional Printhead Alignment:
In PTStatus > Alignment tab, complete the alignment test to synchronize bidirectional dot firing timing.
Frequently Asked Questions
Why does one color stop printing halfway through a long label run?
If a color drops out mid-run, the ink cartridge vent hole is partially blocked, creating a vacuum that starves the printhead. Peel off the top yellow pull-tab completely.
When should I replace the LX900 printhead?
If manual soaking and strong cleanings fail to restore missing color nozzles, the thermal firing micro-resistors have burned out, requiring a replacement LX900 printhead (Part # 53470).
