


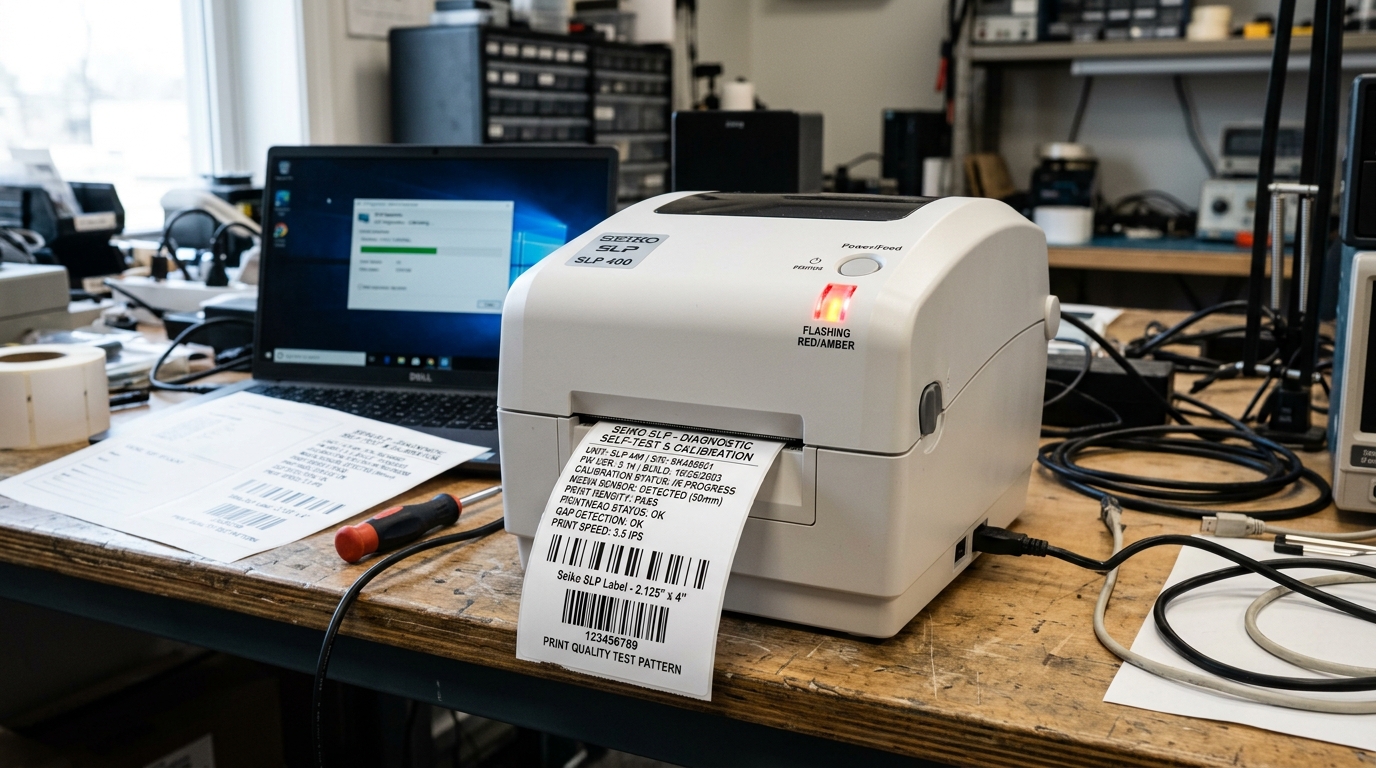
Introduction to Seiko SLP Calibration and Errors
Seiko Smart Label Printers (SLP) are highly regarded for their compact design. Efficient direct thermal printing capabilities, making them a staple in offices, mailrooms, and laboratories.
However, ensuring consistent print quality and accurate label positioning requires precise calibration. When a Seiko SLP encounters an issue with label detection.
Internal mechanisms, it communicates these problems through a series of flashing LED lights. Understanding how to interpret these flashing light errors and perform a self-test.
Calibration is essential for maintaining optimal printer performance and preventing frustrating jams or misaligned prints.
The calibration process allows the printer to measure the specific dimensions of. The labels currently loaded, particularly the gap or black mark between each label.
If the printer loses this calibration—due to a change in label roll size, a sensor blockage. A firmware (internal software) (internal software) glitch—it will not know where one label ends and the next begins.
This results in continuous feeding, skipping labels, or stopping midway through a print job, accompanied by a flashing error light. This guide will provide a detailed breakdown of the self-test procedures, how to recalibrate your Seiko SLP.
What the various flashing light sequences signify, equipping you with the knowledge to troubleshoot and resolve these common errors.
Why This Happens
The most frequent cause of calibration errors and flashing lights on a Seiko SLP. Is changing the label roll without properly prompting the printer to recognize the new media.
Different labels have varying opacities and gap sizes. The printer's transmissive sensor (which shines light through the backing paper).
Reflective sensor (which detects black marks) must be adjusted to the specific characteristics of the new roll. If the printer is expecting a small address label.
You insert a large shipping label, the sensors will be confused, triggering an error state and a flashing light.
Another common issue is sensor obstruction. The small optical sensors inside the label path are sensitive to dust, paper lint, and adhesive residue.
Over time, as labels pass through the printer, small particles can accumulate on the sensor lenses. If a sensor is covered in dust, it may fail to detect the gap between labels, leading.
The printer to assume it has run out of paper or that there is a continuous jam. Regular cleaning of the internal label path is crucial to prevent these false readings and maintain accurate calibration.
Flashing light errors can also indicate mechanical problems. If the platen roller (the rubber roller that feeds the labels) is worn out, slick.
Sticky with adhesive, it may slip against the backing paper. This slipping causes the labels to feed inconsistently, which confuses the timing of the optical sensors.
The printer expects the label gap to pass the sensor at a. Specific interval; if mechanical slipping delays this, the printer will register an error.
In severe cases, a flashing light might indicate a problem with the printhead mechanism failing to lock down properly.
Finally, firmware (internal software) (internal software) bugs or memory corruption can occasionally cause the. Printer to "forget" its calibration settings or become trapped in an error loop.
Performing a factory reset or a hard reboot is sometimes necessary to clear the volatile memory. Force the printer to recalibrate its sensors from a baseline state.
Understanding that these errors are a combination of optical sensing, mechanical feeding. Software logic helps in systematically diagnosing the root cause.
Step-by-Step Fix
- Identify the Light Pattern: Before taking action, observe the LED light. Is it flashing rapidly or slowly? Is it alternating between colors (if applicable to your model)? A slow, steady flash usually indicates an out-of-paper. Calibration issue, while a rapid flash can indicate a more severe hardware or data error. Check your specific SLP model's manual for the exact flash code definitions.
- Clean the Printer Sensors: Turn the printer off and unplug it. Open the top cover and remove the label roll. Use a can of compressed air to gently blow away any loose dust in the label path. Then, use a lint-free swab lightly moistened with isopropyl alcohol to carefully. Clean the small optical sensors (usually located near the label exit path). Allow the alcohol to dry completely.
- Inspect the Platen Roller: While the printer is open, examine the rubber platen roller. If it looks shiny, slick, or has adhesive buildup, it needs cleaning. Wipe it down with the alcohol swab, manually rotating it to clean the entire circumference. A clean roller is essential for accurate label feeding.
- Reload the Labels Correctly: Reinsert the label roll, ensuring it is seated tightly against the guide rails. The labels must feed straight into the printer. If the roll is loaded loosely. At an angle, the labels will drift away from the sensors, causing immediate calibration errors. Ensure the leading edge of the first label is positioned correctly at the tear bar.
- Perform a Self-Test Print: A self-test verifies that the printhead and internal logic are functioning. Ensure the printer is turned off. Press and hold the power button (or feed button, depending on the model). Then turn the printer on while continuing to hold the button. The printer should feed a label. Print a diagnostic page containing firmware (internal software) (internal software) information and test patterns. If this fails, the issue is hardware-related.
- Execute the Calibration Procedure: To recalibrate the sensors for the current labels, turn the printer on. Press and hold the Feed button for several seconds until the LED light begins to flash rapidly, then release it. The printer should feed a few blank labels. During this process, it is measuring the label length and the gap opacity. Once it stops feeding and the light turns solid green, the calibration is complete.
- Test with the Software: Open the Seiko Smart Label software on your computer. Create a simple test label and send it to print. The printer should print the label and stop exactly at the tear-off line for the next label. If it prints correctly, the calibration was successful and the error is resolved.
- Update Firmware (internal software) (internal software) (If Necessary):If calibration fails repeatedly despite cleaning and correct loading, check the Seiko. Website for any available firmware (internal software) (internal software) updates for your specific SLP model. A firmware (internal software) (internal software) update can resolve underlying bugs in the sensor logic. Cause persistent flashing light errors.
Advanced Troubleshooting
If you have cleaned the sensors, replaced the labels, and performed the calibration procedure. The printer continues to flash an error light and feed improperly, you may be dealing with a faulty sensor array.
Optical sensors can degrade over time, losing their sensitivity. If the transmissive sensor can no longer distinguish between the label.
The backing paper, no amount of calibration will fix it. In these instances, the sensor assembly or the entire mainboard may need replacement.
Generally requires contacting Seiko support or an authorized repair center.
Another advanced issue involves the power supply. The motors that drive the label feed require consistent voltage.
If the power adapter is failing. Providing fluctuating power, the motors may stutter or slip, disrupting the precise timing required for calibration.
Testing the printer with a known-good power adapter of the exact. Same specifications can help rule out power-related issues that mimic sensor failures.
Finally, ensure that the label stock you are using is compatible with the printer. While Seiko SLP printers are versatile, using very cheap, third-party labels with inconsistent.
Gap spacing, overly thick backing paper, or poor-quality thermal coatings can cause persistent errors. The printer's sensors are calibrated for standard tolerances; labels.
Fall outside these tolerances will consistently trigger flashing light errors and cause jams. Trying a genuine roll of Seiko labels is a definitive way to.
Determine if the issue is with the printer hardware or the consumable media.
FAQ
Why does the printer feed multiple blank labels when I print?
This is the classic symptom of a lost calibration. The printer does not recognize the label gaps.
What does it mean if the light is solid red instead of flashing?
A solid red light typically indicates a hard error state, such as the printer. Being completely out of paper, the cover being open, or a significant internal hardware failure.
Can I calibrate the printer through the software on my computer?
While you can configure label sizes in the software, the actual physical calibration of the sensors must. Typically be initiated using the physical buttons on the printer itself, as it involves internal hardware measurements.
Is it necessary to calibrate every time I change the label roll?
If you are replacing an empty roll with a new roll of the exact same size. Type, recalibration is usually not necessary.
How can I tell if my platen roller needs replacing?
If the roller is hard, cracked, missing chunks of rubber. If cleaning it with alcohol does not restore its grip.
