


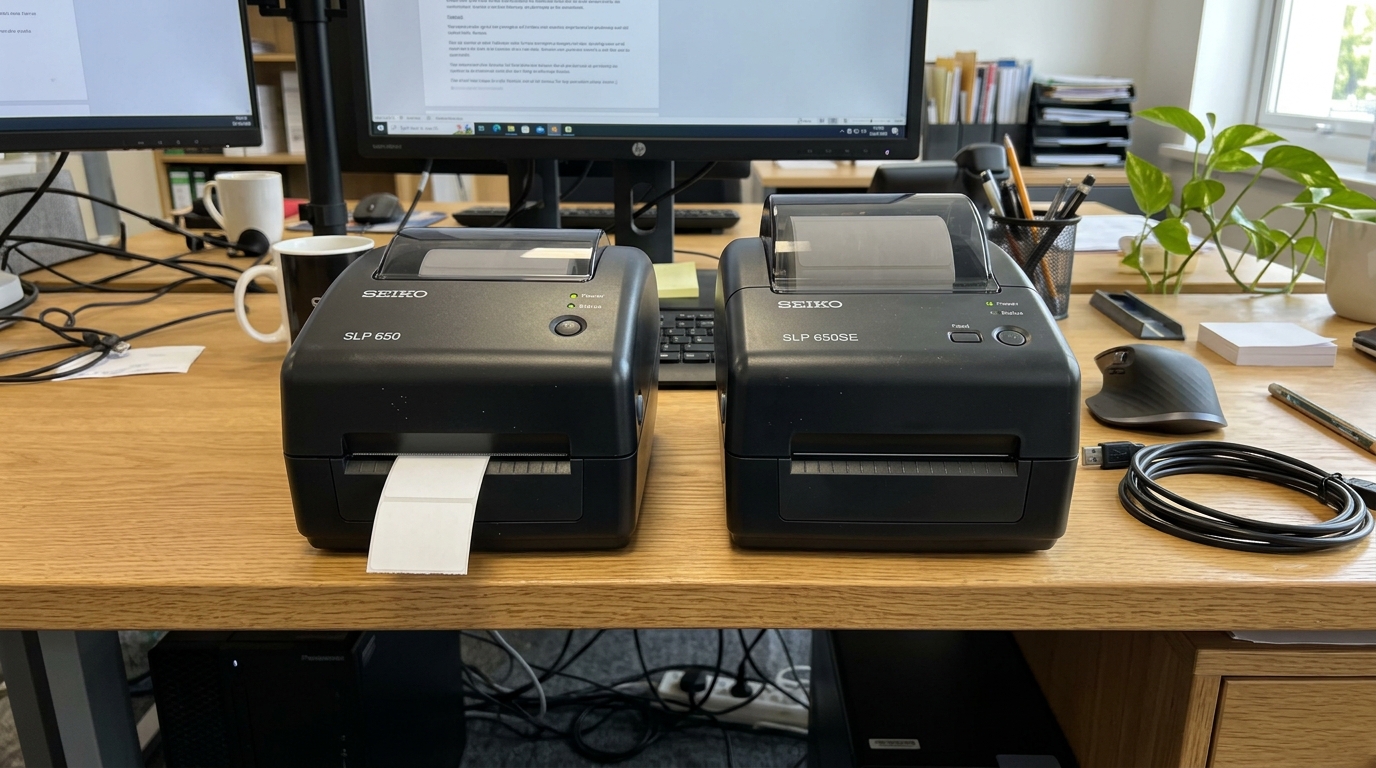
Introduction to Seiko Smart Label Printers
Seiko Instruments has a long-standing reputation for manufacturing durable, high-quality precision electronics. Their Smart Label Printer (SLP) series is proof of this legacy.
The SLP series. Particularly models like the SLP 650, SLP 650SE, and SLP 620, are stalwarts in professional environments such as medical offices, law firms, and shipping departments.
These are direct thermal printers. Meaning they utilize heat to activate chemicals on specially treated label paper, completely eliminating the need for ink cartridges or toner.
This results in a low maintenance. Highly reliable printing solution perfectly suited for printing address labels, file folder labels, name tags, and barcodes in high volumes.
However. Navigating the specific differences between the various models in the 600 series can be confusing for potential buyers or IT administrators tasked with deploying them.
At first glance, the SLP 650, 650SE, and 620 look remarkably similar in physical design and footprint. Yet, beneath the plastic housing, they possess distinct technical specifications regarding print speed, resolution, connectivity interfaces, and software features.
Choosing the wrong model for your specific workflow can lead to bottlenecks or incompatible hardware setups. In this guide.
We will meticulously dissect the differences between the SLP 650, 650SE, and 620, explain why these differences matter in practical applications, and provide a comprehensive setup and troubleshooting guide to ensure a smooth deployment on your Windows or Mac systems.
Why This Happens: Analyzing the Differences (650 vs 650SE vs 620)
The differences between these three models dictate their ideal use cases and justify their varying price points.Seiko SLP 620 is the entry-level model of this generation. It prints at a standard resolution of 203 dots per inch (dpi).
Operates at a moderate speed of approximately 2. 75 inches per second.
It connects exclusively via a standard USB interface. The SLP 620 is ideal for basic text labels, address tags.
Simple black-and-white graphics where ultra-high precision or blazing speed is not critical. It is the workhorse for standard office organization.
Stepping up to the Seiko SLP 650 brings significant performance improvements. The print resolution jumps to a crisp 300 dpi.
The print speed nearly doubles to almost 4 inches per second. The higher resolution is the key differentiator here; 300 dpi is essential if you need to print dense.
Easily scannable barcodes, intricate logos, or very small fonts (like on jewelry tags or tiny medical vials) without the text appearing jagged or pixelated. Like the 620, the standard 650 connects primarily via USB.
The Seiko SLP 650SE (Special Edition) takes the high-resolution, high-speed capabilities of the 650 and adds crucial legacy connectivity. In addition to the standard USB port, the 650SE includes a traditional RS-232 Serial port.
Why does this matter? Many older industrial systems, point-of-sale (POS) terminals, specialized medical equipment.
Bespoke legacy software applications can only send print data via serial COM ports. The 650SE allows organizations to upgrade their printer hardware to a fast.
Modern device without having to rewrite decades-old software or replace expensive built-in systems that rely on serial communication. Understanding these core hardware differences is essential for troubleshooting setup issues; for instance.
You cannot expect high-quality barcode scanning from a 620, nor can you connect a standard 650 to an old serial terminal.
Step-by-Step Fix: Setup and Installation Guide
Proper setup is critical for ensuring the longevity and reliability of your Seiko SLP printer. Follow these steps to install the SLP 620, 650, or 650SE on a modern PC.
- Unbox and Connect Power: Unpack the printer and connect the built-in AC power adapter. Do NOT connect the USB or Serial cable to the computer yet. This is a crucial step; connecting the data cable before installing the software can cause Windows to install generic. Incorrect drivers.
- Install the Smart Label Software: Download the latest version of the Seiko Smart Label software and drivers from the official Seiko Instruments website. Run the installer package as an Administrator. The software suite includes the design application, the necessary printer drivers, and integration add-ins for Microsoft Word and Excel.
- Connect the Printer: When prompted by the installation wizard. Or after the software installation has fully completed, plug the USB cable into the printer and the computer. Turn the printer on. Windows or macOS should now detect the device and bind it to the correct Seiko driver you just installed.
- Load the Label Roll: Open the clear plastic cover. Ensure the label roll is placed on the spindle so that the labels feed off the top of the roll. With the printable side facing down as it enters the feed slot. Gently push the leading edge of the label into the slot until the printer's internal sensor detects it and automatically grabs and feeds it to the starting position.
- Configure Printer Settings: Open the Smart Label software. Go to 'File' -> 'Printer Setup'. Ensure your specific model (e. g. , SLP 650) is selected. Verify that the label size selected in the software exactly matches the part number of the physical label roll installed in the machine.
- Print a Test Label: Create a simple text label in the software and click print. If the text is centered and feeds correctly, the setup is complete. If it feeds multiple blank labels or prints off-center, proceed to the troubleshooting section.
Advanced Troubleshooting
One of the most common advanced issues with Seiko SLP printers involves margin drift or endless feeding. If the printer spits out three or four blank labels when you only requested one.
The optical sensor is failing to detect the black registration mark or the gap between the labels. First, use compressed air to blow out any dust from the sensor path.
Next, ensure you are using genuine Seiko labels. Seiko printers are notoriously sensitive to the specific opacity and registration marks on their built-in labels.
Using cheap generic labels often results in sensor confusion and calibration failure.
For users deploying the SLP 650SE via the Serial port, baud rate. Parity mismatches are the primary cause of failure.
The settings in your sending software or terminal must perfectly match the internal settings of the printer. By default, Seiko serial printers usually operate at 9600 baud, 8 data bits, no parity.
1 stop bit (9600, 8, N, 1) with hardware flow control (DTR/DSR). You can print a settings label directly from the printer (by holding the power/feed button while turning it on) to verify its current internal serial settings and adjust your host software accordingly.
Finally. If you are integrating the printer with custom software rather than using the Seiko Smart Label application, you might need to utilize the Seiko SDK (Software Development Kit) or send raw escape commands.
The SLP series supports a specific command language. If your prints are coming out as raw alphanumeric code instead of formatted labels, your software is sending text data without the proper escape sequences required to instruct the printer to format.
Burn the image onto the thermal paper.
FAQ
Can I print from Microsoft Word directly to the Seiko SLP?
Yes, the Seiko Smart Label software installer typically includes an add-in for Microsoft Word and Excel. Once installed, you will see a Seiko icon in the Word ribbon, allowing you to highlight an address.
Why is the print quality fading or looking scratchy on my SLP 650?
Fading print is almost always caused by a dirty thermal print head or old label stock. Use a thermal printer cleaning pen or a cotton swab dipped in 99% isopropyl alcohol to carefully wipe the dark line of the print head.
Does the SLP 620 work with Mac OS?
Yes, Seiko provides drivers and a Mac version of the Smart Label software for the 600 series printers. Ensure you download the specific Mac installer package from the Seiko support website, as the Windows installer will not work.
Can I use Dymo labels in a Seiko Smart Label Printer?
No, you generally cannot use Dymo labels in a Seiko printer, or vice versa. The optical sensors in these printers are calibrated to look for specific black timing marks or gap sizes printed on the backing paper of their respective built-in labels.
