


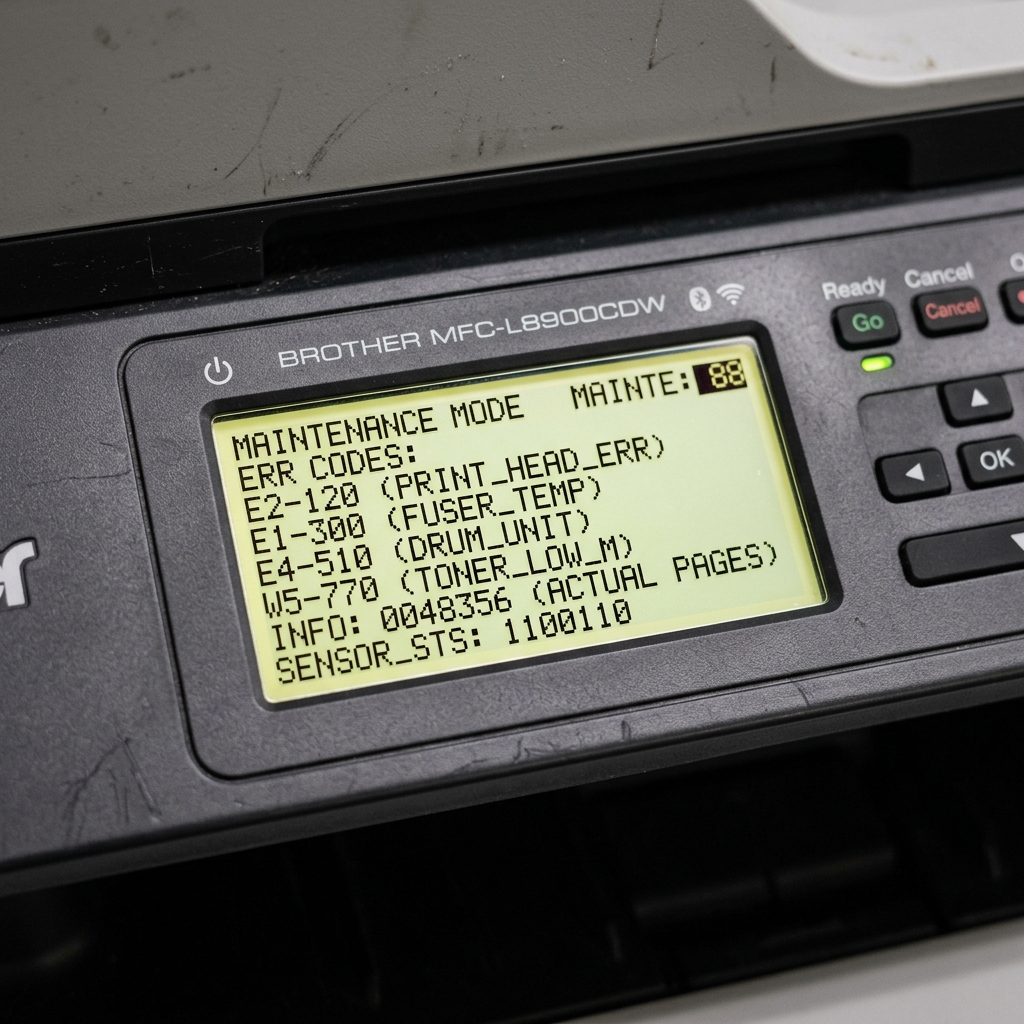
Almost every specific numbered error covered elsewhere on this site — 46, 48, 50, 51. And the rest — sits behind one shared diagnostic layer: maintenance mode. If you've seen this term appear during troubleshooting and weren't sure what it actually is or why you'd want to enter it deliberately.
This explains the whole system in one place.
What Maintenance Mode Actually Is
The messages your Brother printer shows during normal operation. "Unable to Clean," "Unable to Print," general error banners — are simplified, external-facing labels. Underneath them sits a more specific internal diagnostic code that maintenance mode reveals directly.
It's essentially the printer's own hidden service menu. Built for technicians but fully accessible to anyone who knows the entry sequence for their specific model.
Why this matters: the external message alone often isn't specific enough to troubleshoot accurately. "Unable to Clean" could mean several different things internally. And maintenance mode is how you find out which one you're actually dealing with, rather than guessing from a vague label.
How to Enter Maintenance Mode
The exact sequence varies by model and control panel type, but the general pattern is consistent: unplug the printer completely, hold down a specific button (commonly Menu/Set, or Start on simpler button-only models). And plug the power cord back in while continuing to hold that button.
Keep holding until a maintenance-specific message appears on the display, distinct from the printer's normal startup screen.
Why this works: holding the button through power-on interrupts the printer's normal boot sequence and routes it into this diagnostic layer instead. Revealing internal codes and options that never appear during regular use.
What You'll Find Once You're In
Inside maintenance mode, you'll typically see the specific internal error code behind whatever general message prompted you to look. The real number, distinct from the simplified external label.
Depending on your model, you may also find options like counter resets (for toner. Drum, or purge counts) and other diagnostic functions, though these vary considerably between models and product generations.
Why this matters: this is exactly how counter resets for errors like 46 (purge count) work. You're not guessing at a fix, you're using the same internal tools Brother's own service technicians would use, just made accessible directly to you.
A Word of Caution
Maintenance mode gives you access to settings that go beyond normal user controls. And using the wrong sequence, or navigating incorrectly once inside, can affect settings you didn't intend to touch.
Confirm the exact steps for your specific model before entering. Rather than guessing at a sequence you've seen referenced for a different machine.
Why this matters: the button combinations and available options genuinely differ across Brother's product lines. A sequence that works on one model can do something unexpected, or simply nothing at all, on another.
When to Call a Professional
If you've entered maintenance mode correctly and found an internal code you can't identify, or if a reset performed inside maintenance mode doesn't resolve your original issue, this is a reasonable point to involve Brother support or a technician directly — you now have the specific internal code to give them. This considerably speeds up getting real help.
The Complete Architecture of Brother Maintenance Mode
Brother Maintenance Mode is the low-level technician diagnostic environment embedded in the printer firmware (internal software). It bypasses standard operating system locks, sensor safeties. And counters to allow component-level testing, NVRAM parameter changes, sensor flag diagnostics, and purge counter resets.
Universal Maintenance Mode Access Matrix
- Keypad Models (MFC Series): Press
Menu>*>2>8>6>4within 2 seconds. The display will show|| MAINTENANCE |||. - Touchscreen Models (No Physical Keys): Press and hold the Home button for 5 seconds until four bars appear. Touch the blank bottom bar. Enter
*2864on the numeric popup. - Single-Button Laser Printers (HL-Series): Turn off the printer. Hold down the Go button while powering on until all LEDs illuminate, release Go, then press Go 6 times consecutively.
Essential Diagnostic Function Codes
| Code | Function Name | Diagnostic Purpose |
|---|---|---|
| 01 | EEPROM Initialization | Clears non-volatile RAM, resetting all software locks and error states to factory defaults. |
| 32 | Sensor Status Check | Displays live binary feedback from paper sensors, cover interlocks, and fuser thermistors. |
| 76 | Purge Counter Reset | Resets the waste ink absorber page counter (essential for clearing "Unable to Clean 46"). |
| 77 | Maintenance Printout | Prints a complete technical log of jam histories, motor run-times, and voltage logs. |
| 99 | Exit Maintenance Mode | Reboots the printer into standard consumer mode. |
Frequently Asked Questions
Can using Maintenance Mode damage my Brother printer?
Entering diagnostic read codes (like 32, 77) is completely safe. However, modifying country codes (Code 74) or executing improper NVRAM formatting can disable Wi-Fi regions or language menus.
What should I do if my printer is stuck displaying "MAINTENANCE" on the screen?
If the printer powers up directly into Maintenance Mode, type 99 on the keypad. If it does not exit, enter 01 to reset the boot flags, followed by 99.
