


How Canon imagePROGRAF Nozzle Monitoring Works
Canon imagePROGRAF plotters feature an automated optical droplet sensor. During test sweeps, the sensor monitors whether individual ink droplets are ejected accurately.
When multiple nozzles in a single color channel fail to fire, the printer halts printing and alerts with "Nozzle check failed" to prevent wasting expensive large-format media.
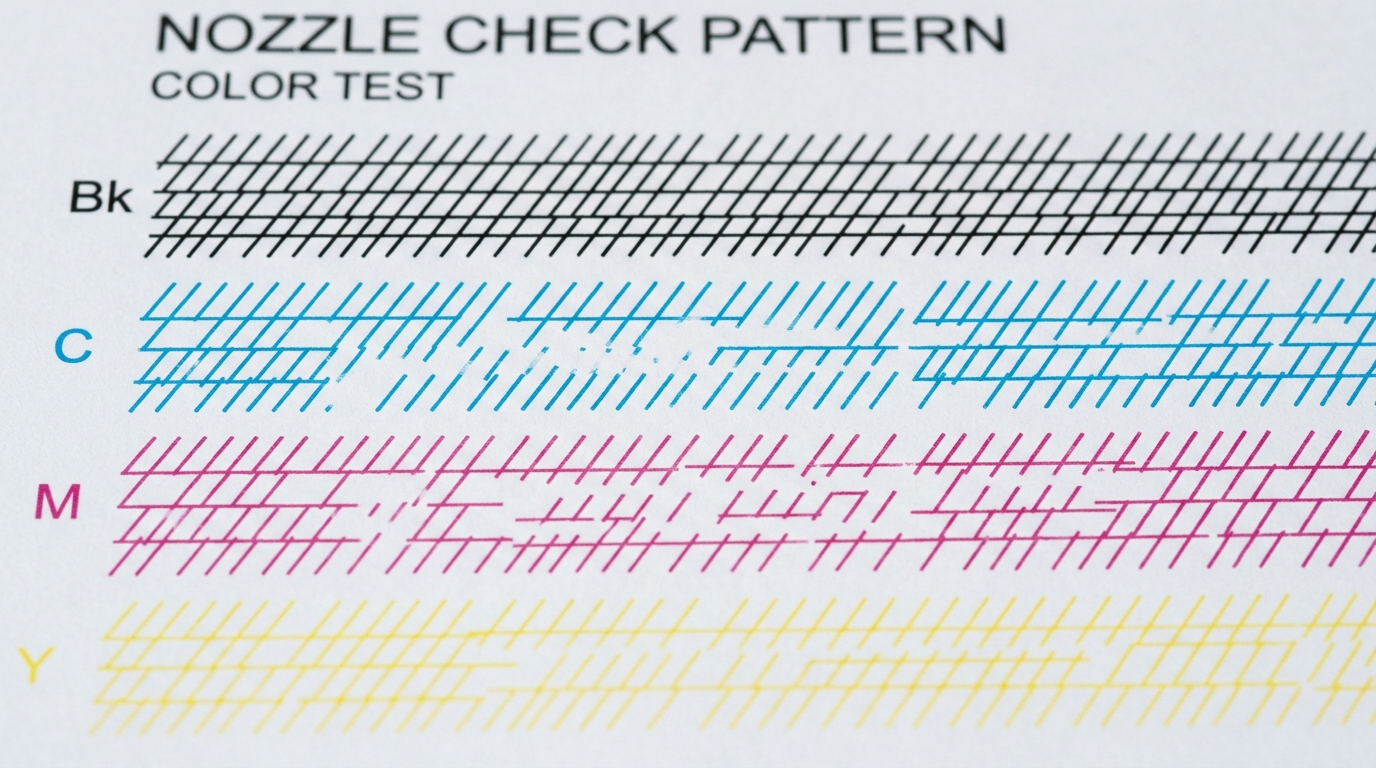
Step 1: Print and Read the Nozzle Check Pattern
Print a physical diagnostic pattern to identify the blocked color channel:
- Load clean white paper: Load a sheet of A4/Letter photo or bond paper in the top feed slot.
- Access Maintenance: On the touchscreen, navigate to Maintenance > Nozzle Check.
- Examine the 12-channel grid: Check the printed blocks for Matte Black (MBK), Photo Black (PBK), Cyan, Magenta, Yellow, Photo Cyan, Photo Magenta, Gray, Photo Gray, Red, Blue, and Chroma Optimizer (CO).
- Identify the gaps: Note which color bar shows missing horizontal lines or uneven density blocks.
Step 2: Execute Head Cleaning Levels
imagePROGRAF printers provide targeted cleaning cycles to preserve ink:
- Run Cleaning 1 (Standard): From Maintenance, select Head Cleaning > Cleaning 1. You can choose to clean all colors or only the blocked color group (Pattern A or B).
- Re-print Nozzle Check: Evaluate the test sheet. If faint lines remain, proceed to Cleaning 2.
- Run Cleaning 2 (Deep): Cleaning 2 uses higher vacuum suction through the purge unit. Do not run Cleaning 2 more than twice, as it consumes significant maintenance tank capacity.
Step 3: Enable Non-Firing Nozzle Compensation
Canon firmware can automatically substitute healthy backup nozzles for clogged jets:
- Access System Settings: On the control panel, tap Device Settings > Print Quality Maintenance.
- Verify Auto Nozzle Detection: Ensure Automatic Nozzle Check is set to ON.
- Allow Backup Nozzles to Take Over: When active, the controller reallocates firing timing to neighboring nozzles, eliminating white banding lines without manual cleaning.
Step 4: Clean the Purge Unit Suction Caps and Wiper Blade
Dried pigment ink on the rubber maintenance cap prevents proper vacuum suction during cleaning:
- Enter Maintenance Position: From the service menu, select Replace Printhead to park the carriage safely away from the cap.
- Inspect the rubber purge caps: Look into the right-hand service station. Locate the soft rubber sealing caps and the wiper blade.
- Clean rubber rims: Dampen a lint-free foam swab with distilled water. Gently wipe dried ink sludge from the rubber cap lips.
- Do not touch the printhead nozzles directly: Clean only the rubber station caps, not the microscopic nozzle plates.
Frequently Asked Questions
How long does an imagePROGRAF PF-10 or PF-06 printhead typically last?
In high-production studios, a genuine Canon printhead typically lasts between 12 to 24 months or roughly 20,000 to 50,000 square feet of media before requiring replacement.
Why does the printer perform automatic nozzle cleaning before every job?
Canon plotters check droplet trajectory before critical prints. You can adjust this frequency in Device Settings > Auto Nozzle Check to save time between small drafts.
What should I do if Cleaning 2 still leaves an entire color channel blank?
If an entire channel is completely absent, ink supply tubes may have air pockets. Run the "Head Refresh" utility from the Service Menu to re-prime the ink feed tubes.
