


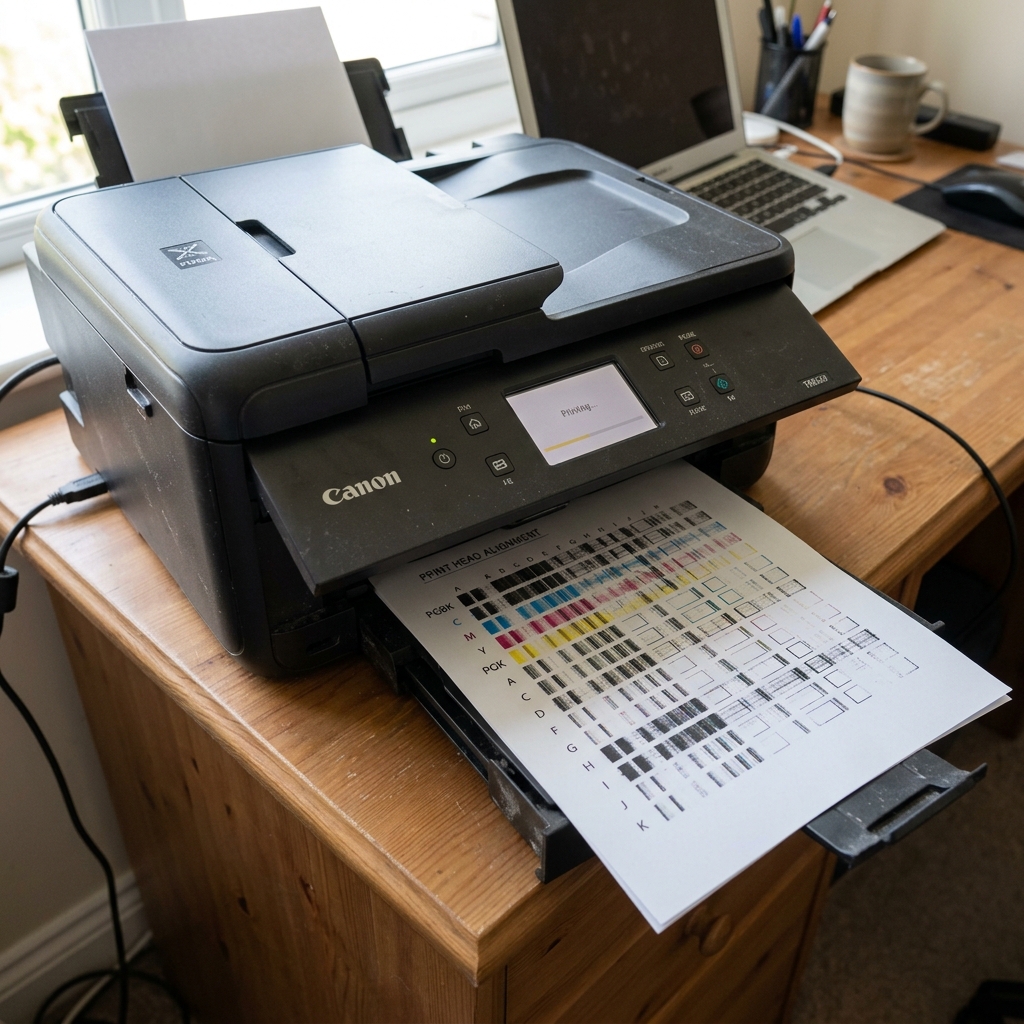
How Auto-Alignment Works (And Fails)
When you install new ink cartridges, Canon recommends a Print Head Alignment to ensure vertical lines print straight. On modern models, this process is automated: the printer prints a page of blue and black grids, asks you to place it on the scanner glass, and presses a button.
The printer scans the page, calculates the microscopic offsets, and adjusts the printhead.
If the printer beeps and displays "Print Head Alignment Failed" (or Error 2500 / 2900), the scanner could not read the grid pattern.
Fix 1: Correct Placement on the Glass
The number one reason for alignment failure is user error during placement.
- The printed alignment page has a bold black triangle or arrow printed in one of the corners.
- Open the scanner lid. Look at the glass. There is an engraved arrow on the plastic frame around the glass (usually the front-left or back-left corner).
- Place the paper face down on the glass, making sure the printed triangle on the paper points directly at the engraved arrow on the glass.
- Close the lid completely so ambient room light doesn't blind the scanner. Press the Copy or OK button.
Fix 2: The Paper and Ink Problem
The scanner is looking for high-contrast blue and black lines against a stark white background.
If you used colored paper, cream-colored recycled paper, or paper with a watermark, the scanner cannot differentiate the grid from the background, and it fails. Always use bright white, standard 20lb copy paper for alignment.
Additionally, look at the alignment sheet that printed out. Are the black grids faint, streaky, or missing sections?
If your printhead is clogged, the alignment sheet will print poorly. The scanner reads this poor printout, realizes the grid is corrupt, and fails the alignment.
You must run a standard Printhead Cleaning cycle to fix the clogs before attempting to align the heads.
Fix 3: Bypassing to Manual Alignment
If your scanner glass is scratched, or the automatic process simply refuses to work, you can force the printer to use the old-school manual alignment method.
- On your computer, open the Canon IJ Printer Assistant Tool (Windows) or the Canon Utility (Mac).
- Click on Custom Settings .
- Check the box that says "Align heads manually" and click OK.
- Now, click Print Head Alignment.
Instead of using the scanner, the printer will print a page with multiple columns of boxes labeled with numbers (e.g., Column A, B, C, with boxes 1 through 5). The software will ask you to look at the page and type in the number of the box that has the least amount of white streaks.
You become the scanner, completely bypassing the error.
Technical Diagnostics for Canon "Print Head Alignment Failed"
When a Canon PIXMA printer finishes printing the alignment test pattern and displays "Print Head Alignment Failed", Support Code 2500, or flashes an orange alarm light 11 times, the optical sensor mounted underneath the carriage was unable to detect the printed test bars with sufficient optical contrast.
Exhaustive 4-Step Calibration Recovery
- Verify Nozzle Firing Health on the Alignment Pattern:
Look at the alignment sheet that was just ejected. If the black or cyan blocks are faint, streaky, or completely missing, the carriage optical sensor reads a blank sheet, triggering an instant 2500 failure.
Run a Printhead Cleaning Cycle through the Maintenance menu to ensure solid ink flow before re-attempting alignment.
- Use Standard Bright White 20 lb Copy Paper:
The optical calibration sensor is calibrated strictly for standard 20 lb or 24 lb bright white bond paper (minimum 92 brightness). Attempting alignment using colored paper, recycled gray paper, lined notebook paper, or glossy photo paper alters the surface reflectance, causing the contrast measurement to fail.
- Clean the Carriage Optical Sensor Lens:
On the bottom of the moving printhead carriage is a miniature optical reflective sensor. Paper fibers and ink mist can coat the lens.
Turn off the printer, unplug it, slide the carriage to the center, and wipe the sensor lens on the bottom of the carriage with a clean, dry cotton swab.
- Switch to Manual Print Head Alignment:
If automated alignment continues to fail due to ambient light or sensor age, switch to Manual Alignment: Open Windows Printer Properties > Maintenance tab > Custom Settings > Check "Align heads manually". The printer will print a manual numbered sheet allowing you to pick the best alignment values with your own eyes.
Frequently Asked Questions
Why does the printer fail alignment when the room is brightly lit?
Direct sunlight or intense overhead fluorescent light shining through the paper exit tray can blind the carriage's optical reflective sensor during its scanning pass. Close the paper output tray cover or shield the printer from direct light during alignment.
Can I skip the alignment process?
Yes. Press the Stop/Reset button to cancel the prompt.
