


The "Missing or Faulty Cartridge" or "Ink Cartridge Unusable" error is a common block on Kodak ESP and Hero inkjet models. Unlike brands that integrate the printhead into the cartridge, Kodak cartridges are simple ink tanks with an attached smart chip.
This chip communicates the ink level, batch number, and region code to the printer carriage. If the gold contacts on the chip are dirty, misaligned, or if the cartridge firmware is rejected, the printer will lock out.
Let's walk through the steps to troubleshoot and bypass this error.
Anatomy of a Cartridge Identification Failure
A cartridge identification failure occurs when the electrical loop between the printer carriage and the cartridge smart chip is broken. This can happen for several reasons:
- Protective Tape Blocks: The yellow venting tape or the clear plastic nozzle film was not completely removed.
- Oxidation Build-up: The gold contacts have accumulated a fine layer of oxidation, creating electrical resistance.
- Pin Misalignment: The spring-loaded pins inside the printhead carriage have bent backward.
- Firmware Lockout: The printer's firmware has flagged a compatible (non-OEM) cartridge chip as invalid.
Step 1: Inspect and Clear Protective Seals
New cartridges come wrapped in protective packaging to prevent ink from leaking during transit. If even a small fragment of these seals is left behind, the chip cannot connect.
- Remove the affected cartridge (black or color) from the printhead.
- Locate the **orange plastic clip** on the bottom. This clip must be twisted off before installation.
- Locate the **yellow pull-tab** on the top of the cartridge. Pull it off completely to expose the vent hole.
- Check the face of the green circuit board chip. Ensure there is no protective clear plastic film remaining over the gold pads.
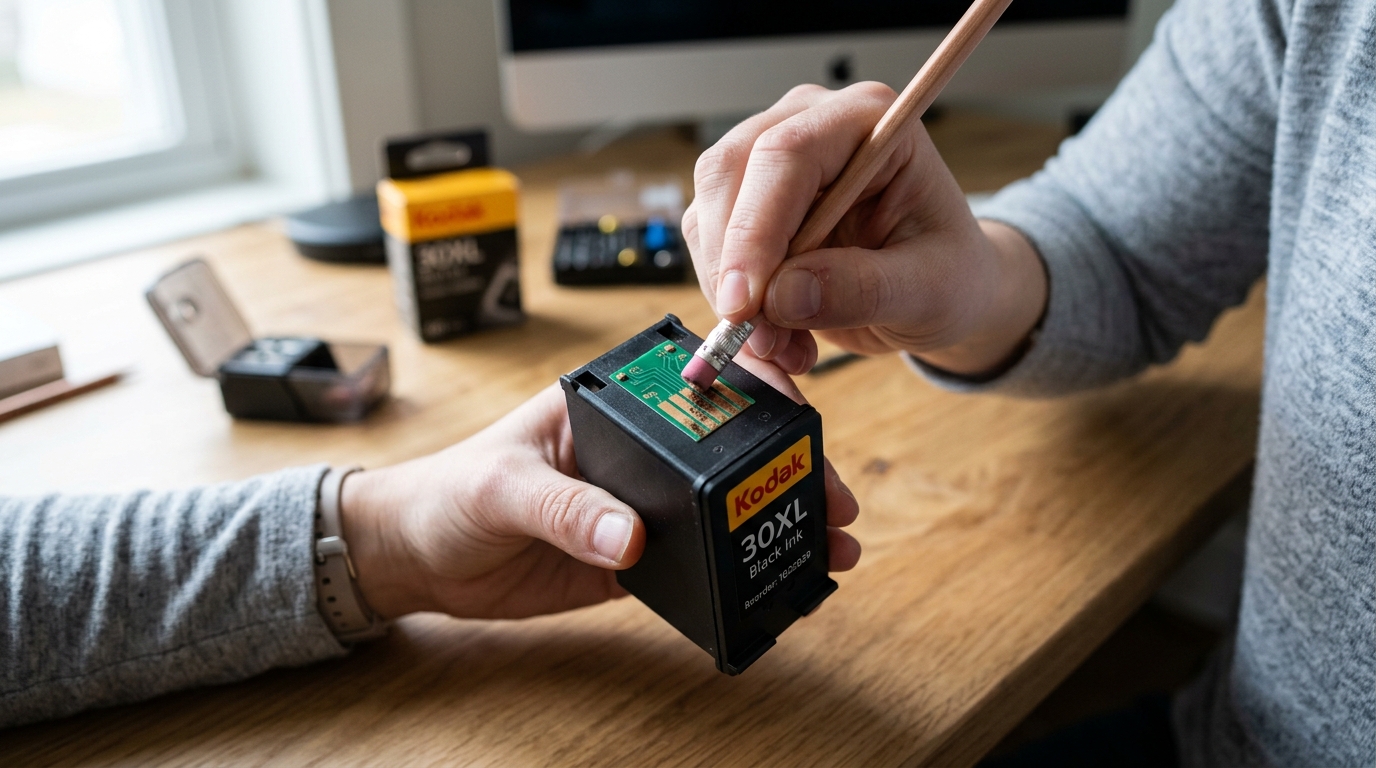
Step 2: Clean the Chip Contacts (The Pencil Eraser Trick)
The gold plating on replacement cartridge chips is very thin and can develop a layer of oxidation over time, blocking the electrical signal.
- Remove the unrecognized cartridge.
- Hold it by the sides, ensuring you do not touch the ink outlet nozzle on the bottom.
- Take a standard, clean **pencil eraser** (the pink or white rubber type).
- Gently rub the gold contact pads back and forth. Rub with light pressure until the pads look bright and shiny.
- Use a dry, lint-free microfiber cloth to wipe away any rubber crumbs or dust.
- **Do not use alcohol or water**, as liquids can damage the chip circuit board.
Step 3: Align and Reset Carriage Pins
Inside the printhead slot where the cartridge sits, there are small spring pins that press against the cartridge chip. If you inserted a cartridge crookedly in the past, these pins may have flattened:
- With the cartridge removed, peer into the slot with a flashlight.
- Look for the set of three or four gold spring pins at the back of the slot.
- If a pin looks flattened or pushed back, use a clean plastic tool (like a toothpick) to gently nudge it forward. It should spring back into place.
- Reinsert the cartridge, ensuring it is level, and press down until you hear the **loud plastic click** of the latch.
Step 4: Bypass the Firmware Chip Lock
If you are using compatible (third-party) cartridges, the printer may reject the chip serial number. You can force the printer to accept the cartridge via a hard reset:
- Turn the printer on and open the access door to allow the carriage to move to the center.
- Install the compatible cartridges.
- Without turning off the power button, **pull the power cord directly out of the wall**.
- Wait 60 seconds, then plug it back in. This forces the printer's firmware to bypass its initial chip check during the boot cycle.
Related Kodak Troubleshooting Guides
Diagnosing "Missing or Faulty Cartridge" Alarms on Kodak Printers
The "Missing or Faulty Cartridge" alarm is an electronic communication failure. When you insert a Kodak Series 10 or Series 30 cartridge, the carriage sensor board reads an integrated cryptographic microchip on the cartridge.
If the chip fails serial validation, has corrupted EEPROM data, or cannot establish clean electrical contact, the printer halts all operations.
Complete 4-Step Recovery Checklist
- The Isopropyl Alcohol Contact Wipe:
Remove the faulted cartridge. On its side or rear, locate the gold-plated contact pads.
Fingerprint oils and microscopic ink splatter create electrical resistance that drops the signal voltage. Clean the cartridge pads and the matching carriage pins with a microfiber cloth dipped in 99% isopropyl alcohol.
Let dry for 2 minutes.
- Inspect the Carriage Spring Pins for Bending:
Look inside the empty carriage slot with a bright light. The spring-loaded gold pins must protrude evenly at a 45-degree angle.
If one pin has been bent flat against the plastic backing by an aggressive cartridge insertion, it cannot touch the chip. Use a fine needle or tweezers to gently pull the pin back to its normal elevated position.
- Check the Latching Lever Pressure:
When you seat the cartridge, you must press down firmly until the plastic locking latch clicks into place. If the latch is loose or cracked, the cartridge sits a millimeter too high, causing intermittent chip disconnects during high-speed carriage movement.
- Cycle Power with Cartridges Removed:
- Remove both black and color ink cartridges.
- Close the printer door and unplug the AC power cord for 5 minutes.
- Plug power back in and turn on the printer. It will prompt "Install Cartridges".
- Install the black cartridge first, snap it down, and close the lid. Wait for the printer to recognize it.
- Open the lid, install the color cartridge, snap it down, and close the lid.
Frequently Asked Questions
Why does the printer reject brand new compatible / remanufactured cartridges?
Third-party manufacturers sometimes use recycled OEM chips that have exceeded their maximum write endurance or contain outdated microcode that conflicts with your printer's installed firmware. Genuine Kodak cartridges will confirm if the issue is chip-specific.
Can a dirty printhead cause the cartridge error?
Yes. Because the cartridge microchips route their signals through the printhead's main circuit board before reaching the logic board, a loose or unlatched printhead will cause false cartridge errors.
