


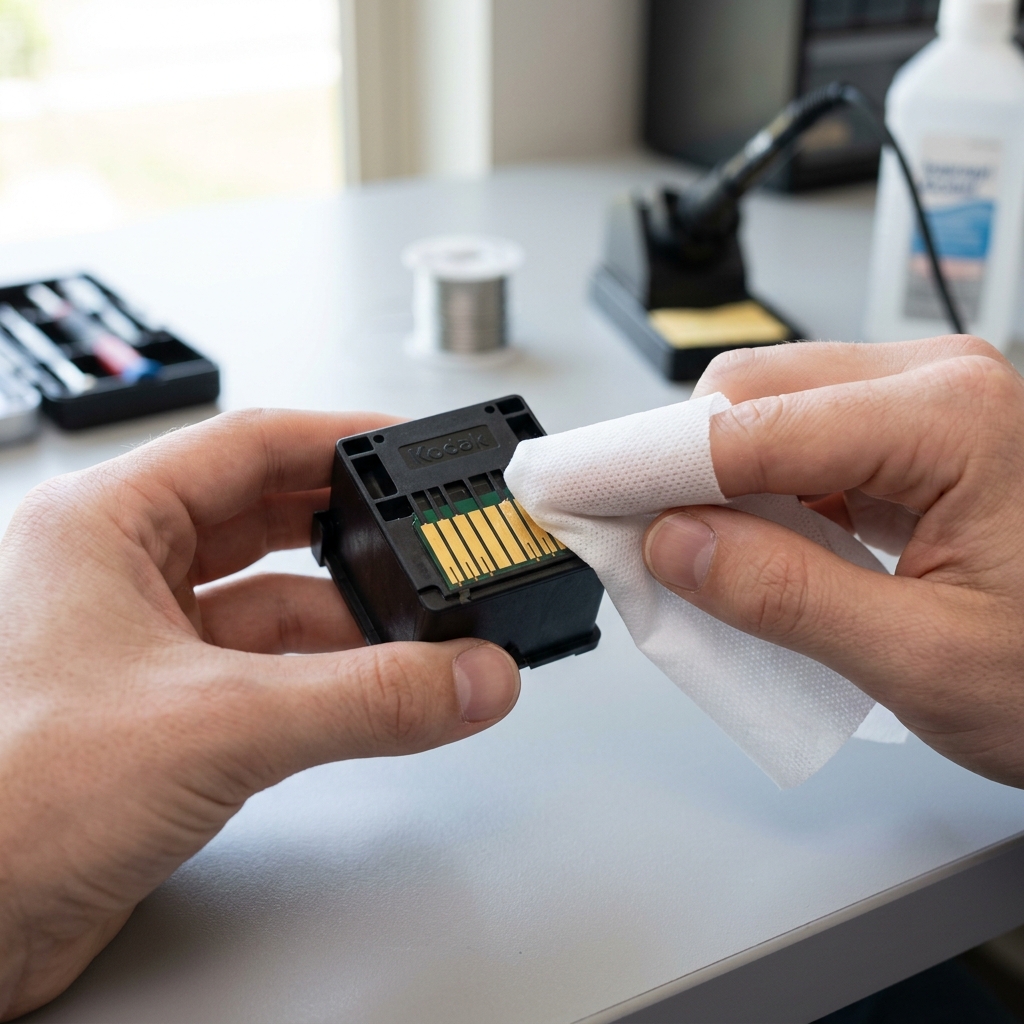
A general "Printhead Error" on Kodak printers can lock the device, preventing printing, scanning, and copying. Unlike other printer brands, Kodak printers use an accessible, modular printhead design.
While this makes it easy to replace, it also makes the printhead prone to alignment shifts and contact faults. Here is how to diagnose and resolve general printhead faults.
Diagnostic Checklist: Symptom vs. Action
Before proceeding with mechanical fixes, match your printer's behavior to the correct remedy:
| Symptom | Probable Root Cause | Target Action |
|---|---|---|
| "Printhead Missing" error on screen | Unlatched assembly or printhead misalignment | Perform the "Snap Test" (Fix 1) |
| Blinking power light + printhead jam | Obstruction in the carriage rail | Clear carriage rail & check carriage belt (Fix 2) |
| Ink smudges or error immediately after swap | Contaminated contact pads | Clean rear printhead contact pins (Fix 3) |
| Intermittent printhead errors during print runs | Weak spring contacts in carriage housing | Inspect and gently align carriage pins (Fix 4) |
Fix 1: The Printhead Reseating "Snap Test"
Many Kodak printhead errors are caused by the printhead block sitting loose in the carriage. Even a fraction of a millimeter of movement will break the electrical connection. To fix:
- Open the printer cover to access the ink carriage.
- Remove both ink cartridges and place them face up on a clean sheet of paper.
- Release the latch (lift the lever in the center of the carriage) or press the release button, depending on your model.
- Pull the printhead unit straight out.
- Slide it back in. Press down firmly on the designated circle target on the printhead until you hear a loud, distinct click or snap.
Fix 2: Clear Carriage Rail Obstructions
If the printhead carriage is blocked, the printer will register a printhead error because it cannot calibrate position. To check:
- Unplug the printer from the wall completely.
- Look down the carriage rail for any scrap paper, dust buildup, or dislodged encoder strip wires.
- Gently slide the carriage from left to right by hand. It should move smoothly without any grinding or resistance.
Fix 3: Clean the Printhead Contact Board
The printhead communicates with the main board through a gold circuit board on the back of the printhead. Ink mist or dust can insulate these contacts.
- Remove the printhead unit.
- Inspect the gold pads on the back. If they look dull or have black ink spots, clean them.
- Use a dry, lint-free microfiber cloth to wipe the pads firmly. If the ink is dry and stubborn, use a slightly damp cloth with distilled water (never tap water), followed immediately by a dry wipe.
- Ensure the contacts are 100% dry before reinstalling.
Fix 4: Inspect Carriage Spring Contacts
Inside the printer's carriage slot (where the printhead sits), there are spring-loaded gold pins that press against the printhead. If one of these pins is bent or stuck, the connection fails.
- With the printhead removed, use a flashlight to peer into the back of the carriage housing.
- Check if any of the spring pins look bent, flattened, or misaligned.
- If a pin is flattened, you can use a clean plastic tool (like a toothpick) to gently nudge it back into alignment so it springs forward to meet the printhead.
When to Replace the Printhead
If all alignment, cleaning, and reset procedures fail to clear the error, the printhead's internal electronics are likely dead. For Kodak ESP and Hero printers, the printhead model number is typically **Series 30** (for older ESP/Hero models) or **Series 10** (for classic models).
You can purchase replacement printheads online. Since the printhead drops directly into the carriage slot, replacing it takes less than two minutes.
Related Kodak Troubleshooting Guides
Detailed Circuitry & Thermal Physics of Kodak Printheads
Kodak Series 10 and Series 30 printheads feature a thermal inkjet silicon die housing hundreds of microscopic ink firing chambers. Each nozzle chamber contains a tiny thin-film heating element.
During printing, electric current vaporizes a bubble of ink in less than 2 microseconds, projecting a droplet onto the paper. When the logic board detects an open circuit, shorted trace, or thermal runaway in any nozzle bank, it displays a "Printhead Error" or "Printhead Missing/Faulty".
Advanced Ultrasonic & Deep Soak Printhead Restoration
- The Warm Distilled Water Bath Technique:
If automated cleaning cycles have failed to clear dried pigment clogs, perform a manual external soak:
- Remove the printhead assembly from the printer carriage.
- Place a shallow dish with 1/4 inch of distilled water heated to roughly 120°F (50°C) — warm to the touch, not boiling.
- Gently rest the printhead in the dish so that only the bottom nozzle plate is submerged. Do NOT submerge the rear copper electrical contact board.
- Allow the printhead to soak for 15 to 20 minutes. You will see plumes of black and color ink bleed out into the water.
- Remove the printhead and gently blot the bottom nozzle plate onto a clean paper towel. Never wipe horizontally across the nozzles.
- Allow to dry completely for 1 hour before reinstalling.
- Cleaning the Rear Electrical Interface:
Use a lint-free swab moistened with 99% anhydrous isopropyl alcohol to clean the copper contact grid on the back of the printhead and the matching carriage pins. Ensure no moisture remains on the gold contacts before powering the printer on.
- Inspect the Carriage Ribbon Cable:
Check the multi-conductor flat flexible cable (FFC) connecting the printhead carriage to the mainboard. If ink has seeped into the carriage socket, disconnect the cable, clean the contacts with contact cleaner, and reseat.
Frequently Asked Questions
How do I know if my Kodak printhead has an electrical failure vs. a clog?
If the printer displays "Printhead Missing", "Printhead Incompatible", or error code 3802/105-3513, the failure is electrical (contact short or blown resistor). If the printer completes print jobs with blank pages, missing colors, or white streaks without displaying an on-screen error, the issue is physical nozzle clogging.
Can I clean a Kodak printhead in an ultrasonic jewelry cleaner?
Yes. Submerging only the metal nozzle plate in an ultrasonic cleaner filled with distilled water for 60-90 seconds is an industry-standard method to break up hardened pigment deposits in stubborn clogs.
