


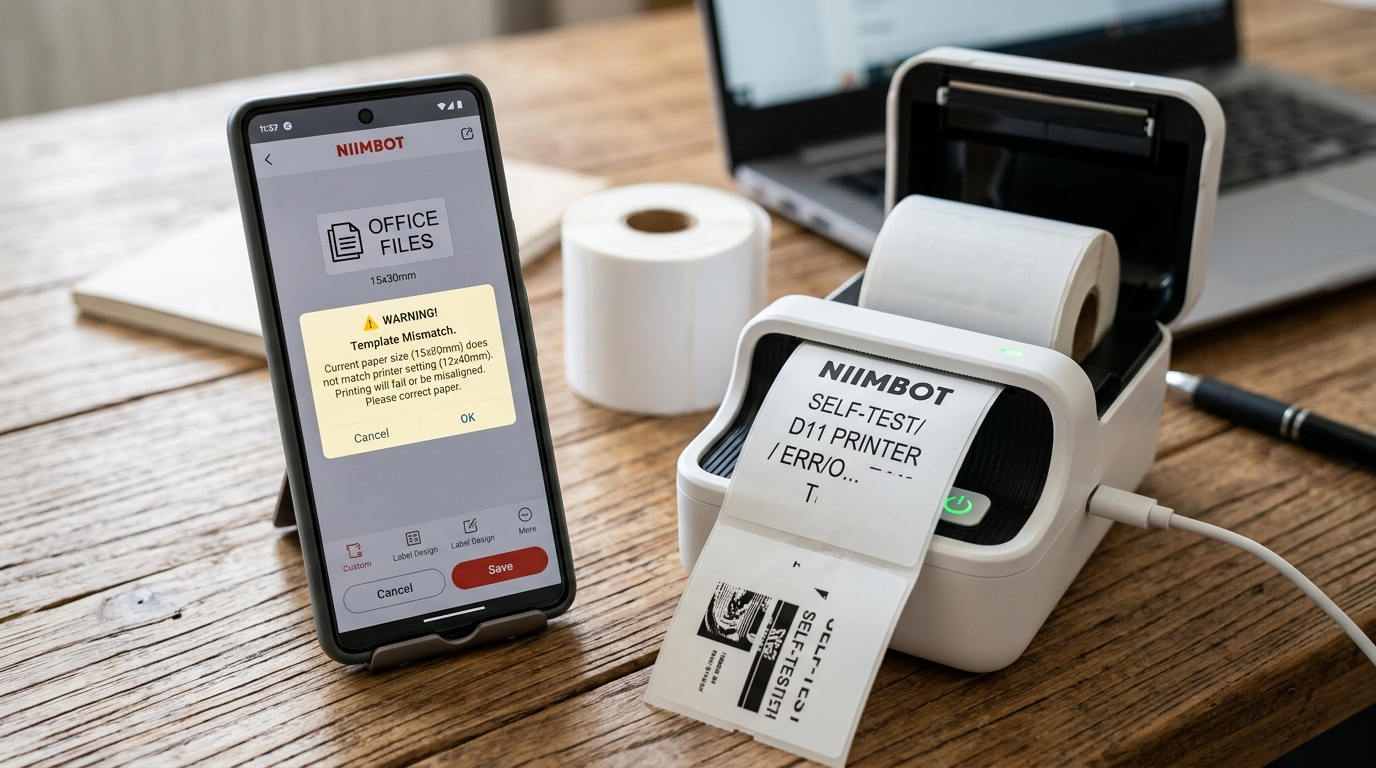
Introduction to Niimbot Print Direction and Template Calibration
Owning a Niimbot thermal label printer—such as the B21. D11, or D110—brings incredible convenience to organizing everything from pantry jars to small business inventory.
However, one of the most frequent hurdles new users face is battling with print alignment. Incorrect print direction, and scaling issues.
You might spend ten minutes meticulously designing a beautiful label in the Niimbot app. Only to print it and discover the text is entirely cut off.
Printing perpendicular to the label, or bleeding over the edges of the sticker. These frustrating results occur when there is a fundamental mismatch between the digital template you have selected in the software.
And the physical characteristics of the thermal paper roll installed in the machine. Thermal printing relies on microscopic, rapid heating elements triggering a chemical reaction on the paper.
Meaning precise alignment and calibration are non-negotiable for a clean result. To conquer these alignment issues, users must master the interplay between app settings—specifically print direction.
And template dimensions—and the printer's internal hardware calibration. This extensive guide will break down exactly why these misalignment errors happen.
How to read your physical labels to select the correct digital counterparts. And how to execute a hardware self-test to manually calibrate the printer's optical sensors.
Ensuring flawless, centered prints every single time.
Why This Happens: The Mechanics of Thermal Paper and Optical Sensors
To understand why your labels are printing sideways. Or off-center, you have to look at the anatomy of the printer and the app ecosystem.
When you insert a roll of labels into a Niimbot printer. The machine does not inherently "know" the exact millimeter dimensions of the label.
Nor does it know if the label is wide. And short (landscape) or tall and narrow (portrait) relative to the print head.
Modern Niimbot models use RFID chips inside official rolls to auto-detect the paper type. But this system can fail, or you might be using older or third-party rolls that require manual setup.
If you insert a roll of 50mm x 30mm labels. But accidentally select a 30mm x 50mm template in the app.
The software will attempt to render a tall design onto a wide label. The result is a print job that is rotated 90 degrees and heavily cropped.
Furthermore, the print direction setting in the app dictates the axis of the text relative to the feed path. If the direction is set incorrectly.
Your text will print across the gap between labels rather than neatly inside the borders. Beyond software settings, the printer relies on an internal optical sensor (a small laser.
Or infrared diode) to detect the physical gap or black mark between each individual sticker. This sensor tells the roller exactly when to stop feeding so the.
Print head aligns perfectly with the top edge of the next label. If this sensor is dirty with paper dust.
Or if the printer's internal memory has become miscalibrated regarding the gap distance. The printer will start printing too early.
Or too late, causing the design to drift progressively further off-center with each consecutive label printed.
Step-by-Step Fix: Matching Templates and Running the Self-Test
- Identify Your Physical Label Size: Before opening the app, take out the physical roll of labels. Look at the sticker on the side of the spool, or measure a single peel-off label with a ruler. Note the exact dimensions in millimeters (Width x Height). Width is always the dimension running parallel to the printer's tear-off blade. And height is the length of the label as it feeds out of the machine.
- Ensure Correct Physical Loading: Open the printer bay. Place the roll inside, ensuring the printable surface of the labels is. Facing upward towards the thermal print head (usually located in the lid). Pull a small portion of the first label out past the tear blade. And close the lid firmly until it clicks. The printer should automatically feed a tiny amount of paper to index the first gap.
- Select the Exact Template in the App: Open the Niimbot app and connect your printer. Navigate to the template selection screen. Do not guess the size. Use the search function to find the exact millimeter dimensions you measured in Step 1. If your roll has an RFID chip, the app should auto-detect it; verify that the auto-detected size matches reality.
- Configure Print Direction: Once in the design canvas, look for the "Print Direction" or "Orientation" toggle in the settings menu. , 50x30), your text should generally be oriented horizontally. If your text is showing up sideways on the physical print. Toggle the Print Direction setting in the app by 90 degrees and run a single test print.
- Execute a Hardware Self-Test and Calibration: If the template is correct but the print is still drifting up or down, the optical sensor needs calibration. Ensure the printer is powered ON and loaded with paper. Press and hold the main power button on the printer for approximately 2. To 3 seconds until you hear a specific double-beep, then release it immediately. (Note: Holding it too long will turn the device off).
- Review the Self-Test Output: The printer will feed out a long diagnostic label. This action forces the printer to feed paper and actively scan for the gaps. Recalibrating its internal sensor memory to the specific physical distance between the labels currently loaded. The printed test page will also display firmware (internal software) (internal software) versions. Bluetooth MAC addresses, and print head density status.
- Perform a Final App Test: Return to the Niimbot app, ensure your design is centered on the digital canvas, and hit print. The recalibrated hardware combined with the perfectly matched software template should now produce a perfectly aligned label.
Advanced Troubleshooting: Sensor Cleaning and Firmware (internal software) (internal software) Quirks
If you have run the self-test calibration multiple times and the alignment is still drifting—perhaps printing half on one label. And half on the next—you are likely dealing with a physical obstruction or a firmware (internal software) (internal software) glitch.
The optical gap sensor inside the printer is highly sensitive. Over time, the cheap adhesive used on some label rolls can ooze out.
And coat the sensor, or thermal paper dust can accumulate, rendering the sensor blind. Power off the printer, open the paper bay.
And locate the small glass or plastic sensor window (usually situated slightly behind the print head roller). Moisten a cotton swab with 90% or higher isopropyl alcohol and gently clean the sensor and the rubber feed rollers.
Allow it to air dry for five minutes before testing again. Another advanced issue involves continuous paper versus gap paper.
If you have loaded a continuous roll of thermal paper (like a receipt roll without peel-off stickers). But the app is configured for "Gap".
Or "Label" paper, the printer will feed endlessly looking for a gap that doesn't exist. You must go into the printer hardware settings within the app.
And manually change the paper type from "Gap Label" to "Continuous Paper". Finally, out-of-date firmware (internal software) (internal software) can cause mathematical errors.
In how the printer scales digital fonts to physical thermal dots. Navigate to the "Me" or "Device Management" tab in the Niimbot app.
And check for a device firmware (internal software) (internal software) upgrade. Flashing the latest firmware (internal software) (internal software) can often resolve persistent.
Algorithmic scaling issues that cause text to shrink or stretch inappropriately.
FAQ: Frequently Asked Questions
Why is my text printing incredibly small in the corner of the label?
This is a classic template mismatch. , 15x30mm).
How do I know if my labels are loaded upside down?
Thermal printers only print on one side of the paper—the side coated with the heat-reactive chemical. If your labels are loaded upside down (backing paper facing the print head).
What does the self-test page actually tell me?
The primary purpose of the self-test is mechanical calibration of the gap sensor. However, the printed text on the self-test page is also useful.
Why does the printer feed a blank label every time I turn it on?
This is standard behavior. When powered on, the printer feeds paper until the optical sensor detects the gap between labels.
Can I print custom images, or just text?
Yes, the Niimbot app allows you to insert images, QR codes, and barcodes. However, thermal printers are strictly monochrome (black and white, no grayscale).
