


Introduction
The status light on your Phomemo printer is its primary method of communicating its current state, errors, and operational readiness. Understanding what the different colors and flashing patterns mean is essential for smooth operation and quick troubleshooting.
A solid green or white light typically signifies that the printer is powered on, fully charged, and ready to print or connect. A flashing green or white light often indicates that the printer is in pairing mode, actively searching for a Bluetooth connection.
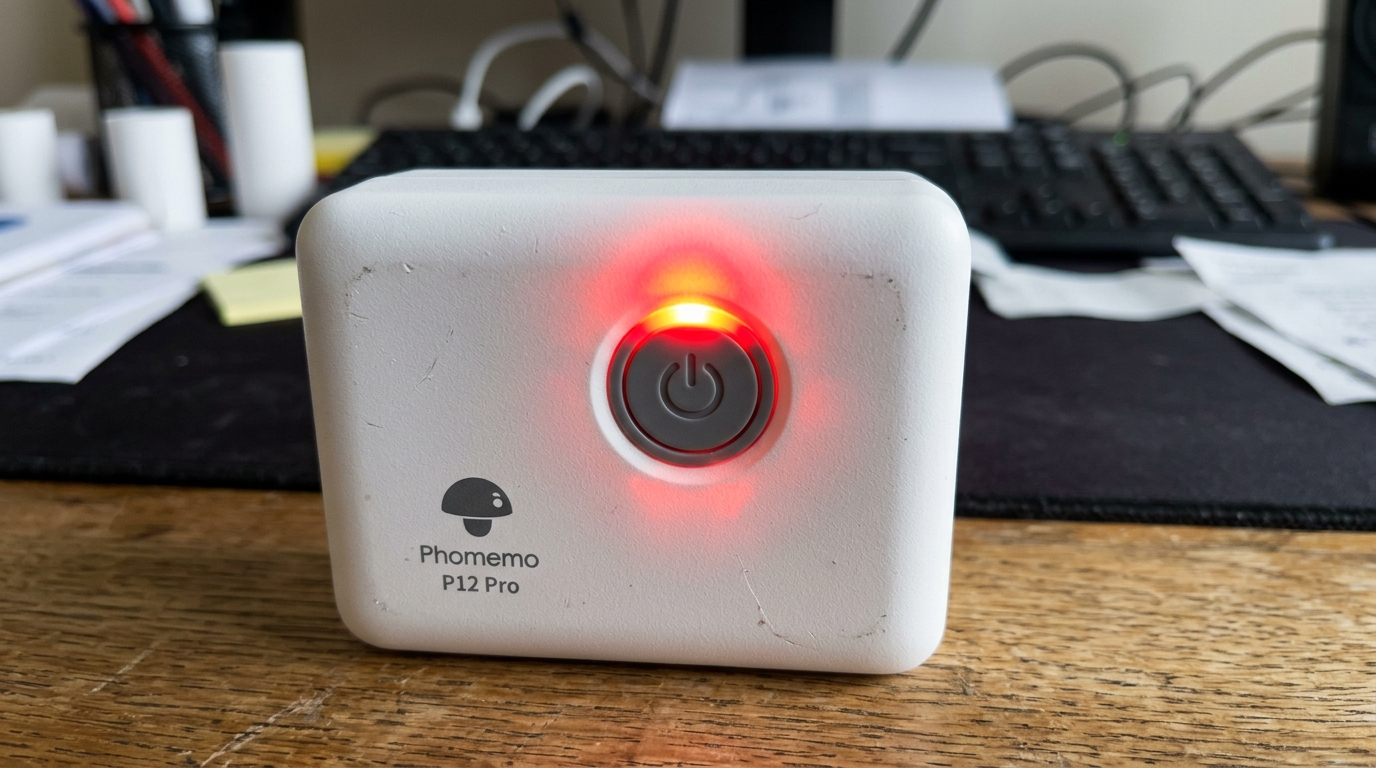
However, it is the red light that most frequently causes concern for users. A flashing red light is a universal indicator of an error state in Phomemo printers.
This can range from simple, easily resolvable issues like an open paper compartment or a depleted battery, to more complex problems such as paper jams, sensor errors, or an overheating print head. The exact meaning of the flashing red light can sometimes vary slightly between specific models (like the M110, D30, or M220), but the general troubleshooting approach remains consistent.
Ignoring a flashing red light or attempting to force the printer to operate while in an error state can lead to further complications or even hardware damage. In this comprehensive guide, we will decode the language of the Phomemo status lights, explaining the various colors and their significance.
More importantly, we will focus on diagnosing and fixing the dreaded flashing red light. By understanding the common triggers for this error state and following our step-by-step resolution process, you can quickly restore your printer to working order and minimize downtime.
Let's illuminate the meaning behind the lights and conquer the flashing red error.
Why This Happens
A flashing red light on a Phomemo printer serves as a critical alert mechanism, signaling that an operational parameter is out of bounds or a mechanical issue has been detected. The most frequent cause is related to the paper supply.
If the printer runs out of labels mid-print, or if the label roll is not loaded correctly, the optical sensor will fail to detect the paper, triggering the red light. Similarly, if the paper compartment cover is not securely closed and latched, a safety switch will prevent printing and activate the warning light.
Paper jams are another common culprit. Even a small piece of torn label or adhesive residue stuck in the feed mechanism or covering the sensor can disrupt normal operation and cause the red light to flash.
Beyond paper issues, the red light often indicates a low battery condition. When the battery voltage drops below a certain threshold, the printer cannot sustain the power required for the thermal print head and will enter an error state to prevent incomplete prints or sudden shutdowns.
Overheating is a less common but more serious trigger. Continuous, heavy printing can cause the thermal print head to exceed safe operating temperatures.
To protect the hardware, the printer will automatically halt operation and flash the red light until it cools down. Finally, firmware glitches or communication errors with the companion app can sometimes result in a false red light indication.
Understanding these diverse causes is crucial for effective troubleshooting, as the appropriate fix depends entirely on correctly identifying the underlying issue triggering the flashing red alert.
Step-by-Step Fix
- Check the Paper Compartment: The most common cause of a flashing red light is an open cover. Firmly press down on the paper compartment lid until you hear a distinct click, ensuring it is securely latched on both sides.
- Inspect for Paper Out/Misalignment: Open the cover and check the label roll. If it is empty, replace it. If it is still full, ensure the roll is seated correctly, snug against the guides, and the printable side is facing the correct direction (usually up towards the print head).
- Clear Paper Jams and Debris: Carefully inspect the paper path, the thermal print head, and the optical sensor for any torn pieces of paper, adhesive buildup, or dust. Use tweezers to gently remove debris and a cotton swab with isopropyl alcohol to clean the print head and sensor.
- Charge the Printer: A flashing red light frequently indicates a low battery. Connect the printer to a reliable power source using the provided USB cable. Let it charge for at least 30 minutes before attempting to use it again. A solid light during charging usually indicates it's receiving power.
- Allow the Printer to Cool: If you have been printing continuously for an extended period, the print head may have overheated. Turn off the printer and let it rest for 15-20 minutes in a cool, well-ventilated area before resuming printing.
- Perform a Reset: If the light continues to flash after addressing physical issues, perform a soft reset. Turn the printer off, wait 10 seconds, and turn it back on. For a hard reset (model dependent), hold the power and feed buttons simultaneously until the printer restarts.
- Calibrate the Labels: If the printer is struggling to find the gap between labels, force a calibration. With the printer on and loaded with labels, press the power button once quickly (or use the calibration function in the app). It should feed one blank label and stop at the gap.
- Check Firmware and App Updates: Ensure your Phomemo app is updated to the latest version. Connect the printer and check the app settings for any available firmware updates, as these can fix bugs related to error reporting.
- Test with a Different Label Roll: Occasionally, a defective label roll or a roll with irregular gaps can confuse the sensor. Try loading a brand new, official Phomemo label roll to see if the issue resolves.
- Contact Support: If you have exhausted all these steps and the red light persists, it may indicate a hardware failure. Contact Phomemo customer support for warranty service or advanced technical assistance.
Advanced Troubleshooting
When basic troubleshooting fails to resolve a persistent flashing red light, it is time to investigate deeper potential hardware or intricate firmware issues. A continuous flashing red light that is unaffected by opening the cover, replacing paper, or charging often points to a failure in the printer's mainboard or optical sensor.
The optical sensor is a delicate component responsible for detecting the presence of paper and the gaps between labels. If this sensor is permanently damaged, obscured by deeply embedded adhesive, or disconnected internally, the printer will perpetually believe it is out of paper or jammed.
Carefully examine the sensor, usually a small window or notch near the paper exit path. In some cases, extremely strong ambient light shining directly into the paper exit can temporarily blind the sensor, so try troubleshooting in a normally lit room.
If the sensor appears physically damaged, professional repair or replacement is likely required. Another advanced consideration is the condition of the internal battery.
Over time, lithium-ion batteries degrade and can lose their ability to hold a charge or deliver the required voltage under load. If the printer only flashes red when attempting to print but appears normal when idle, a failing battery is a strong suspect.
This often necessitates contacting the manufacturer for a battery replacement or upgrading to a new printer.
Firmware corruption can also cause erratic behavior, including false flashing red light states. While user-accessible firmware flashing tools are not always available for every model, maintaining communication with the manufacturer's support team can sometimes yield specific diagnostic software or reset procedures.
In industrial or high-volume settings, environmental factors such as extreme temperature fluctuations, high humidity, or excessive dust can prematurely wear out printer components, leading to frequent error states. Implementing a regular maintenance schedule, which includes deep cleaning the print head and platen roller with specialized thermal printer cleaning pens or wipes, can significantly extend the lifespan of the device and prevent frustrating red light errors.
Furthermore, always ensure you are using high-quality, compatible labels. Cheap, generic labels may shed excessive paper dust or leave heavy adhesive residue, rapidly fouling the internal mechanisms and triggering repeated errors.
By combining rigorous maintenance practices with a deep understanding of the printer's diagnostic signals, you can ensure reliable operation and effectively manage any advanced troubleshooting scenarios that arise.
FAQ
What does a solid blue light mean on my Phomemo printer?
A solid blue light (on models that feature a blue LED) generally indicates a successful and active Bluetooth connection with a paired device. It signifies that the printer is ready to receive print commands from the companion app.
Why does the red light flash three times and stop?
Specific flashing patterns, such as flashing three times and pausing, are often error codes designed to identify specific issues. While meaning varies by model, this pattern frequently points to a severe battery issue, such as an inability to charge, or a critical hardware failure on the mainboard.
Can I print while the red light is flashing?
No. The flashing red light is a hard stop indicating an error state.
Is it safe to leave the printer charging overnight to fix the red light?
While modern printers have overcharge protection, it is generally recommended to unplug the printer once it is fully charged (indicated by a solid light). If a low battery caused the red light, a couple of hours of charging should suffice.
