


Introduction
Maintaining the printhead of your Phomemo thermal printer is the single most important task for ensuring consistent. High-quality prints over the lifespan of the device.
When users begin to notice their prints becoming faint, displaying vertical white lines. Or Looking generally blotchy, the immediate assumption is often that the printer is broken or out of ink.
However, because direct thermal printers do not use ink or toner, these degradation issues are almost universally caused by the accumulation of dirt, paper dust. And Adhesive residue on the printhead itself.
This critical component must remain spotless to function correctly.
The printhead is a delicate, precise piece of engineering. It consists of a microscopic row of heating elements laid across a ceramic substrate.
As the thermal paper is pulled over this row. Specific elements rapidly heat up and cool down, causing the heat-sensitive coating on the paper to turn black and form your image or text.
If any physical barrier exists between the heating elements and the paper, the heat transfer is insulated. This results in the paper remaining white in those spots.
Manifesting as faint areas or distinct vertical lines running down the length of your labels.
This comprehensive cleaning guide will walk you through the safe and effective methods for removing this stubborn buildup. We will detail the necessary supplies, emphasizing why household cleaners should never be used.
And Provide a step-by-step procedure to restore your printhead to factory condition. Regular maintenance not only improves immediate print quality but also extends the life of the printhead.
Preventing permanent damage caused by overheating due to prolonged insulation.
We will also explore the different types of residue that can accumulate. For instance, paper dust creates a general faintness.
While adhesive residue from poorly cut or jammed labels creates distinct, sharp lines or complete dropouts. Understanding what you are cleaning will help you adjust your technique and prevent future buildup.
Let's dive into the anatomy of the printer and the specific. Careful steps required to perform a thorough cleaning without damaging this sensitive electronic component.
Why This Happens
The accumulation of debris on a thermal printhead is an unavoidable consequence of the printing process. Every time thermal paper passes over the printhead, microscopic fibers are sheared off due to friction.
Over hundreds or thousands of prints, this paper dust builds up, forming a thin, insulating layer across the heating elements. This general buildup leads to a uniform decrease in print darkness, making everything look faded or washed out.
A more severe problem is adhesive residue. Many Phomemo users print on self-adhesive label stock.
If a label jams, or if the roll is slightly misaligned causing the edge of the label matrix to drag across the printhead. The adhesive backing can smear onto the hot ceramic surface.
Heat bakes this adhesive into a hard, stubborn crust. When the next label passes over this crust.
The heat cannot reach the paper at all, resulting in stark, vertical white lines running through barcodes, text, and images.
Furthermore, using low-quality, generic thermal paper can accelerate this process. Cheap paper often has loosely bound coatings or inferior adhesives that flake off much faster than high-quality stock.
Environmental factors also play a role; operating the printer in a dusty environment. Like a warehouse or a busy crafting room, will naturally draw more particulate matter into the mechanism, necessitating more frequent cleaning intervals.
Step-by-Step Fix
- Gather the Right Supplies: You will need high-concentration Isopropyl Alcohol (at least 90%, preferably 99%). Do not use standard 70% rubbing alcohol, as it contains too much water and can cause corrosion. You will also need lint-free applicators, such as foam swabs (ideal) or high-quality microfiber cloths. Avoid standard cotton swabs (Q-tips), as they can leave microscopic fibers behind that will burn onto the printhead.
- Power Down and Unplug: Safety first. Turn the printer off completely. If it is charging, unplug the USB cable. You should never clean electronic components while they have power running through them.
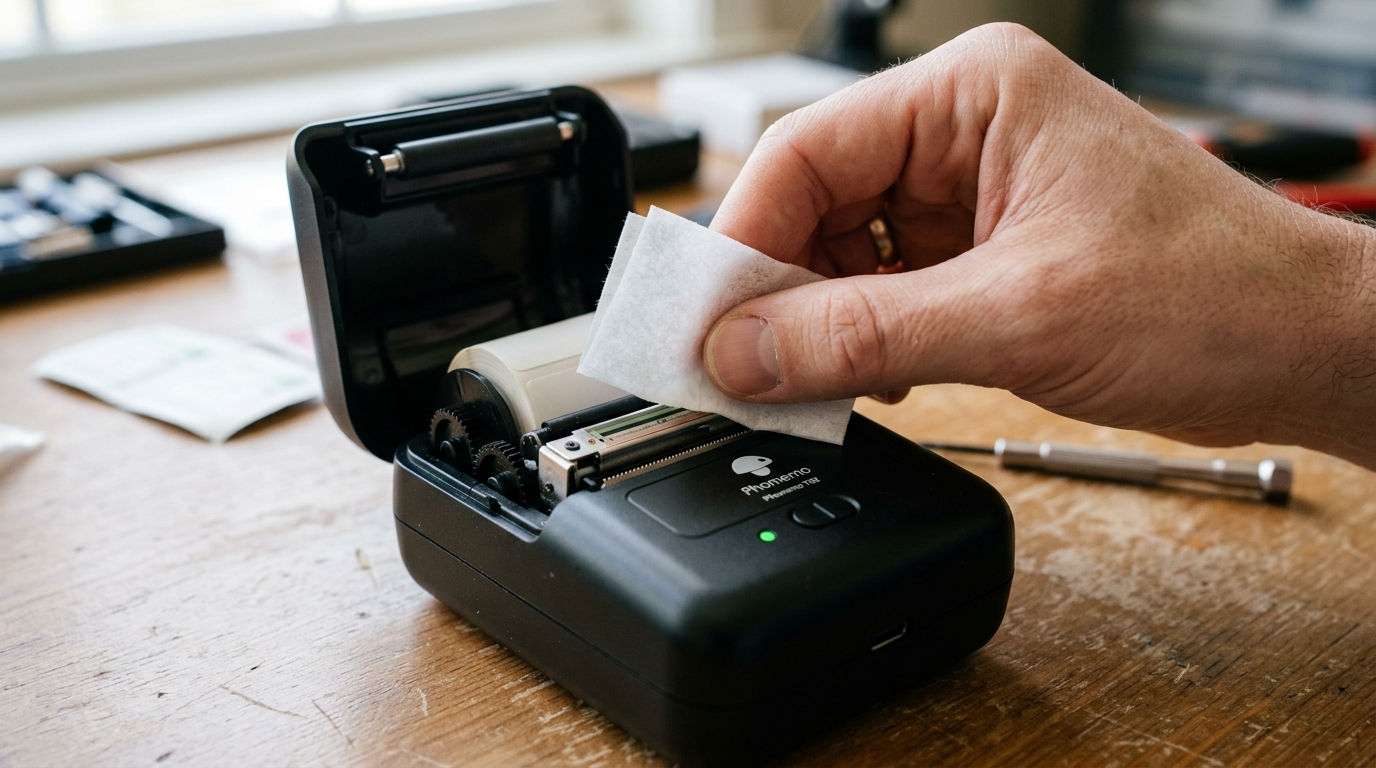
- Open the Printer: Open the lid or clamshell mechanism to expose the paper chamber and the printhead.
- Locate the Printhead: Look for a narrow, straight strip, usually embedded in the upper portion of the lid. It often looks like a thin line of dark glass or ceramic with a green or brown circuit board backing. This is the printhead.
- Apply the Alcohol: Lightly dampen your foam swab or microfiber cloth with the isopropyl alcohol. It should be damp, not dripping wet. You do not want liquid seeping into the internal circuitry.
- Wipe the Printhead: Gently wipe the dampened swab back and forth across the entire length of the printhead strip. Apply light pressure. If there is baked-on adhesive, you may need to go over that specific spot several times. Crucial Warning: Never use anything hard or metallic (like a fingernail, knife, or screwdriver) to scrape the printhead. This will permanently scratch the delicate heating elements and destroy the printer.
- Clean the Roller (Platen): While you have the printer open, wipe down the rubber roller (the platen roller) situated directly opposite the printhead. This roller pulls the paper through. And If it becomes slick with dust or oil, the paper will slip, causing distorted or compressed prints. Rotate the roller manually to clean the entire circumference.
- Let it Dry: Wait at least 3-5 minutes for the alcohol to completely evaporate. Isopropyl alcohol dries very quickly, but ensuring the components are completely dry before powering on prevents short circuits.
- Test Print: Reload the paper, close the lid, turn the printer on, and run a test print. The lines should be gone, and the text should be significantly darker.
Advanced Troubleshooting
If you have rigorously cleaned the printhead with 90%+ isopropyl alcohol and foam swabs multiple times. And The vertical white lines or severe faintness persist, you may be dealing with a permanent hardware failure.
The heating elements on a thermal printhead are rated for a certain lifespan (usually measured in kilometers of printed paper). While it takes a very long time to reach this limit under normal home use.
High-volume users might burn out elements. A burnt-out element cannot be fixed; the entire printhead (or usually, the whole printer for portable models) must be replaced.
Another issue that mimics a dirty printhead is insufficient pressure. The printhead must press firmly against the rubber platen roller to transfer heat efficiently.
If the hinges on the printer lid are damaged, bent. Or If the latching mechanism is worn out, the lid might not close tightly enough.
You can test this by applying firm. Even pressure to the top of the closed printer lid while running a print.
If the print quality improves dramatically while you press down, the mechanical closure is the problem, not a dirty printhead.
Finally, consider the paper itself. If you recently switched to a new brand or batch of thermal paper and suddenly experience terrible print quality.
The paper might be defective or have degraded due to poor storage (e.g., left in a hot car). Thermal coating degrades over time.
Try loading a roll from a different. Known-good batch to isolate whether the issue is the printer hardware or the consumable media.
FAQ
How often should I clean the printhead?
For casual users (a few labels a week), cleaning every 3-6 months is sufficient. For heavy users (dozens of labels daily), you should clean it every time you change the paper roll.
Can I use water or Windex to clean it?
Absolutely not. Water can cause rust and short circuits.
I used a Q-tip, and now it prints worse. What happened?
Standard cotton swabs leave behind tiny, nearly invisible fibers. When the printhead heats up, these fibers burn and stick to the elements, creating even more insulation.
The prints are dark, but everything is stretched out or squished. Is this a printhead issue?
No, distortion along the length of the print is usually a feed issue. The rubber platen roller might be dirty, slick, or damaged, causing the paper to slip or feed unevenly.
