


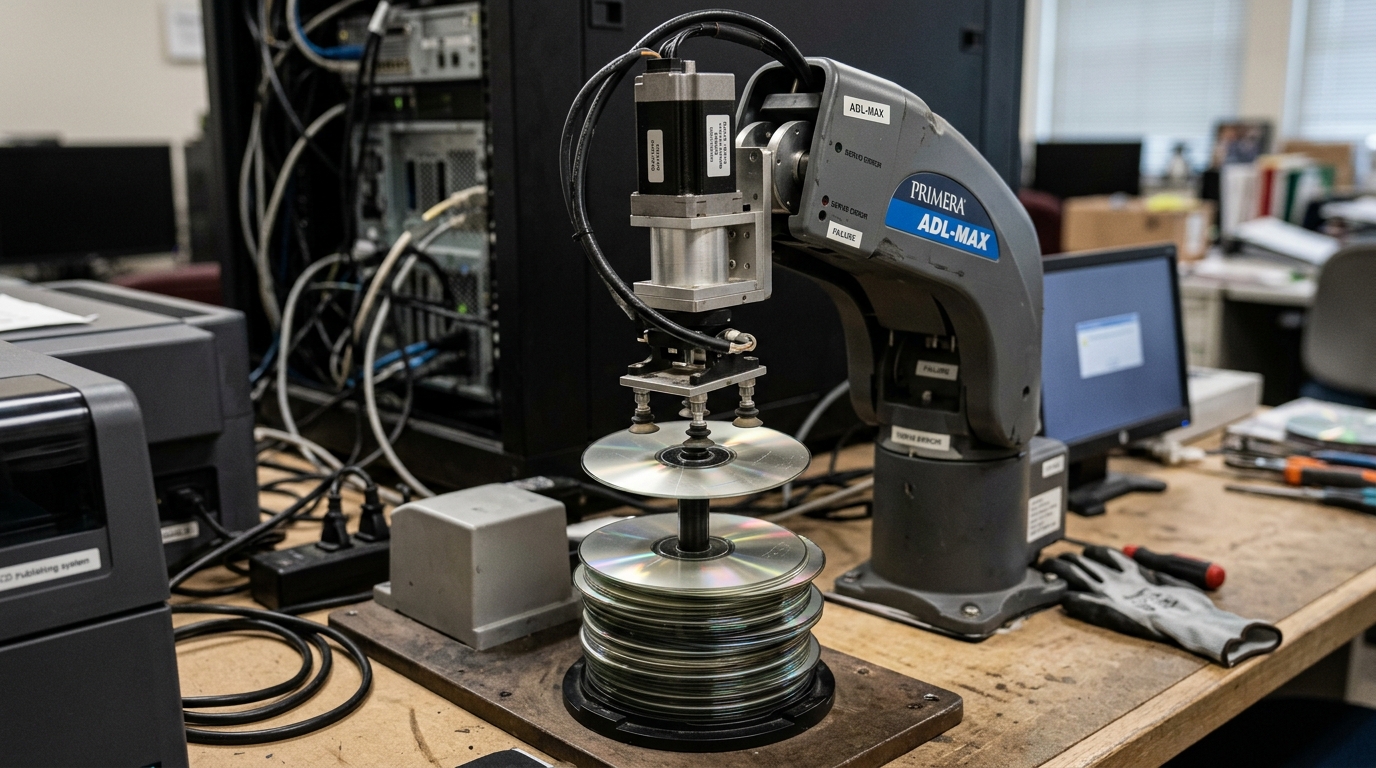
Troubleshooting the Primera Robotic Arm
The robotic arm in a Primera Bravo disc publisher is an incredible piece of automation, but it operates in a dusty environment. If the arm freezes, grinds against the sides, or drops discs midway to the printer tray, mechanical friction is the culprit.
Fix 1: Cleaning the Picker Fingers
The arm picks up discs by lowering into the center hole of the CD/DVD and expanding three small "fingers" outward to grip the inner plastic ring.
- The Problem: Blank discs often have microscopic burrs of plastic left over from the manufacturing mold. As the picker grabs them, this plastic dust sheds, coating the picker fingers. They lose friction and drop the disc.
- The Fix: With the printer off, manually pull the arm to the center. Use a cotton swab dipped in rubbing alcohol to thoroughly clean the three expandable fingers on the bottom of the picker mechanism.
Fix 2: Sticking on the Guide Rail
If the arm attempts to move but emits a loud grinding or clicking sound and halts, the stepper motor is fighting too much resistance on the metal guide rail.
- Power off the unit.
- Gently grab the robotic arm and slide it from the far left to the far right. If you feel a "sticky" or rough patch, the rail has accumulated dust or dried grease.
- Wipe the metal rail clean with a dry cloth.
- Apply a very small amount of white lithium grease or sewing machine oil to the rail. Slide the arm back and forth 10 times to distribute it evenly.
Fix 3: ADL-MAX Auto Disc Loader Misalignment
If you use the high-capacity ADL-MAX attachment and the arm descends but crashes into the edge of the disc instead of entering the center hole, the input bin is misaligned.
- Remove all discs from the bin.
- Lift the plastic bin out completely. Look at the bottom; there are specific alignment pegs that must seat deeply into the holes on the base plate. If a cable or a dropped disc is wedged under the bin, it will sit at an angle, causing the robotic arm to miss the target coordinates.
Troubleshooting Robotic Arm and ADL-MAX Disc Picker Failures
Primera automated disc publishers (Bravo SE, Bravo 4100, Bravo 4200, Bravo XRP) utilize a precision 3-axis robotic picker arm (equipped with vacuum suction or mechanical expanding claw fingers) to transport discs between input bins, optical drives, and the printer tray. When the arm binds, drops discs, or fails to pick discs from the ADL-MAX autoloader, mechanical or optical calibration is required.
Step-by-Step Robotic Arm Diagnostic & Recovery Guide
- Inspect and Clean the Robotic Picker Pads / Gripper Fingers:
Turn off the unit. Inspect the picker head on the robotic arm. If using a vacuum suction model, wipe the rubber suction cups with a clean alcohol swab to remove disc dust. If using a mechanical claw model, verify that the three metal fingers expand and retract smoothly without binding.
- Execute Full Robotic Arm Coordinate Calibration:
- Launch PTPublisher on your PC.
- Navigate to Tools > Calibrate Robotic Arm.
- Follow the interactive on-screen calibration wizard:
- Step 1: Input Bin 1 Calibration: Use on-screen arrows to center the picker head directly over the center hole of the disc stack.
- Step 2: Optical Drive Tray Calibration: Align the picker head with the open CD/DVD drive tray center spindle.
- Step 3: Printer Tray Calibration: Align the picker head over the printer tray well.
- Click Save Coordinates to write the new X/Y/Z motor step values to non-volatile EEPROM.
- Check the ADL-MAX Autoloader Extension Alignment:
If using the ADL-MAX (100-disc autoloader attachment), ensure the metal interlocking alignment bracket is locked tightly to the main Bravo chassis. A 1mm tilt will cause the arm to miss the bottom of the disc spindle.
- Lubricate the Vertical Guide Post:
Clean the vertical metal robotic elevator rod with a lint-free cloth. Apply 2 drops of synthetic silicone oil to ensure smooth vertical lifting without motor stalling.
Frequently Asked Questions
Why does the robotic arm pick up two discs at once (double-picking)?
Static electricity between glossy disc surfaces causes them to stick together. Fan the disc stack before loading into the input bins to break surface cohesion.
What should I do if the robotic arm is stuck inside the optical drive?
Power off the unit. Gently rotate the horizontal arm drive gear by hand to lift the picker head out of the optical drive tray before powering back on.
