


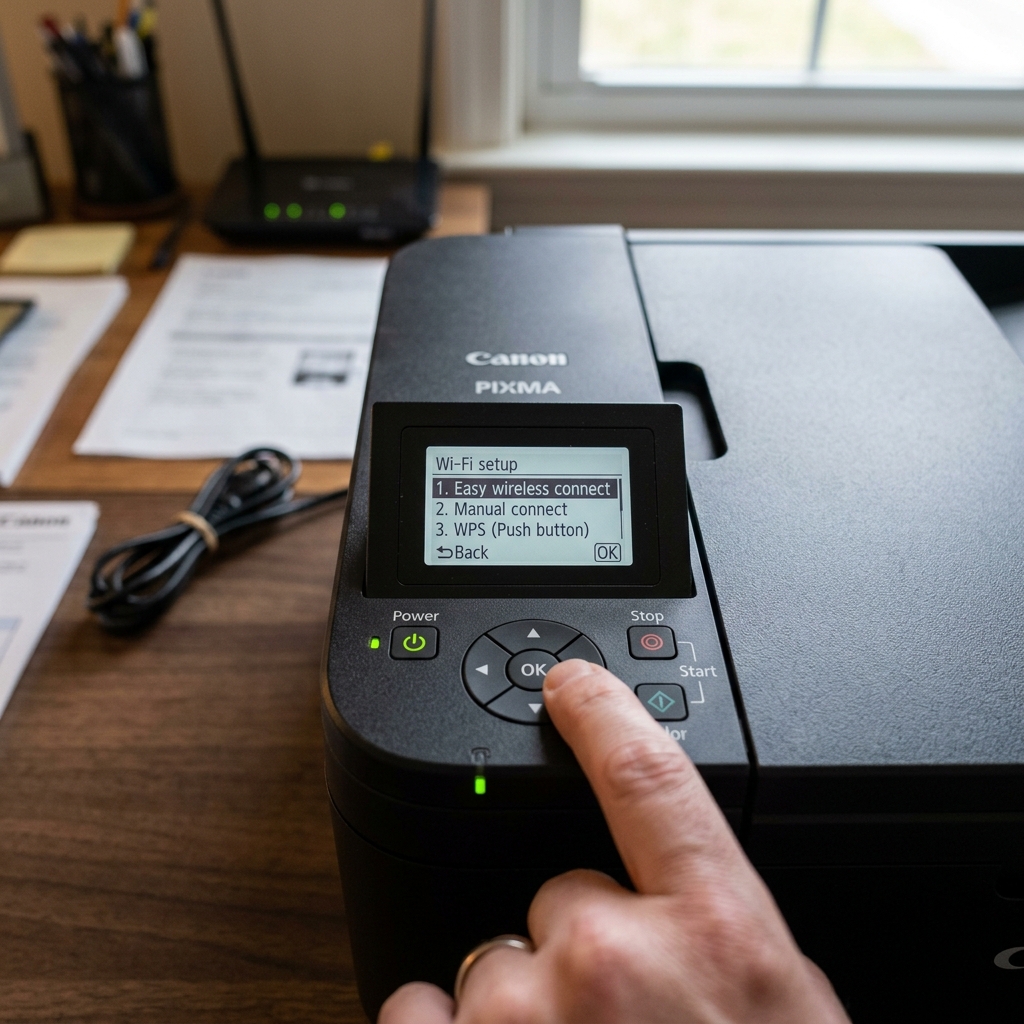
Method 1: The Fast WPS Method (Recommended)
If your home Wi-Fi router was built in the last 5 years, it almost certainly has a WPS (Wi-Fi Protected Setup) button. This is by far the fastest way to connect the TR4720.
- Press the Setup button on trong> button on the printer (it looks like a pair of pliers and a screwdriver).
- Press the right arrow until you see Wi-Fi setup, then press OK.
- Select WPSrong>WPS (Push button) and press OK.
- The printer screen will tell you to press the WPS button on your router.
- Walk over to your router. Find the WPS button (usually on the back, sometimes labeled with two circular arrows) and hold it down for 3 to 5 seconds.
- Walk back to the printer. Within 2 minutes, the screen should display Connected. Press OK.
Method 2: Easy Wireless Connect (Smartphones)
If your router doesn't have a WPS button (like many mesh networks such as Eero or Google Nest), you must use your smartphone to pass the Wi-Fi password to the printer.
- Download the Canon PRINT Inkjet/SELPHY app on your iOS or Android device.
- On the printer, press the Setup button, go to Wi-Fi setup, and select Easy wireless connect. The printer is now broadcasting its own temporary Bluetooth/Wi-Fi signal.
- Open the Canon app on your phone. It will automatically detect the new printer.
- Follow the on-screen prompts. The app will ask for your home Wi-Fi password and transmit it securely to the printer.
Method 3: The 5GHz Problem
If the printer refuses to connect using either method, your router is likely broadcasting a 5GHz-only network. The Canon TR4720 only has a 2.4GHz Wi-Fi chip.
You must log into your router's admin panel and ensure the 2.4GHz band is enabled. If your router uses "Band Steering" (combining both bands under one name), temporarily disable the 5GHz band, connect the printer, and then re-enable 5GHz.
Complete Wi-Fi Setup Guide for the Canon PIXMA TR4720 / TR4700 Series
The Canon PIXMA TR4720 is a compact home-office wireless all-in-one featuring an Automatic Document Feeder (ADF), faxing, and auto-duplexing. Connecting it to modern mesh and dual-band Wi-Fi networks is seamless when following the proper wireless pairing methods.
Method 1: Easy Wireless Connect via Canon PRINT Mobile App (Fastest)
- Turn on the TR4720 printer.
- Press and hold the physical Wireless Connect (Phone/Wi-Fi icon) button on the front panel for 3 seconds until the display confirms "Processing...".
- Open the Canon PRINT Inkjet /SELPHY app on your smartphone (ensure Bluetooth and Location are ON).
- Tap Add Printer > Register Printer.
- Select "Perform Wireless Setup". The app will automatically transfer your smartphone's 2.4GHz Wi-Fi credentials to the TR4720 in under 60 seconds.
Method 2: Manual Wi-Fi Setup via Printer Control Panel
- Press the physical Setupng>Setup (Gear/Wrench) button on the TR4720.
- Select Device settings > LAN settings > Wi-Fi > Wi-Fi setup > Manual connect.
- Select your wireless network name (SSID) from the list.
- Enter your WPA2 password using the alphanumeric keypad. Press OK. The screen will confirm "Connected".
Method 3: WPS Push Button Pairing
- In the Wi-Fi setup menu, select WPS (Push button method). Press OK.
- Within 2 minutes, press and hold the physical WPS button on your router for 3 to 5 seconds. The TR4720 will pair automatically.
Frequently Asked Questions
Why does the TR4720 drop offline in Windows 11?
In Windows Printer Properties > Ports tab, switch from a WSD port to a Standard TCP/IP Port using the printer's local IP address.
Does the TR4720 support Apple AirPrint?
Yes. Once connected to the same local Wi-Fi network, the TR4720 appears automatically in the iOS and macOS AirPrint dialogs without needing any drivers.
