


Performing a factory reset on your Kodak printer is the ultimate troubleshooting step to clear persistent error codes (like 3802), resolve Wi-Fi connection loops, or wipe corrupted print queue caches from the non-volatile memory (NVRAM). Because Kodak produced both full-sized All-in-One inkjet printers and ultra-portable pocket photo docks, the reset procedures vary significantly by device class.
Let's walk through the exact steps for each series.
Reset Procedures by Kodak Model Class
Locate your specific Kodak printer type below to perform the correct reset sequence:
1. Kodak LCD Screen Models (Hero 3.1/5.1, ESP C310, ESP 7250)
If your printer has an LCD screen and navigation keys, you can trigger a clean firmware reset through the onboard menu:
- Press the **Home** button on the control panel.
- Use the arrow keys to scroll to the **Maintenance** (or Printer Settings) menu and press OK.
- Scroll down to find **Restore Factory Defaults** (or Reset All Settings). Press OK.
- A confirmation prompt will appear on the screen saying "This will reset network and print settings. Continue?" Select **Yes** and press OK.
- The printer will reboot. You will be prompted to select your language and region, confirming the reset was successful.
2. Kodak Button-Only Models (ESP 3, ESP 5, older 5000-series)
If your printer lacks an LCD display and only has status LEDs and buttons, you must perform a hardware button bypass:
- Turn the printer off using the power button.
- Unplug the power cord from the back of the printer.
- Press and hold both the **Copy (or Start)** and **Cancel (X)** buttons simultaneously.
- While continuing to hold these buttons, plug the power cord back into the printer.
- Keep holding the buttons for **10 seconds** after the power LED lights up.
- Release the buttons. The printer carriage will move back and forth, indicating the NVRAM has been cleared and reset.
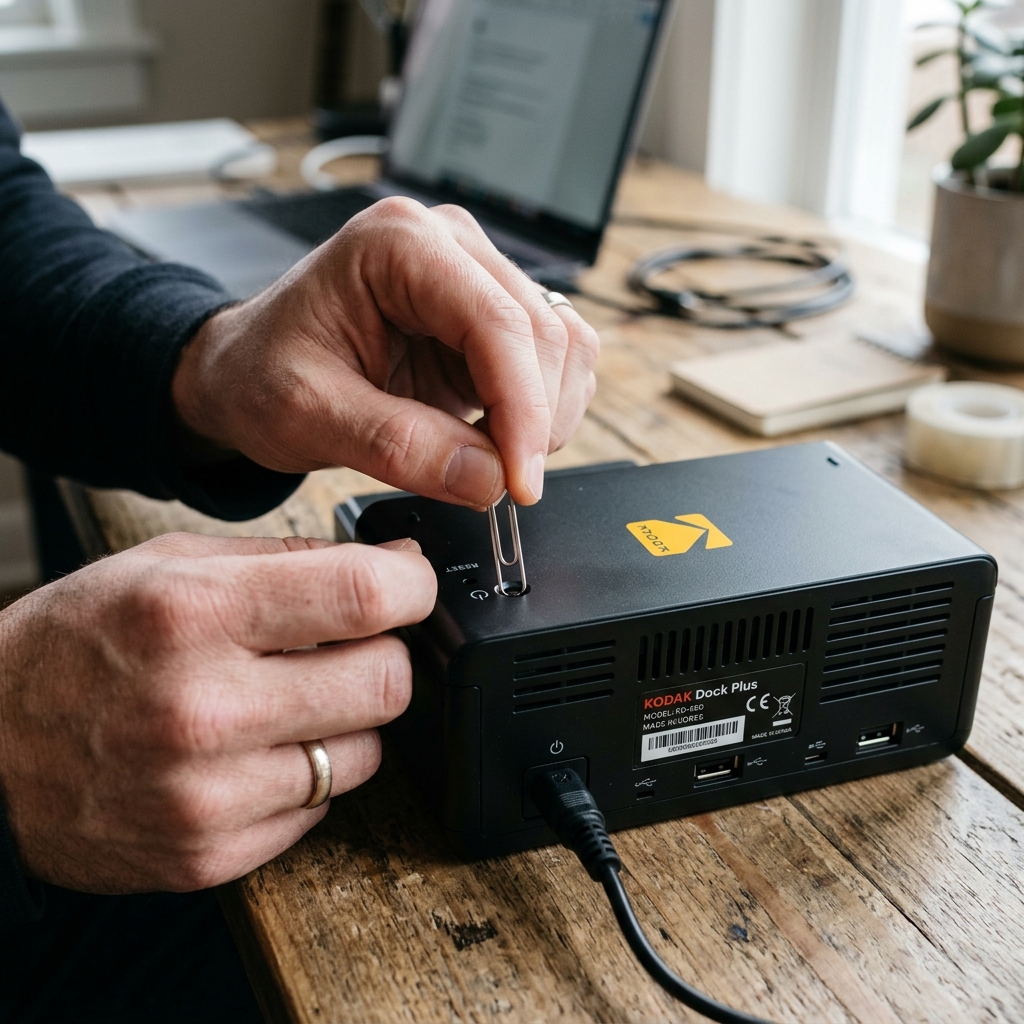
3. Kodak Portable Photo Docks & Pocket Printers (Step, Smile, Dock Plus)
Portable printers do not have menu buttons. They rely on a physical micro-switch reset:
- Ensure the pocket printer isrror-codes-alerts/kodak-step-printer-orange-light-flashing" title="Kodak Step Printer Orange Light Flashing? Diagnostic Fixes">pocket printer is turned on (solid power LED).
- Locate the tiny **Reset** pinhole on the chassis (typically next to the micro-USB charging port on the Step, or on the bottom panel on the Dock Plus).
- Straighten a paperclip or use a SIM card ejector tool.
- Gently insert the tool into the pinhole until you feel the micro-switch click down.
- **Hold the switch down for 5 seconds.**
- Release the tool. The status LED will flash red/yellow and the printer will reboot, clearing its Bluetooth cache and returning to pairing mode.
When to Perform a Power Drain Reset (Capacitor Purge)
If the printer is frozen and the control panel buttons do not respond, a menu reset is impossible. You must perform a manual capacitor purge:
- Unplug the power cord from the wall outlet.
- Disconnect the cable from the printer.
- Hold the physical **Power** button on the printer down for 30 seconds. This drains any residual voltage stored in the mainboard capacitors.
- Leave it disconnected for **10 minutes** before plugging back in.
Related Kodak Troubleshooting Guides
When to Perform a Full Factory Reset on a Kodak Printer
Performing a factory reset clears corrupted network configurations, flushes stuck print spooler buffers from NVRAM, resets print quality calibration tables, and restores the machine's initial out-of-the-box software parameters. A reset is recommended when the printer is unresponsive to Wi-Fi setup, constantly displays false error messages, or before selling or gifting the machine.
Method 1: Menu-Based Soft Reset (ESP & Hero All-in-Ones)
- Press the Home button on theng> button on the printer's front control panel.
- Use the arrow keys to scroll to Maintenance (or the gear icon) and press OK.
- Scroll down to Reset All Settings or Restore Factory Defaults.
- Press OKtrong>OK. The screen will prompt for confirmation. Press OK or Start to confirm.
- The printer will reboot automatically with cleared network and user settings.
Method 2: Hard Button Power Drain (For Frozen or Unresponsive Printers)
- Disconnect the AC power cable from the rear of the printer while the machine is powered on.
- Unplug the power brick from the AC wall outlet.
- Press and hold the physical Powerng>Power button on the control panel for 30 seconds to discharge the high-voltage internal capacitors.
- Leave the machine unplugged for a minimum of 15 minutes to allow volatile memory buffers to fully clear.
- Plug directly into a wall outlet and power on.
Method 3: Pin-Hole Reset for Kodak Portable & Instant Printers
- Ensure the portable printersetup-installation/kodak-printer-firmware-update-failed-loop" title="Fix Kodak Printer Firmware Update Frozen or Failed Loop">portable printer (Kodak Step, Mini 2, Mini 3 Retro, Dock Plus) has at least 50% battery or is plugged into a charger.
- Locate the tiny recessed reset pin-hole on the side or bottom of the casing.
- Insert a straightened paperclip into the hole until you feel a soft tactile switch click.
- Hold for 5 to 8 seconds until the LED indicators turn off and restart.
Frequently Asked Questions
Does a factory reset erase the page count or printhead life counters?
No. Total lifetime page counts, total ink consumed, and printhead serial registrations are stored in permanent ROM and are retained across all resets.
Will I need to reinstall the ink cartridges after a factory reset?
No, you do not need to remove the physical cartridges. However, the printer may execute a short 2-minute printhead alignment and calibration sweep following the reboot.
