


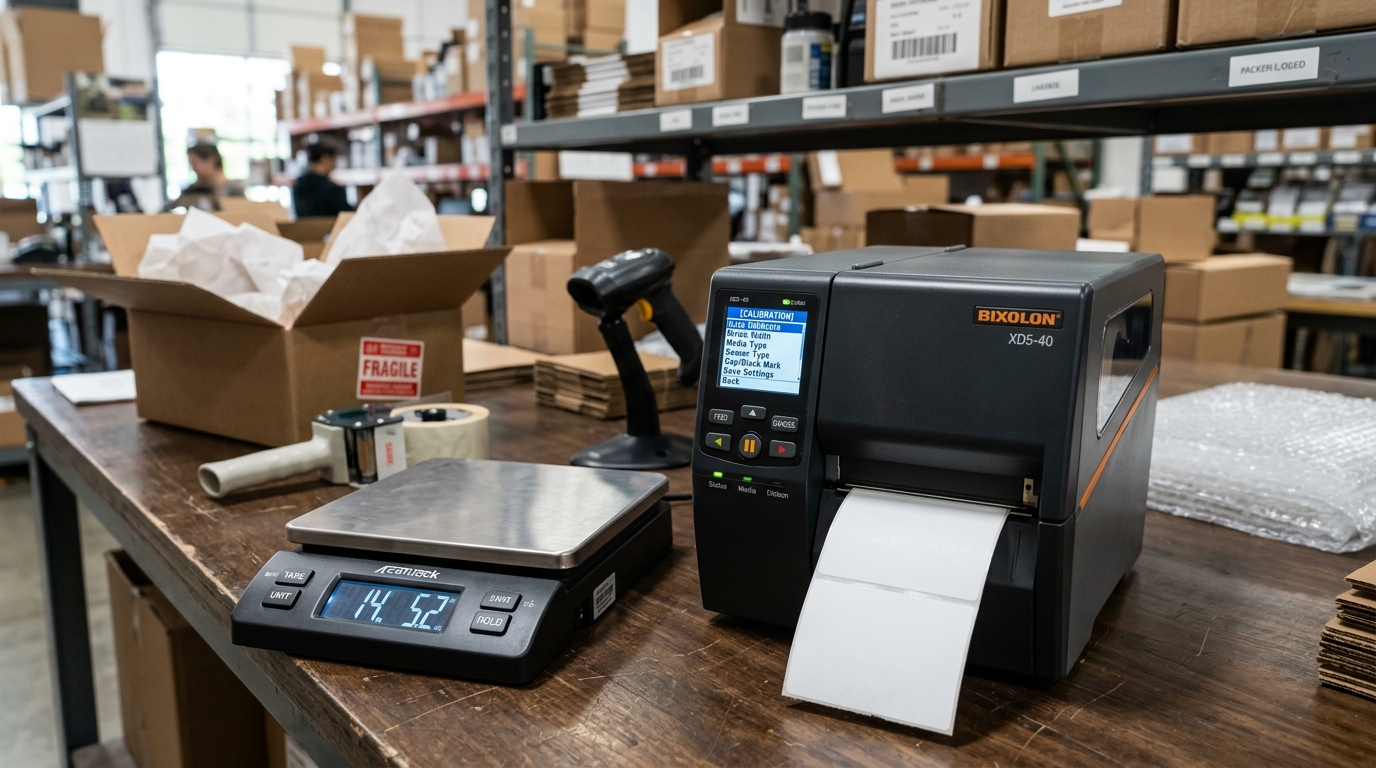
The Direct Answer
The Bixolon XD5-40 uses a two-LED combined-color system to report every error state. Red On + Orange On = Media Jam (sensor can't find gap/black mark).
Red On + Green Blink = Print Head Overheating (wait 10 minutes idle). Red On + Orange Blink = No Media Loaded.
Red On + Red Blink = Media Cover Open. Red On + LED 2 Off = Calibration Failure.
Red Blink + Red Blink = Auto-Cutter Error.Settings → Sensor → Gap Cal or B/M Cal.
What Is the Bixolon XD5-40?
The Bixolon XD5-40 is a commercial-grade direct thermal label printer designed for high-volume warehouse, logistics, retail, and healthcare labeling environments. It prints labels up to 4 inches (104mm) wide at speeds up to 6 inches per second (152mm/s) and supports a wide range of media types — gap-detected labels, black-mark continuous media.
Liner-free labels — using dual sensing technology (transmissive gap sensor + reflective black-mark sensor).
Unlike the budget-tier XD3-40, the XD5-40 features a backlit LCD display for direct menu navigation, an optional auto-cutter module, USB/Serial/Ethernet connectivity. Significantly more robust memory switch configurability.
This additional complexity means its error reporting is correspondingly richer — which is good once you understand the LED table. Bewildering before you do.
The XD5-40d variant adds an internal dispenser/peeler for peel-and-apply workflows. Most of the troubleshooting in this guide applies equally to both variants unless specifically noted.Bixolon XD3-40 error guide.
The Complete XD5-40 Two-LED Status Table
The XD5-40 has two physical LEDs — LED 1 (left) and LED 2 (right). Each has three possible states: On (solid), Blinking, or Off.
The color of each (Green, Orange, or Red) combined with the state of both LEDs together tells you exactly what mode the printer is in. Reading one LED in isolation will mislead you.
| LED 1 | LED 2 | State / Meaning | Action Required |
|---|---|---|---|
| ● Green On | ● Green On | Print Ready — normal operating state | None — ready to print |
| ● Green On | ◌ Red Blink | Print Cancel Mode — waiting for button input | Press FEED or CANCEL to resume |
| ◌ Green Blink | ● Red On | Print Paused — temporarily stopped mid-job | Press FEED to resume |
| ◌ Green Blink | ◌ Green Blink | Print Standby Mode — waiting for data or button | Press FEED or send a print job |
| ● Orange On | ● Orange On | Mode Switching — normal notification during mode change | Wait — clears automatically |
| ● Red On | ● Orange On | ❌ Error: Media Jam — gap/mark not recognized | Clear jam, reload, run Gap Cal |
| ● Red On | ◌ Green Blink | ⚠️ Error: Print Head Overheating | Leave idle 10 min, improve ventilation |
| ● Red On | ◌ Orange Blink | ❌ Error: No Media Loaded | Load media roll, clean sensor if persists |
| ● Red On | ◌ Red Blink | ❌ Error: Media Cover Open | Press cover firmly until latch clicks |
| ● Red On | ⬜ Off | ❌ Error: Media Calibration Failure | Clean sensors, re-run correct Cal mode |
| ◌ Red Blink | ◌ Red Blink | ❌ Error: Auto-Cutter Error | Clear cutter jam, verify cutter enabled in menu |
Error: Media Jam — Red On + Orange On
This is the most common XD5-40 error. The LED combination Red On + Orange On means the printer's media sensor cannot find the gap between labels (or the black position mark on continuous media).
This can be caused by a physical jam, incorrect media loading, or a sensor that needs calibration for the new media type.
What Causes This Error
- Physical media jam: A label or piece of liner is caught between the printhead and platen roller, or at the media exit slot
- Incorrect media threading: The leading edge of the media isn't properly seated under the media guides or through the sensor path
- Wrong sensor mode: The printer is configured for gap sensing but you've loaded black-mark media (or vice versa)
- Uncalibrated sensor: The gap sensor hasn't been calibrated for this specific label stock — common when switching between different label sizes or brands
- Dirty transmissive sensor: Paper dust and label adhesive residue on the gap sensor lens causes it to misread the gap position
Step-by-Step Fix
- Power off the printer completely
- Open the media cover — press the cover release button and lift the clamshell top
- Inspect the media path for any stuck labels, torn liner, or adhesive residue — remove gently without forcing; fine tweezers can help with liner fragments in the exit slot
- Remove the media roll entirely and inspect the first 12 inches of the roll — if any labels are partially detached or the liner is damaged at the leading edge, tear back to a clean section
- With the roll removed, use a lint-free cloth lightly dampened with 99% isopropyl alcohol to wipe the transmissive sensor windows (the small lens pair facing each other across the media path) and the reflective sensor (the small angled window below the platen)
- Allow 30 seconds for the alcohol to evaporate
- Reload the media roll: ensure the roll sits flush in the media spindle, the leading edge is straight (not torn or angled), and the media is threaded between the media guides with the guides adjusted snugly to the media width
- Close the cover and power on — wait for the boot sequence to complete
- If the error persists, run sensor calibration (see Calibration section below)
Error: Print Head Overheating — Red On + Green Blink
The XD5-40's thermal printhead contains a temperature sensor that triggers this protective error when head temperature exceeds safe operating limits. This is not a defect — it's a designed safety mechanism that prevents permanent printhead damage from heat buildup during high-speed, high-density continuous printing.
Common Scenarios That Trigger Overheating
- High-volume continuous printing: Printing dense barcodes or all-black graphics at maximum speed for extended periods — the XD5-40 is designed for high-throughput, but sustained maximum-density runs can still accumulate heat faster than it dissipates
- High print density setting: If density is set to 4 or 5 (on a 1–5 scale), the head elements energize longer per dot, generating more heat per label
- Poor ventilation around the printer: The printer requires at least 4 inches of clearance on all sides.
- High ambient temperature: Operating in environments above 40°C (104°F) — common in summer near loading docks or in non-air-conditioned warehouses
Fix and Prevention
The immediate fix is straightforward: leave the printer powered on but idle for 8–10 minutes. Do not power cycle it — the temperature monitoring only works while the printer is on.
Powering off removes the thermal protection circuit. The error clears automatically once the head temperature drops to safe levels.
The printer resumes normal operation without any button press.
For prevention:
- Reduce print density by one level (e. g.
- Increase the gap between print batches to allow passive cooling
- Ensure the printer has adequate ventilation clearance on all four sides
- If operating in a hot environment, consider a small fan circulating air across the top of the printer
If overheating occurs regularly even at low print density with good ventilation, check whether the printer's internal cooling vents are clogged with dust — compressed air blown through the vent slots (with the printer powered off) clears accumulated dust from internal surfaces.
Error: No Media — Red On + Orange Blink
The media sensor doesn't detect any loaded media.
- Media not threaded past the sensor: The media roll is loaded into the spindle but the leading edge hasn't been threaded through the media guides and under the printhead to reach the exit slot where the sensor reads it
- Media loaded face-down: Direct thermal media has a coated (sensitive) side and an uncoated liner side.
- Dirty media sensor: Heavy paper dust or adhesive residue on the sensor lens causes a false "no media" reading even with a full roll correctly loaded
- Wrong media type for sensor mode: Transparent liner material may not register correctly with gap sensing if the sensor's detection threshold isn't calibrated for it
Fix
- Open the cover and verify the media roll is correctly seated on the spindle (roll sits in the spindle holders, not resting loose)
- Thread the leading edge of the media through the media guides — the coated (slick, print-receiving) side faces up toward the printhead
- Thread the leading edge forward until it protrudes 1–2 inches past the exit slot
- Adjust the media width guides to sit flush against both edges of the media — loose guides cause skewing that can bring media off the sensor
- Close the cover firmly
- If the error persists with a correctly loaded roll: open the cover again and clean the transmissive sensor windows with IPA on a lint-free swab, allow to dry, reload, and retry
Error: Media Cover Open — Red On + Red Blink
The cover latch detection switch isn't registering the cover as fully closed. The XD5-40's clamshell cover has a mechanical latch on both sides that engages a micro-switch when pressed to the closed position.
- Press the cover firmly at the center and both sides simultaneously — if one side latches before the other, it can appear closed but not register
- Listen for an audible click from the latch mechanism — if you hear one click on one side but not both, the cover isn't fully seated
- Inspect the latch hooks on both sides of the cover for visible damage or accumulated label adhesive buildup that prevents full engagement — clean with IPA if adhesive is visible
- On well-used printers (typically after 12–18 months of high-volume use), the latch springs can weaken and no longer generate enough force to close reliably — contact Bixolon support about latch spring replacement if cleaning doesn't resolve it
Error: Media Calibration Failure — Red On + LED 2 Off
This error is specific: the printer actively attempted an auto-calibration for the loaded media type and the calibration algorithm failed to produce a reliable result. It's different from the Media Jam error — with a Jam, the printer didn't attempt calibration; with a Calibration Failure, it tried and the result was outside acceptable tolerance.
Why Calibration Fails
- Wrong calibration mode for the media: Running Gap Calibration while black-mark media is loaded (or vice versa) — the sensor readings will be inconsistent and out of range
- Non-standard media specifications: Labels with very short inter-label gaps (under 2mm), unusually transparent liner, dual-sided printing material, or pre-printed backing that confuses the gap sensor
- Dirty sensors: Paper dust on the gap sensor causes the calibration reference readings to be offset, producing values outside the algorithm's acceptable window
- Damaged media at the leading edge: If the calibration uses the first few labels of the roll and those labels have torn, folded, or missing gaps, the calibration data will be invalid
- Very thin or transparent liner: Some premium label stocks use ultra-thin liners that can confuse standard transmissive sensor thresholds
Fix Sequence
- Power cycle the printer and open the cover
- Clean both the transmissive gap sensor windows and the reflective black-mark sensor with a lint-free IPA swab — this is the most commonly skipped step and the most effective one
- Remove the first 3–4 labels from the roll to expose a fresh section with clean gaps
- Reload with the fresh leading edge and close the cover
- Navigate to Settings → Sensor and manually select the correct calibration type for your media:
- Gap Cal — for standard labels with die-cut gaps between each label
- B/M Cal (Black Mark) — for continuous media with printed black position marks
- Continuous — for plain continuous media with no gaps or marks (no calibration needed)
- Run the calibration — the printer feeds a length of media and measures the sensor signal variation across at least one complete label + gap cycle
- If auto-calibration still fails on unusual media, switch to manual calibration via the Unified Label Utility-II software: select the sensing type, enter the label length in millimeters, click "Check Sensing Value," and manually input the optimal sensing threshold from the test results
Error: Auto-Cutter Error — Red Blink + Red Blink
This error only appears when the XD5-40 is fitted with the optional auto-cutter module. Both LEDs blinking red simultaneously means the cutter mechanism has encountered a fault — typically a jam in the cutter blade assembly, or a missettings where the cutter is enabled in the menu but no physical cutter module is installed.
Fix
- Power off the printer
- Open the media cover and carefully inspect the cutter mechanism — look for any label, liner fragment, or adhesive buildup in the blade channel
- Use fine tweezers or a toothpick to gently remove any foreign material from between the cutter blades — never use metal tools that could nick or misalign the blade edge
- Verify the cutter blade moves freely by gently pressing the blade retainer — it should spring back without resistance
- Close the cover and power on
- If the error returns immediately: navigate to Print Mode → Cutter in the menu — if a factory reset was recently performed, the cutter may have been reset to disabled, causing the module to fault.
- If no physical cutter module is installed but this error appears, navigate to the menu and disable the cutter function under Print Mode
Sensor Auto-Calibration: Complete Procedure
Sensor calibration is the most important maintenance task on the XD5-40. It should be performed whenever you switch to a new label stock type, after a factory reset, after cleaning the sensors, or whenever the printer begins mis-feeding labels.
A miscalibrated sensor is the root cause of the majority of "Media Jam" and "Calibration Failure" errors on this printer.
Gap Sensor Calibration (Standard Labels)
- Load the media roll you want to calibrate for — calibration is media-specific, so you must have the actual roll installed
- Power on and wait for the ready state (Green On + Green On)
- Press the Menu button to trong> button to enter the settings menu
- Navigate to Sensor using thestrong> using the navigation buttons
- Select Gap Cal>Gap Cal
- Press the Select button (Function Button 1) to confirm
- The printer feeds approximately 4–5 labels and measures the signal difference between label area and gap — you'll see the media feed and then retract slightly as the calibration completes
- The display shows "Done" or returns to the ready screen — calibration is complete
- Print a test label to confirm correct gap detection and label-to-label alignment
Black Mark Calibration (Continuous/Mark Media)
The procedure is identical to gap calibration but you select B/M Cal instead of Gap Cal in step 5. The printer uses the reflective sensor (located below the printhead, facing the non-print side of the media) to detect black mark positions.
Ensure the black marks on your media are on the underside (liner side) of the media, not the print face.
Manual Calibration via Unified Label Utility-II
When auto-calibration fails repeatedly on non-standard media, manual threshold setting through the software gives you precise control:
- Connect the XD5-40 to your Windows PC via USB
- Open Bixolon Unified Label Utility-II (downloadable from bixolon.
- Select your printer from the device list and click Connect
- Navigate to Calibration → Media Sensing
- Select your sensing type (Gap or Black Mark)
- Enter your label length in millimeters
- Click Check Sensing Value — the utility reads the current sensor signal and displays min/max/threshold values across a sample feed
- Adjust the threshold value to fall midway between the label and gap signal peaks
- Click Save — the calibration data is written to the printer's NVM
- Run a test print to validate
Factory Reset Procedure
A factory reset returns the XD5-40 to its shipped default settings. Use this when accumulated setting changes have produced unpredictable behavior, or after troubleshooting has stalled and a clean start is faster than tracking down the corrupted setting.
What factory reset clears:All network settings, print density, media type selection, sensor calibration data, memory switch values, cutter settings. Any macro or stored format data.
Before resetting, note your current settings: print the current settings via Tools → settings Print so you have a physical record of your settings to reference during resettings.
- Ensure media is loaded and the printer shows the ready state
- Press Menu to enter the settings menu
- Navigate to Toolsng>Tools → Reset
- Press Function Button 1 to confirm — the display shows a confirmation prompt
- Confirm again — the printer immediately reboots
- After reboot, run Gap Cal or B/M Cal calibration before printing production labels
- Reconfigure network settings, print density, and cutter settings if applicable
After a factory reset, if you're using this printer with a custom barcode or label software application, re-run any software-side printer setup or driver settings as well — the factory reset may change identifiers that the software references.
Data Dump Mode: Debugging Communication Issues
If the XD5-40 is receiving print jobs but outputting garbled content — random characters, raw ZPL/DPL command text printed literally, or completely wrong formats — Data Dump Mode reveals exactly what bytes the printer is actually receiving from the host.
- Navigate to Toolsng>Tools → Dump in the printer menu
- Enable Dump Mode
- Send a normal print job from your computer or POS system
- Instead of printing the intended label, the printer outputs the received data in hexadecimal + ASCII format — one character per position
- Compare this against the expected command structure for your label language (DPL for Datamax-compatible, SLCS for Bixolon-native, or ZPL for Zebra-compatible firmware (internal software) (internal software) variants)
- Turn Dump Mode off when done — navigate back to Tools → Dump and disable, or power cycle the printer
Common findings: the wrong label language is configured (printer set to DPL but host is sending ZPL), the baud rate doesn't match on serial connections, or a Windows driver is sending PCL/PostScript header data before the label commands.
Print Head Dot Check
The XD5-40's Print Head Check function tests every heating element (dot) in the printhead and flags any that aren't responding. Dead or degraded elements create white horizontal stripes in printed output — a faint stripe at the same vertical position on every label, regardless of label content.
- Ensure a media roll is loaded
- Navigate to Toolsng>Tools → Head Chk
- The printer prints a full-coverage test pattern that activates every dot element simultaneously
- Inspect the test print for white stripes — a white stripe at position X means the element(s) at that horizontal position are not firing
A single dead element (1 dot = 0. 125mm at 203dpi) may be acceptable for text labels but will compromise barcode readability if it falls within a barcode bar.
Multiple consecutive dead elements will visibly affect label readability and scan reliability. If the head check shows significant dropout, the printhead requires replacement.
Before replacing the printhead, always clean it first — accumulated adhesive or paper residue can prevent elements from making contact with the media, mimicking dead elements. Clean with a lint-free IPA swab across the full width of the printhead edge, allow to dry. Re-run the head check.
For broader LED error pattern reference across all Bixolon models, see the Bixolon blinking light meaning and LED code chart.
Print Quality Problems: Causes and Fixes
Even when no error LEDs are active, print quality issues are common on the XD5-40 — particularly in high-volume environments where consumables and hardware wear occurs faster.
Faint, Washed-Out Print
- Print density too low: Navigate to Settings → Print Density and increase by one level — start at level 3 (default) and step up to 4 if output is faint
- Wrong media side: Verify the print-receiving (coated) side faces the printhead — the coated side is slightly shinier and more reflective than the liner side
- Dirty printhead: Clean the printhead edge with an IPA swab — accumulated adhesive residue reduces thermal transfer efficiency
- Worn printhead: If cleaning doesn't improve density and the head check shows normal element activity, the printhead's thermal coating may be worn — this requires replacement
White Horizontal Stripes Across Every Label
A consistent white stripe at the same position on every label = a dead or damaged printhead element at that dot row.Tools → Head Chk to confirm, then clean the head and re-test. If the stripe persists after cleaning, printhead replacement is needed.
Skewed or Angled Print / Labels Not Tracking Straight
- Media width guides are not adjusted snugly to the media width — the roll can drift sideways as it feeds, causing the print to shift
- Media roll is not seated parallel in the spindle — the roll should sit flat with even tension across its width
- Platen roller may have uneven wear on one side — a worn platen applies uneven pressure, pulling the media sideways
Barcodes Not Scanning After Printing
If barcodes print visually but fail to scan:
- Increase print density slightly — under-dense barcode bars have ragged edges that confuse scanners
- Run Gap Cal to ensure labels are printing in the correct start position — an offset print position can shift barcodes outside the expected quiet zone
- Check barcode width specification — if the ZPL/DPL barcode width multiplier produces bars thinner than the minimum scannable width, adjust the barcode definition in your label template
- Run the Head Chk — a dead element falling within a barcode bar creates a white gap that breaks the barcode
firmware (internal software) (internal software) Update
Bixolon periodically releases XD5-40 firmware (internal software) (internal software) updates that improve calibration accuracy, add label language compatibility, fix communication edge cases. Address specific hardware variants.
Keeping firmware (internal software) (internal software) current is good practice — many intermittent calibration failures and communication issues are resolved by firmware (internal software) (internal software) updates without any hardware intervention.
- Download the latest XD5-40 firmware (internal software) (internal software) from bixolon.
- Connect the printer to your PC via USB
- Open Bixolon Unified Label Utility-II
- Navigate to firmware (internal software) (internal software) Update
- Select the downloaded firmware (internal software) (internal software) file (. bin or .
- Click Update — the process takes 2–4 minutes; do not disconnect USB or power off during update
- The printer automatically reboots after the update completes
- Verify the firmware (internal software) (internal software) version in Tools → Self Test or the self-test printout
Important: A firmware (internal software) (internal software) update does not perform a factory reset — your settings are preserved. However, on rare occasions after a major version update, re-running sensor calibration is recommended as sensor threshold algorithms may have changed.
Running a Self-Test Print
The XD5-40 self-test is a critical diagnostic tool — it prints a summary of all current settings values including firmware (internal software) (internal software) version, interface settings, baud rate, print density, sensor type, label length, calibration values. Memory switch states.
- You receive the printer for the first time and want to document its starting settings
- Before and after any significant settings change, to compare settings
- When troubleshooting, to confirm whether settings are what you expect
- After a firmware (internal software) (internal software) update, to verify the update completed successfully
To print a self-test: navigate to Tools → Self Test and confirm. The printer feeds one or more labels printed with settings data. Alternatively, power on while holding the FEED button to trigger the self-test directly from startup.
For the complete Bixolon error code reference across all product lines, see the Bixolon printer error codes master guide.
Preventive Maintenance Schedule
High-volume XD5-40 deployments (500+ labels/day) benefit from a proactive maintenance schedule. Most errors that appear as "sudden" failures are actually the end result of gradual sensor contamination, platen wear, or adhesive buildup that could have been caught earlier.
| Frequency | Task | Method |
|---|---|---|
| Every roll change | Wipe printhead edge | Lint-free IPA swab across full head width |
| Every roll change | Re-run Gap Cal or B/M Cal | Settings → Sensor → appropriate Cal type |
| Weekly | Clean gap + reflective sensors | IPA swab on sensor windows with media removed |
| Weekly | Wipe platen roller | Slightly damp IPA cloth — rotate roller while wiping |
| Monthly | Print Head Check | Tools → Head Chk — document result |
| Monthly | Self-test print | Tools → Self Test — file for settings record |
| Quarterly | Check firmware (internal software) (internal software) version, update if available | bixolon. |
XD5-40 vs XD3-40: Key Differences for Troubleshooting
If you also manage XD3-40 printers alongside the XD5-40, be aware that while the two models share the same general LED color scheme, there are important differences:
- The XD5-40 has an LCD display for direct menu navigation — the XD3-40 does not; it relies entirely on the Unified Label Utility-II for settings
- The XD5-40 supports an optional auto-cutter — the XD3-40 does not have this option, so the Red Blink + Red Blink (cutter error) code will never appear on an XD3-40
- The XD5-40 has a print speed advantage (6 ips vs 4 ips on the XD3-40) — overheating errors are more likely on the XD5-40 at maximum throughput
- The XD5-40 supports both gap and black-mark sensing natively — the XD3-40 variant determines sensing type by hardware settings
For complete XD3-40 specific error troubleshooting, see the XD3-40 error and calibration guide.
For Bixolon SRP-Q300 and other receipt printer LED error codes, see the SRP-Q300 error light guide.
Frequently Asked Questions
Why does the Bixolon XD5-40 keep showing a Media Jam error even with a new roll?
A Media Jam error (Red On + Orange On) with a brand new roll is almost always a calibration mismatch, not an actual jam. When you switch to a new label stock — especially if it's a different brand, size, or liner type — the gap sensor's stored calibration thresholds may no longer match the new media's optical profile.
How do I get the Bixolon XD5-40 into the settings menu?
Press the Menu button on the front panel (the button labeled MENU or with a menu icon, depending on firmware (internal software) (internal software) version). The LCD display switches from the ready screen to the main menu.
What's the difference between Gap Cal and B/M Cal on the XD5-40?
Gap Cal (Gap Calibration) uses the transmissive optical sensor — two lens elements facing each other across the media path — to detect the gap (transparent or semi-transparent space) between individual die-cut labels. It's the correct mode for standard label rolls with physical spaces between each label.
The Bixolon XD5-40 prints barcodes that don't scan. What's wrong?
Several issues can produce visually acceptable barcodes that fail to scan reliably: (1) A dead printhead element creating a white gap within a barcode bar — run Tools → Head Chk to check. (2) Print density too low — bar edges are ragged at low density, which some scanners reject.
The XD5-40 overheats frequently. Is the printhead dying?
Frequent overheating errors (Red On + Green Blink) are not usually a sign of a failing printhead — they're a sign that the thermal load on the head is consistently exceeding the cooling capacity. Before assuming hardware failure: (1) Check ventilation — the printer needs at least 4 inches of clearance on all sides.
Does factory resetting the XD5-40 delete the firmware (internal software) (internal software)?
No. A factory reset only clears the settings data stored in non-volatile memory — settings like IP address, print density, sensor calibration values.
