


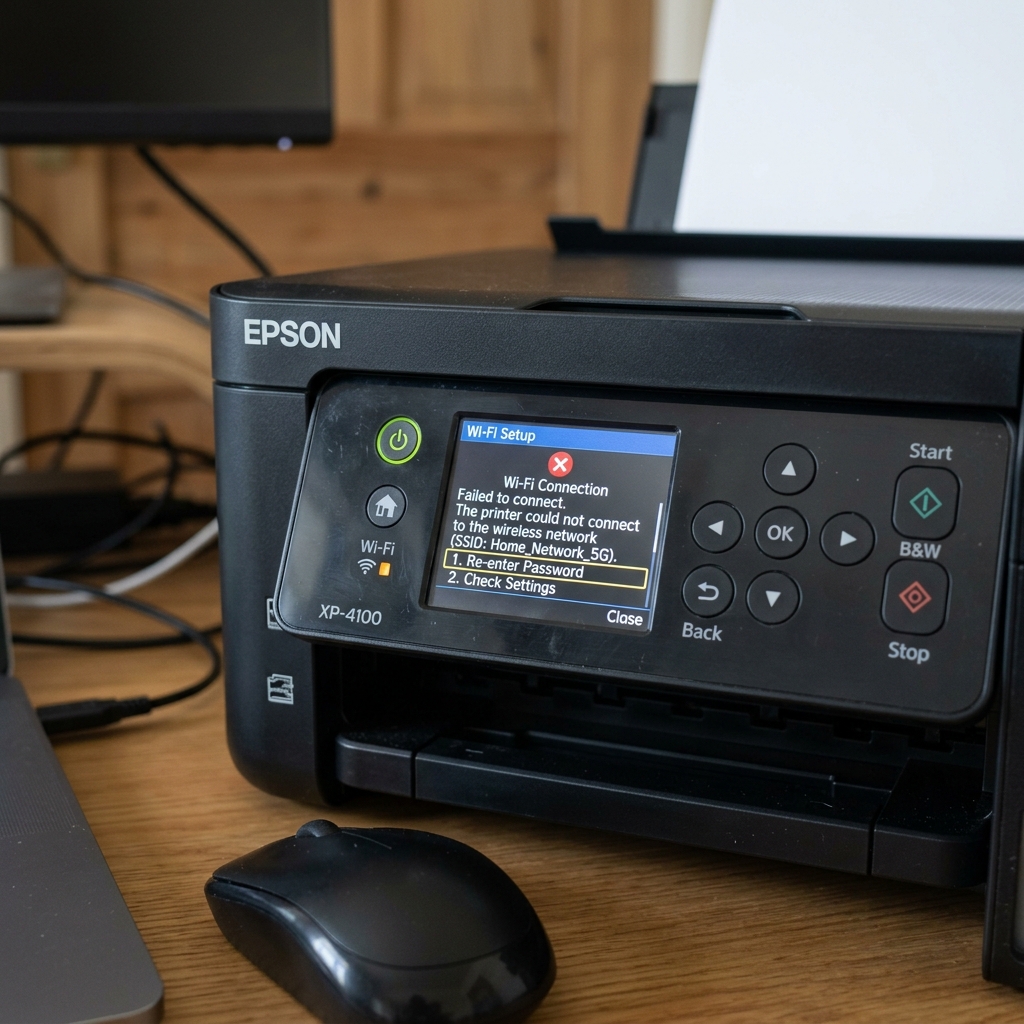
The Dual-Band Router Dilemma
The Epson Expression XP-4100 and EcoTank ET-2400 are excellent budget-friendly printers. However, to keep costs low, Epson equips them with older, single-band Wi-Fi chips. These printers can only communicate on the 2.4GHz Wi-Fi frequency. They cannot even see 5GHz networks.
Modern internet providers (like Comcast, Xfinity, and AT&T) issue "Smart" dual-band routers. These routers broadcast both 2.4GHz and 5GHz under a single, merged network name (SSID), and try to auto-assign devices to the best band.
The XP-4100 and ET-2400 almost always fail to negotiate this handshake, resulting in endless "Connection Failed" errors during setup.
Fix 1: Separate Your Wi-Fi Bands (The Bulletproof Fix)
To get the printer to connect, you must force it onto a dedicated 2.4GHz channel.
- Log into your home router's admin panel (usually by typing
192.168.1.1or10.0.0.1into a web browser on your computer). - Navigate to the Wireless Settings or WLAN tab.
- Look for an option labeled "Smart Connect," "Band Steering," or simply look at the network names.
- Disable Smart Connect, and rename the two bands so they are distinct. For example, name one
MyNetwork_2Gand the otherMyNetwork_5G. Save the settings and let the router restart. - Go to your Epson printer. Run the Wi-Fi Setup Wizard, select
MyNetwork_2G, and enter your password. It will connect instantly.
Note: Once the printer is on the 2G network, your laptop or phone can be on the 5G network, and they will still be able to send print jobs to it (as long as both networks share the same local subnet).
Fix 2: The WPS Button Timeout
If you are trying to set up the printer by pressing the WPS button on your router, timing is everything. A common mistake is pressing the button on the router, walking away to make coffee, and then pressing the button on the printer 5 minutes later.
WPS mode only stays active for exactly 120 seconds for security reasons. You must initiate WPS on the printer's screen, walk immediately to the router, press and hold the WPS button for 3 seconds until its light flashes, and wait for the printer to confirm.
If it fails, move the printer closer to the router just for the initial setup.
Fix 3: The USB Cable Bypass
If you absolutely cannot get the printer to connect to your Wi-Fi using its own screen or buttons, use your computer as a bridge.
- Download the official Epson software package for the XP-4100 or ET-2400 to your Windows or Mac computer.
- Begin the installation. When it asks how you want to connect, select Wireless.
- When it fails to find the printer on the network, it will eventually prompt you to temporarily connect a USB cable.
- Plug a standard USB printer cable from the printer to your PC. The Epson software will instantly read your PC's saved Wi-Fi passwords and push them directly into the printer's brain over the cable.
- Once the software confirms the printer is on the Wi-Fi, it will tell you to unplug the USB cable. Setup is complete!
Why the Epson XP-4100 and ET-2400 Struggle with Wi-Fi Pairing
The Epson Expression Home XP-4100 and EcoTank ET-2400 are popular compact wireless all-in-ones. Because they utilize single-band 2.4GHz 802.11b/g/n wireless adapters without 5GHz support, pairing them to modern dual-band mesh Wi-Fi networks (such as eero, Google Nest WiFi, and Netgear Orbi) frequently fails due to automatic 5GHz band steering.
Step-by-Step Wireless Recovery for XP-4100 and ET-2400
- Use the Epson Smart Panel Mobile App (Direct Bluetooth Setup):
- Download Epson Smart Panel on your iOS or Android smartphone.
- Enable Bluetooth and Location on your phone.
- Turn on the printer. Open the app and tap the
+icon. - The app uses Bluetooth to discover the printer and automatically injects your phone's 2.4GHz Wi-Fi credentials into the printer memory.
- Temporarily Disable 5GHz on Your Mesh Router:
In your mesh router app, pause or turn off the 5GHz frequency for 15 minutes during printer setup. Once the Epson printer establishes a stable 2.4GHz link, re-enable the 5GHz radio.
- Run the On-Screen Wi-Fi Setup Wizard (XP-4100):
On the XP-4100 color LCD: Navigate to Settings > Network Settings > Wi-Fi Setup > Wi-Fi Setup Wizard . Select your network name and enter the WPA2 key. Note: password entry is case-sensitive.
- Push-Button Wi-Fi Setup for ET-2400 (Non-Screen Model):
Press and hold the physical Wi-Fi button on the ET-2400 for 5 seconds until the Wi-Fi and Wi-Fi Direct LEDs flash alternately. Within 2 minutes, press the WPS button on your router.
Frequently Asked Questions
Why does the Wi-Fi light flash green and orange alternately?
Alternating green/orange Wi-Fi flashing indicates an authentication rejection (wrong Wi-Fi password) or an unsupported security mode (such as WPA3-only).
Can I set a Static IP on the XP-4100 and ET-2400?
Yes. Access the printer's Embedded Web Server (type its IP into a browser), navigate to Basic Settings > Network, and change IP settings from DHCP to Manual.
