


"Parts inside your printer are at the end of their service life"
It is the most frustrating error in the Epson ecosystem. You go to print a document, and your printer completely locks up, displaying a warning that its internal parts are at the end of their service life.
This sounds like a fatal mechanical failure, but it is actually a programmed software lock related to a piece of sponge.
What is the Waste Ink Pad?
Every time your printer runs a cleaning cycle, turns on, or prints borderless photos, it purges excess ink to keep the microscopic printhead nozzles clear. This waste ink doesn't magically disappear; it is pumped via a silicone tube into a plastic tray filled with dense felt pads at the bottom of the printer.
This is the Waste Ink Pad (or Maintenance Box).
The printer has no physical liquid sensor to know when this pad is actually overflowing. Instead, a chip on the motherboard (the EEPROM) simply counts every drop of ink pumped.
Once that counter reaches a mathematical limit (usually around 6,000 to 10,000 pages), the printer locks itself to prevent black ink from overflowing onto your desk.
The Two-Part Fix
Fixing this error requires addressing both the digital counter (so the printer will turn on again) and the physical pad (so it doesn't actually leak). Doing one without the other is a recipe for disaster.
Step 1: The Digital Reset (WIC Reset Utility)
Since this is a software lock, no amount of unplugging or pressing buttons will clear it. You must rewrite the EEPROM memory using specialized software.
- Connect your printer to your Windows or Mac computer using a physical USB cable. (Firmware tools cannot reliably communicate over Wi-Fi).
- Download the WIC Reset Utility (Waste Ink Counter Reset). This is an industry-standard, third-party tool used by repair technicians globally.
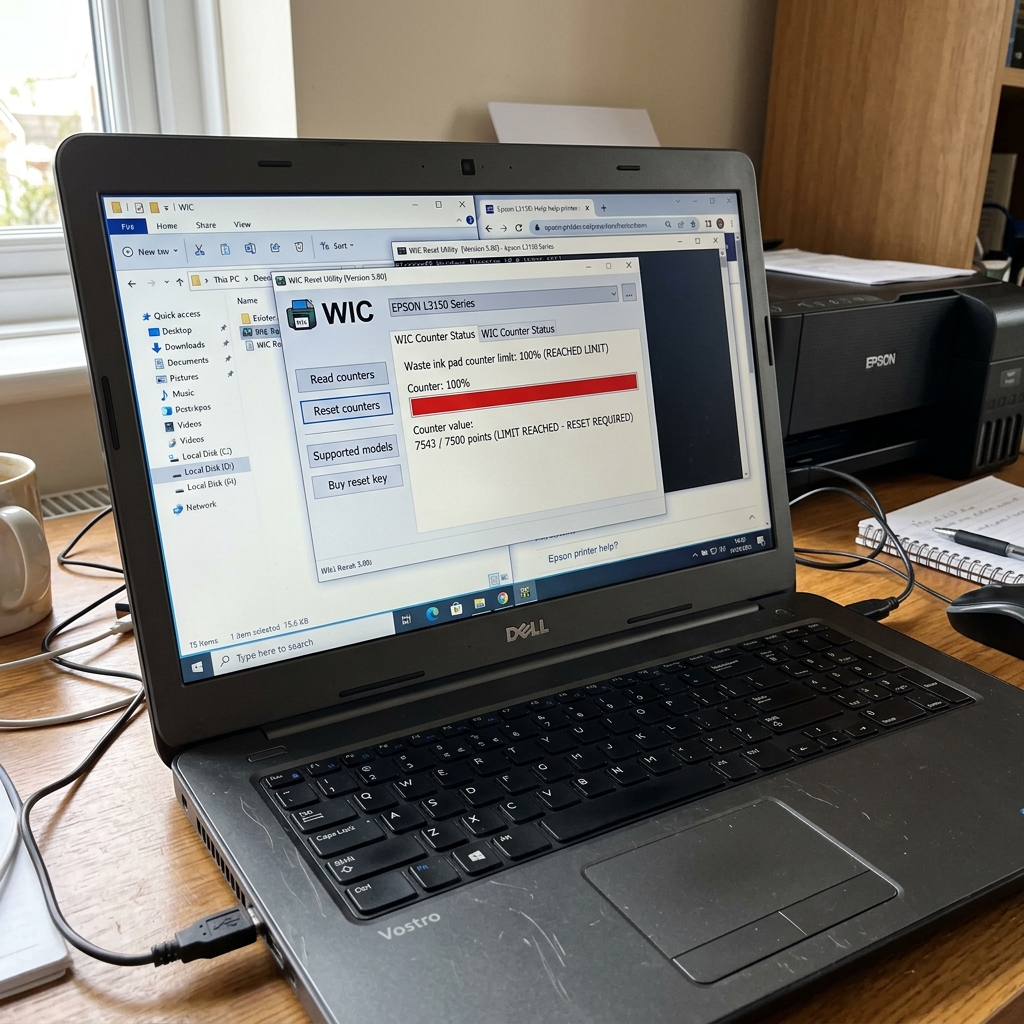
- Open the software. It will detect your printer model. Click the button to Read Waste Counters. It will likely show a value of 100% or higher.
- Click Reset Waste Counters . The software requires a digital key to perform the reset. You can purchase these keys for about $10 from various authorized WIC resellers online.
- Input the key, wait for the software to rewrite the EEPROM, and turn the printer off and back on when prompted. Your printer will now function normally.
Note: Some newer EcoTank models have a user-replaceable maintenance box with a green microchip on it. For these models, you do not need the WIC utility. You simply buy a new box, pop it in, and the new chip resets the printer automatically.
Step 2: The Physical Pad Replacement
Now that the printer works, you have a ticking time bomb. The software thinks the pad is empty, but physically, it is still soaked in years of waste ink. If you run another cleaning cycle, it will overflow.
- Locate the waste ink box. On most Epson models, there is a small panel on the back or bottom right side held by a single Phillips-head screw.
- Remove the screw, slide the panel off, and pull the plastic tray out. (Wear gloves!).
- Option A (Recommended): Throw away the soaked pads and buy a set of replacement felt pads for your specific model online (usually $5 to $15). Stuff the new pads into the plastic tray and reinsert it.
- Option B (The Messy Way): Remove the soaked pads, place them in a bucket of warm soapy water, and squeeze them out until the water runs clear. Let them air dry in the sun for 24-48 hours. They will shrink slightly and lose some absorbency, but they will work for one more lifecycle. Do not put them back in wet.
The Permanent Mod: External Waste Ink Tank ("Printer Potty")
If you do high-volume printing or sublimation and find yourself hitting the waste limit frequently, consider bypassing the internal pads entirely. You can detach the internal waste ink tube, route it through a hole in the back chassis, and connect it to an external plastic bottle.
This modification (often called a "Printer Potty") means you never have to change physical pads again—you just unscrew the external bottle and dump it in the trash when it gets full. You will still have to buy a WIC reset key to clear the digital counter when it hits 100%, but the physical mess is completely eliminated.
The Truth About the Epson Waste Ink Pad Counter Lockout
Every time an Epson printer powers on, primes nozzles, or executes cleaning cycles, waste ink is pumped into porous felt absorber pads in the chassis base. An internal EEPROM counter monitors this waste volume.
When the counter reaches 100% (typically 10,000 to 20,000 pages), the firmware locks the machine with "Parts inside your printer are at the end of their service life".
WIC Reset Utility vs. Epson Official Adjustment Program
| Feature | WIC Reset Utility | Epson Adjustment Program (AdjProg) |
|---|---|---|
| Compatibility | Windows, macOS, and Linux supported | Windows only (XP through Windows 11) |
| Cost | Free 80% trial reset; ~$10 for one-time full reset key | Free official utility (service centers) |
| Execution Method | 1-click GUI via USB connection | Select "Particular Adjustment Mode > Waste Ink Pad Counter > Check > Initialize" |
Frequently Asked Questions
Will resetting the counter stop ink from overflowing?
Resetting the electronic counter clears the software lock, but the physical felt pad inside your printer is still holding waste ink. If this is the first reset, the sponges usually have 20% reserve capacity.
Can I reset the waste ink counter over Wi-Fi?
No. Reset utilities communicate directly with the printer's EEPROM flash registers and require a stable, direct USB cable connection.
