


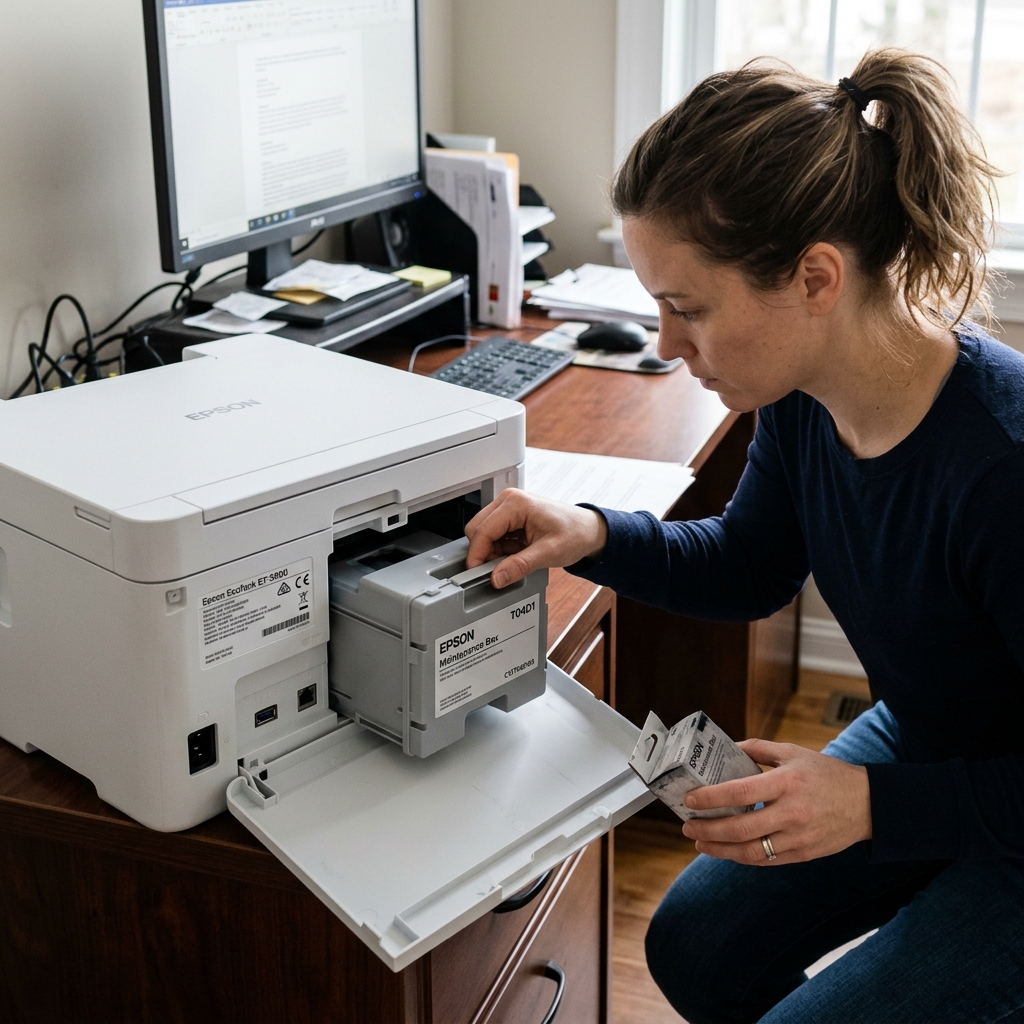
The Inevitable Maintenance Box Error
Every Epson printer generates waste ink during automatic head cleaning cycles. This ink is routed into a plastic tray filled with absorbent felt pads, known as the Maintenance Box (or Waste Ink Pad).
Eventually, the printer will display an error stating that the maintenance box is full, and it will lock you out of printing until it is resolved.
You essentially have two paths forward: buy a completely new replacement box, or extract the old box and clean it yourself. Here is the financial and practical breakdown of both options.
Option 1: Buying a Replacement Box (The Cost)
On modern Epson EcoTank and WorkForce Pro models (such as those using the T04D1, T0212, or T6716 maintenance boxes), Epson has made the box highly accessible. It usually sits behind a single plastic panel on the back or bottom right of the printer, secured by one Phillips-head screw.
The Financial Cost:
- Official Epson OEM Boxes: Typically cost between $15.00 and $25.00 depending on the size of the printer.
- Third-Party Generic Boxes (Amazon/eBay): Typically cost between $9.00 and $12.00.
Crucially, these modern replacement boxes feature a small green microchip on the side. When you install the new box, the printer reads the new chip, instantly realizes the box is empty, and clears the error code automatically. There is no software resetting required.
The Verdict: If your printer uses a chipped, user-replaceable maintenance box, buying a $10 third-party replacement is absolutely the best route. It takes two minutes, involves zero mess, and resets the software instantly.
Option 2: The DIY Wash Method
If you own an older EcoTank (like the L3110), an older Artisan model, or if you simply don't want to wait three days for Amazon to deliver a replacement box, you can clean the existing box yourself.
The Process:
- Remove the single screw on the back of the printer and slide the plastic waste ink tray out. (Wear rubber gloves; it will be dripping with thick, black sludge).
- Take the tray to a utility sink. Pull the soaked felt pads out of the plastic tray.
- Run warm, soapy water over the pads, squeezing them repeatedly. You will need to squeeze them dozens of times until the water runs relatively clear.
- Place the pads in the sun or in a warm, dry place. They must air dry for at least 24 to 48 hours. Putting wet pads back into the printer will cause mold or prevent them from absorbing new ink properly.
- Stuff the dried, slightly shrunken pads back into the plastic tray and reinstall it in the printer.
The Hidden Cost of DIY:
If your maintenance box has a microchip, simply washing the pads will not clear the error. The microchip still thinks it is at 100% capacity. You will have to buy a physical "Chip Resetter" tool (usually $15) to zero out the chip.
If your older printer doesn't use a chipped box (it uses an internal EEPROM counter), washing the pads is free, but you still have to buy a digital WIC Reset Key (usually $10) to reset the motherboard's internal counter.
The Verdict: Washing the pads is incredibly messy, takes two days of drying time, and you still have to spend $10 to $15 on a chip resetter or WIC key. Therefore, DIY cleaning actually costs the exact same amount of money as just buying a brand-new third-party replacement box.
DIY should only be used in an absolute emergency where you cannot wait for shipping.
The Economics & Engineering of the Epson Maintenance Box
Modern Epson EcoTank and WorkForce printers utilize a dedicated, user-replaceable Maintenance Box (Waste Ink Box) equipped with absorbent porous felt pads and an integrated microchip (e.g., T04D1, T6716, T04D0). The maintenance box captures waste ink flushed during nozzle cleaning cycles and borderless printing.
DIY Maintenance vs. OEM Box Replacement Comparison
| Attribute | OEM Maintenance Box Replacement | DIY Sponge Wash & Chip Reset |
|---|---|---|
| Average Cost | $12 - $25 (Genuine Epson OEM) | $0 (Washing) + $10 (One-time Chip Resetter tool) |
| Installation Time | 2 minutes (Single flathead screw on rear/side) | 48 hours (Required drying time for washed sponges) |
| Mess & Risk | Zero mess; sealed disposable plastic cartridge | High ink stain risk; gloves and protective apron required |
Step-by-Step Maintenance Box Replacement Protocol
- Turn off the printer power.
- Locate the maintenance box access cover on the rear or side of the machine.
- Loosen the single flathead or Phillips screw holding the plastic cover and remove the door.
- Slide out the old maintenance box cartridge.
- Insert the brand-new maintenance box until it clicks into its guide rails.
- Reattach the access door and tighten the screw. Turn on the printer — the maintenance counter will reset to 0% automatically via the new box's microchip.
Frequently Asked Questions
Can I wash and dry the felt pads inside the maintenance box?
Yes. You can wear rubber gloves, remove the felt pads, wash them thoroughly in warm running water until the water runs clear, squeeze them out, let them dry completely in the sun for 48 hours, and reinstall them.
How many pages does a typical Epson maintenance box last?
Under standard office printing conditions, an Epson maintenance box lasts between 15,000 and 30,000 pages or approximately 2 to 3 years of automated cleaning cycles.
