


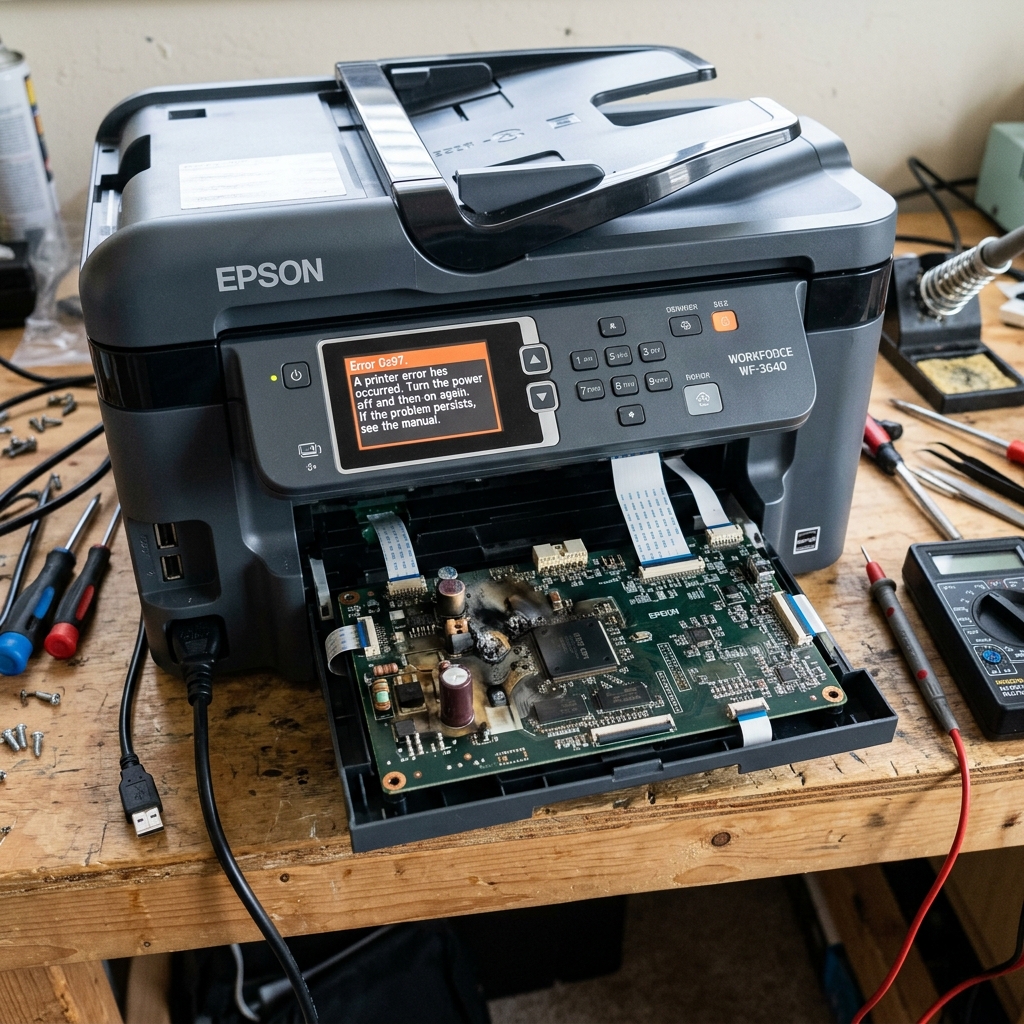
The Technical Reality Behind Epson Error 0x97
If you own an Epson WorkForce printer (especially models like the WF-3620, WF-3640, WF-4630, or WF-7620) and suddenly receive Error Code 0x97, you are facing one of the most notorious hardware failures in the printing world.
Many online guides will tell you to "clean the printhead with a wet paper towel" or "unplug the printer for five minutes." While a power drain works in roughly 5% of cases caused by a transient static spike, the harsh reality is that Error 0x97 is a fatal internal hardware failure.
It specifically indicates a loss of communication or a power surge detected on the mainboard related to the printhead's piezoelectric driving circuit.
What Actually Breaks Inside the Printer?
Inside an Epson printer, the mainboard sends high-voltage pulses to the printhead to fire ink droplets. When ink accidentally leaks onto the golden electrical contacts of the printhead ribbon cable (often due to aggressive syringe cleaning, a leaking third-party cartridge, or simply wear and tear), it bridges two pins and causes a massive short circuit.
When this short happens, the energy violently surges back up the ribbon cable to the mainboard. This surge usually destroys two components:
- The Printhead IC: The internal circuitry of the printhead melts.
- The Mainboard Transistors & Fuses: The surge blows the tiny surface-mount (SMD) fuses labeled
F1orF2on the motherboard, and frequently fries the main driving transistors (the large black chips attached to a metal heatsink on the board).
Diagnostic Step 1: The Power Drain (The 5% Hope)
Before breaking out a multimeter, always rule out a simple static charge buildup. Unplug the printer from the wall.
Press and hold the printer's physical power button for 60 seconds to drain all residual capacitance from the power supply unit. Leave it unplugged for an additional 10 minutes.
Plug it directly into a wall outlet (bypass any surge protectors) and turn it on. If 0x97 returns instantly, the hardware is fried.
Diagnostic Step 2: Isolating the Short (Motherboard vs. Printhead)
If you want to repair the printer, you must determine which components are destroyed. Do not just buy a new printhead.
If your motherboard is shorted and you plug a brand new $100 printhead into it, the bad motherboard will instantly send a surge and fry the new printhead. Conversely, plugging a shorted printhead into a new motherboard will fry the new motherboard.
To isolate the fault:
- Unplug the printer and open the chassis to expose the motherboard (usually located on the right or rear side behind a metal shield).
- Locate the wide, flat, white ribbon cables connecting the motherboard to the printhead carriage.
- Carefully unplug only the printhead ribbon cables from the motherboard. Leave the scanner, motors, and sensors plugged in.
- Plug the printer in and turn it on.
Interpreting the Results:
- Scenario A: The error changes to 0x43 (or similar "Printhead not detected" code). This is the best-case scenario. It means your motherboard is alive and correctly realizing the printhead is missing. Your short is isolated to the printhead alone. You can safely replace the printhead.
- Scenario B: The error remains 0x97. This means the motherboard itself is damaged. Even with the printhead completely removed, the board is failing its own internal power checks. You have blown the F1/F2 fuses or the transistors.
The Repair Reality: Is It Worth It?
If your motherboard is blown (Scenario B), repair is rarely economical for a consumer. To fix it, you would need to either:
- Buy a replacement motherboard AND a replacement printhead (because the printhead is likely what caused the board to blow in the first place). The combined cost usually exceeds the price of a brand new printer.
- Use a soldering iron and a multimeter to test the
F1SMD fuse for continuity. If it's blown, you can solder a replacement fuse (or piggyback a new one). You must also test the NPN/PNP transistors for shorts. This requires advanced micro-soldering skills.
For 95% of users, an entrenched 0x97 error means it is time to harvest the printer for parts and purchase a new machine. It is a catastrophic failure equivalent to a blown engine block in a car.
The Truth About Epson Error Code 0x97 (Blown Mainboard Circuit)
Error Code 0x97 is the most critical hardware fault in Epson desktop printing. It indicates that the mainboard's high-voltage DC-DC converter detected a catastrophic electrical over-current event on the +42V piezo drive line.
In 80% of cases, 0x97 is triggered when liquid ink leaks past the internal printhead gasket and pools into the ribbon cable connector, shorting the high-voltage pins and blowing the mainboard's surface-mount F1/F2 protection fuse.
Emergency 5-Step Diagnostic & Recovery Protocol
- The 1-Hour Complete Power & Capacitor Discharge:
- Unplug the power cord from the wall outlet and the back of the printer.
- Disconnect all USB and network cables.
- Open the scanner lid and remove any jammed paper scraps.
- Press and hold the physical Power button for 60 seconds while completely unplugged.
- Leave the printer disconnected for at least 1 hour to allow high-voltage MOSFETs and capacitors to discharge completely.
- Reconnect power directly to a wall socket (no power strips) and attempt power-on.
- Inspect Printhead Flat Flexible Ribbon Cables (FFC):
Open the carriage casing. Inspect the white ribbon cables plugging into the printhead. If blue/black ink residue is visible inside the connector socket, liquid ink has shorted the pins. Clean the cable ends and sockets with 99% isopropyl alcohol and allow 2 hours to dry before testing.
- Understanding Motherboard F1/F2 Fuse Status:
If the printer powers on normally after the 1-hour rest but prints completely blank pages with zero ink, the logic board's F1/F2 pico-fuse blew to protect the CPU during the 0x97 event. Resolving blank prints requires micro-soldering a replacement 0.5A fast-blow fuse or swapping the mainboard.
Frequently Asked Questions
Can Error 0x97 be fixed permanently without replacing parts?
If Error 0x97 was triggered by an electrical line power surge or static discharge, the 1-hour power drain resolves it permanently in about 20% of cases. If caused by an internal ink leak short, replacing the printhead and mainboard fuse is required.
Is Error 0x97 covered under Epson warranty?
Yes. If your printer is within its 1-year or 2-year warranty period and you used genuine Epson ink, Epson will replace the entire printer under warranty for Error 0x97.
