


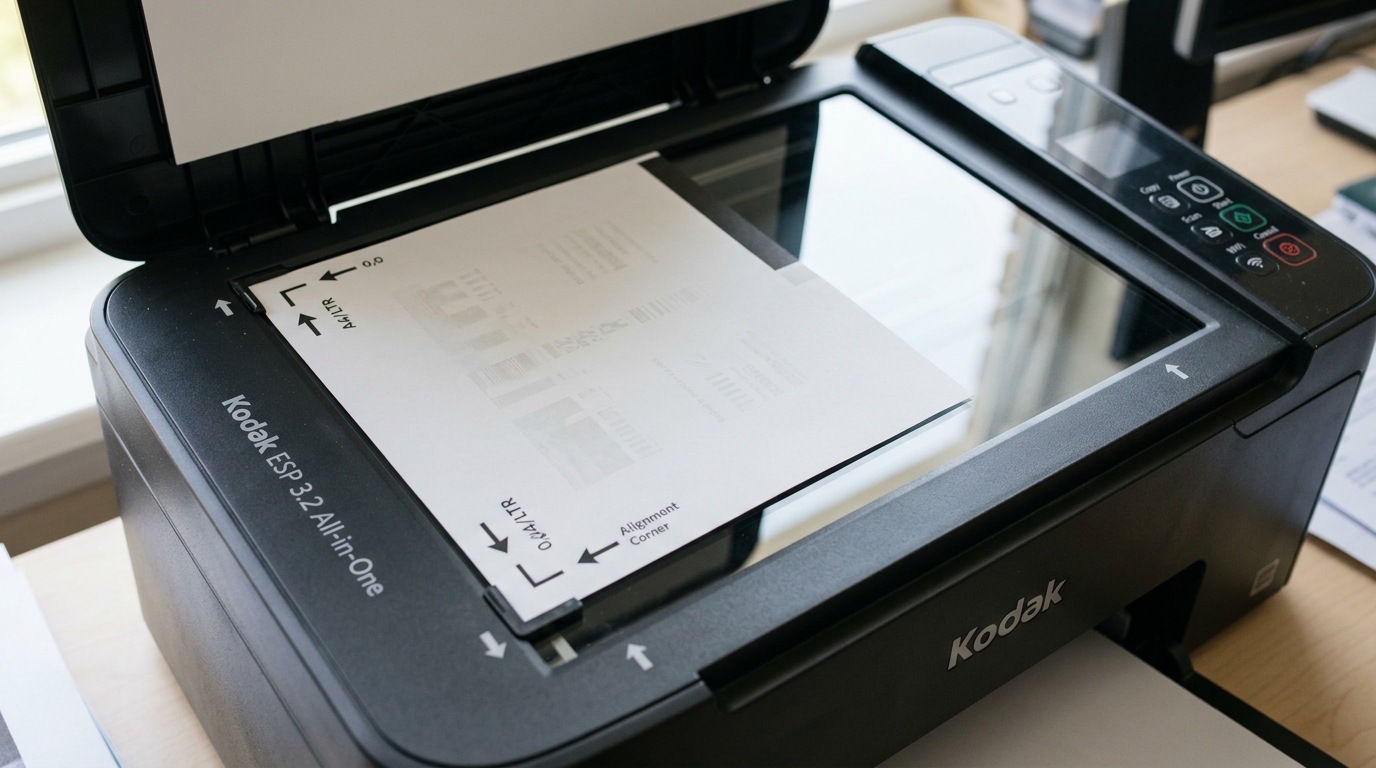
A "Calibration Failed" or "Alignment Failed" error on Kodak ESP and Hero All-in-One printers is a common print-halt condition. This occurs during initial setup, printhead replacement, or after swapping ink cartridges.
To align the nozzles, the printer prints an alignment page containing patterns of black and color blocks, which you must then scan on the scanner glass. If the printer's onboard optical reader or flatbed scanner cannot read the lines, the calibration cycle fails.
Let's work through the troubleshooting steps systematically.
Diagnostic Checklist for Alignment Failures
Identify which subsystem is causing the calibration lock by verifying the output sheet and scanner parameters:
| Calibration Phase | Observed Defect | Root Cause |
|---|---|---|
| Phase 1: Test Page Print | Missing lines, horizontal white gaps, or faded bars on the alignment sheet. | Clogged printhead nozzles preventing the printer from printing the required scan markers. |
| Phase 2: Page Placement | No scanner motor sound, or the scanner lens moves but errors immediately. | Crooked page placement, incorrect corner alignment, or page placed face-up. |
| Phase 3: Image Acquisition | Printer scans the page but reports 'Alignment Failed' after 30 seconds. | Smudged scanner glass, dusty calibration strip under the bezel, or loose scanning belt. |
Step 1: Verify the Quality of the Printed Sheet
The single most common cause of an alignment failure is a poor-quality printout of the test sheet itself. The printer's firmware is programmed to look for specific coordinates and density of color blocks.
If ink nozzles are clogged, the printed blocks will have missing stripes, and the scanner will reject the sheet as incomplete.
- Examine the printed alignment sheet. Look for solid black, magenta, cyan, and yellow blocks.
- If you see horizontal white streaks cutting through the colored blocks, your printhead nozzles are clogged.
- Run a Printhead Clean cycle from the printer control panel under the Maintenance menu. Repeat up to 3 times, allowing 15 minutes between cycles for ink flow to stabilize.
- Print a Test Page. Once the test page prints cleanly with solid, solid-filled blocks and no streaks, run the alignment process again.
Step 2: Clean the Flatbed Scanner Glass
If the alignment sheet is perfect but the scan still fails, microscopic dust, fingerprints, or ink mist on the scanner glass can distort the optical reading, causing the scanner to miss the target patterns.
- Unplug the printer from the wall outlet.
- Open the scanner lid.
- Slightly dampen a clean microfiber cloth with distilled water or glass cleaner. **Never spray cleaner directly onto the glass**, as liquid can seep under the bezel and short-circuit the scan bar.
- Wipe the scanner glass thoroughly. Pay close attention to the **front-left corner** where the scanner glass calibration strip resides. Wipe away all grease, fingerprints, and paper lint.
- Dry the glass completely with a dry section of the microfiber cloth.
Step 3: Precise Page Alignment and Orientation
The flatbed scanner reads the coordinates of the page based on the physical corner stops. Placing the sheet even slightly crooked will result in an alignment failure.
- Place the printed alignment sheet **face-down** on the scanner glass.
- Align the top-left corner of the page with the **front-left corner** of the scanner frame (marked with a small arrow icon).
- Ensure the paper rests flat against the plastic guide borders.
- Close the scanner lid completely. Do not hold the lid up or press down with excessive force during scanning, as this changes the focal distance of the scanner lens.
- Press the **Start** button on the control panel to begin the scanning phase.
Step 4: Bypass the Onboard Alignment Loop
If you are in a rush and need to bypass the loop (noting that print quality might be slightly misaligned for photos):
- On older ESP models, you can press the **Cancel (X)** button during the scanning phase to skip the calibration.
- For LCD models, if the error screen appears, press the **Back** or **Home** button to return to the main menu. The printer will remain operational, but you should address the printhead quality as soon as possible.
Related Kodak Troubleshooting Guides
Technical Diagnostics for "Alignment Failed" on Kodak Printers
When a Kodak printer displays "Alignment Failed", "Calibration Error", or refuses to save printhead registration, the optical sensor on the carriage was unable to detect the printed test pattern with sufficient mathematical contrast. This calibration is essential for synchronizing the microsecond firing timing between bidirectional carriage sweeps.
Exhaustive Calibration Troubleshooting Workflow
- Verify Nozzle Output on the Alignment Sheet:
Look at the printed calibration page that just came out of the printer. It should contain crisp, dark black and color rectangular blocks with numbers.
If the black ink is faint, streaky, or missing completely, the optical sensor on the carriage reads a blank white sheet, triggering an instant failure. Run a Printhead Cleaning Cycle through the Maintenance menu to ensure 100% ink flow before attempting alignment.
- Use Standard Bright White 20 lb Copy Paper:
The optical calibration sensor is tuned specifically for standard 20 lb or 24 lb bright white bond paper (92+ brightness rating). Attempting alignment using colored paper, recycled gray paper, lined paper, or glossy photo paper alters the optical reflectance, causing the sensor to fail the contrast threshold test.
- Clean the Optical Line Sensor Lens on the Carriage:
On the bottom of the moving printhead carriage is an optical reflective sensor. Paper dust and aerosolized ink mist can coat the clear lens.
Turn off the printer, unplug it, move the carriage to the center, and wipe the miniature sensor lens on the bottom of the carriage with a clean, dry cotton swab.
- Manual Flatbed Calibration Step (For All-in-One Models):
On models like the ESP 5250, ESP 7250, and Hero 5.1/7.1/9.1, after the alignment pattern prints, you must place the sheet face-down on the flatbed scanner glass (top-left corner aligned with the guide arrow) and press Start / OK to complete the scan calibration.
Frequently Asked Questions
Can I bypass the alignment prompt and use the printer normally?
Yes. Press the Cancel (X) or Back button on the control panel to return to the home screen.
Why does the printer ask for alignment every time I power it on?
If an alignment routine is canceled or fails, the firmware does not set the "Alignment Complete" flag in EEPROM. Complete one successful calibration with fresh white paper to permanently clear the startup prompt.
