


The Hidden Cause of Blank Pages on EcoTank Printers
Epson's EcoTank series revolutionized home printing by ditching cartridges for massive ink reservoirs. However, this system introduces a new point of failure: the flexible silicone tubes that carry ink from the tanks to the moving printhead.
If air gets into these tubes, the printhead receives nothing but empty air, resulting in banded prints or completely blank pages.
Air usually enters the system if you let a tank run completely dry before refilling it, if the printer is stored at a harsh angle during a move, or if the internal ink damper (a mini-cartridge sitting on the printhead) loses its vacuum seal.
Why "Power Cleaning" is Often the Wrong Choice
Epson's official solution to air in the lines is to run a Power Cleaning (or "Power Ink Flushing") via the software utility. While this works, it has massive drawbacks:
- It wastes an incredible amount of ink. A single Power Clean can consume up to 20% of your tank's capacity, dumping perfectly good ink just to force air through the nozzle.
- It destroys your Maintenance Box lifespan. All that purged ink goes straight into the internal waste pad. Running 2 or 3 Power Cleans in a row will almost certainly trigger the dreaded "Waste Ink Pad is Full" error, bricking the printer until you replace the pad and reset the chip.
- It strains the piezoelectric printhead. Forcing high volumes of thick ink through microscopic nozzles generates heat and pressure that can damage older printheads.
The Hardware Fix: Manual Damper Priming with a Syringe
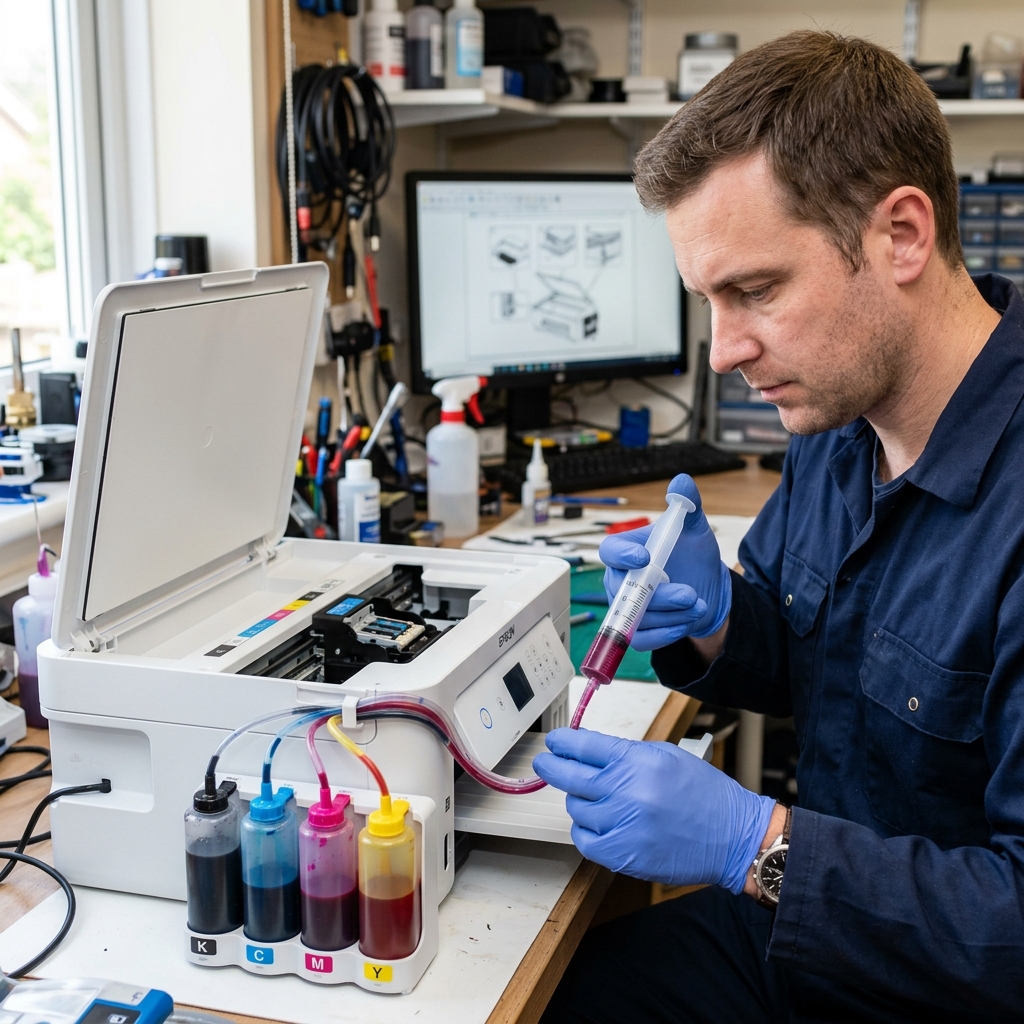
Instead of relying on the printer to forcefully pump the ink, you can manually bleed the lines. This uses zero excess ink, protects your maintenance box, and guarantees the air is removed.
You will need a standard 10ml plastic syringe and a blunt needle tip or a rubber silicone adapter (often sold as "printhead cleaning kits" online).
Step 1: Unlock the Printhead Carriage
Turn the printer on. When the printhead carriage begins to slide across the rail, immediately unplug the power cord from the wall. This leaves the carriage unlocked so you can freely move it to the center of the machine with your hands.
Step 2: Access the Ink Dampers
On top of the printhead carriage, you'll see a white or clear plastic cover securing the ink lines. Remove the single Phillips head screw holding this cover in place and unclip it.
Underneath, you will see four (or more) plastic components connected to the tubes. These are the dampers.
Their job is to filter the ink and maintain a steady vacuum pressure for the printhead below.
Step 3: Prime the Damper
Identify the damper with the air bubble in its tube. Gently unclip it by squeezing the small plastic tab at its rear and lifting it straight up. Do not disconnect the tube from the top of the damper.
Look at the bottom of the damper—you'll see a small circular valve. Insert your blunt syringe tip securely into this valve.
Slowly pull the plunger back. You should see the air bubble travel rapidly down the tube, into the damper, and into your syringe, followed by a solid flow of liquid ink.
Once the damper is mostly full of ink and the tube is completely solid, stop pulling. Any ink in your syringe can be carefully injected back into the main ink tank.
Step 4: Reassemble and Test
Push the damper back down onto its post on the printhead until it clicks securely. Replace the plastic tube cover and screw it down tight.
Plug the printer back in and power it on. Run a standard, basic Head Cleaning cycle (not a Power Clean) just to prime the final microscopic nozzles, and then print a Nozzle Check.
Advanced Troubleshooting: Vacuum Leaks
If you bleed the lines, but notice air bubbles returning a few days later, you have a vacuum leak. The EcoTank system relies on negative pressure.
If a damper is cracked, the plastic film on its side is punctured, or the seal where the tube meets the damper is compromised, air will slowly seep in over time.
In this scenario, manually priming will only work temporarily. You must purchase a replacement damper (they are inexpensive and widely available online) and swap it out.
To replace a damper, you simply unscrew the plastic nut holding the tube, pull the tube off, slide the nut onto the new damper, and reattach the tube.
