


The Quick Answer
The definitive map to setting your Munbyn to 4x6 on Windows, Mac, and Chromebooks—and the secret Windows menu to make the setting permanent.
Every shrunken label, every print split across two stickers, every barcode too small to scan — trace them back far enough and you nearly always arrive at the same place:
a size setting, somewhere in the chain, that doesn't say 4x6. This guide is the definitive map of Munbyn label size settings 4x6 across every system you'll print from — Windows, Mac, and Chrome/Chromebook — because the setting hides somewhere different on each one, and one of those hiding spots (Windows, naturally) has two nearly identical menus where only one of them actually makes your choice permanent.
That two-menu secret is my uncommon tip, and it's the answer to the most persistent complaint in label printing: "I set it to 4x6 and it keeps going back."
Quick Summary
- The rule everywhere: three layers — the document, the print dialog, the driver — must all say 4x6, with scaling at 100%.
- Windows: set 4x6 in Printing Preferences for yourself — but in Printing Defaults to make it permanent for everything. (The tip.)
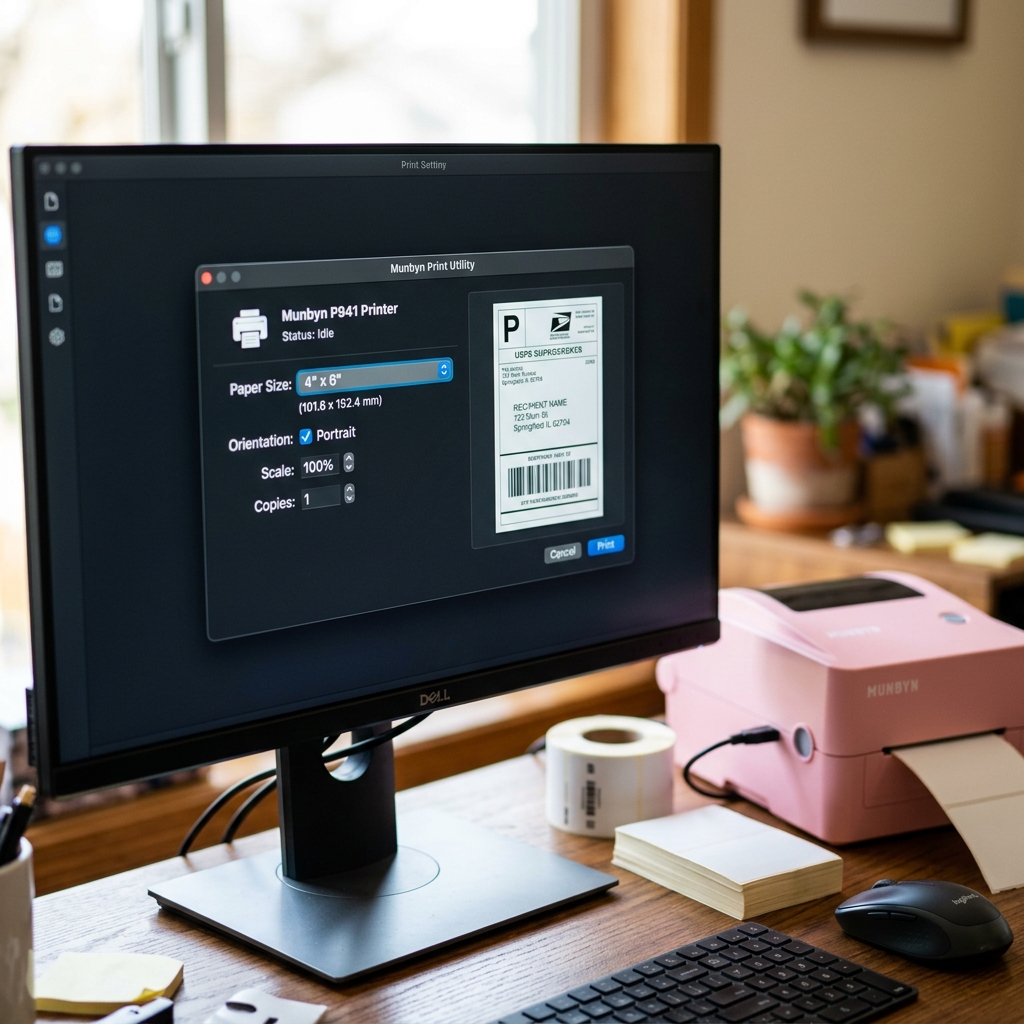
- Mac: choose 4x6 in the print dialog's Paper Size, and save it as a Preset so you never choose again.
- Chrome/Chromebook: 4x6 hides under the alias "oe w288h432 " — it's the same size in points.
- Always: calibrate the printer itself with every new roll; size settings can't fix an unmeasured printer.
First, the Three-Layer Rule
Every label passes through three checkpoints, each with its own opinion about paper size: the document (the PDF your platform generates — set your platform to produce 4x6 labels at the source), the print dialog (the window where you click Print — paper size 4x6, scale 100%/Actual Size, margins none), and the driver (your operating system's stored settings for the printer).
Any single layer set to Letter or "fit to page" quietly rescales everything the other layers agreed on.
Why this matters: people fix one layer, see the problem persist, and conclude size settings "don't work." They work perfectly — all three of them, multiplied together. Every fix below is just finding each layer's hiding spot on your system.
Windows: Preferences vs. Defaults (My Uncommon Tip)
Here's the one that generates the eternal complaint — "I set 4x6, it worked, and next week it was back to Letter" — and the answer is that Windows has two separate settings menus for the same printer, nearly identical in appearance, wildly different in authority.
Menu one — Printing Preferences: Settings → Bluetooth & devices → Printers & scanners → your Munbyn → Printing Preferences. Set the paper size to 4x6 here (look under Page Setup or Stock; if 4x6 isn't listed, create a custom size at exactly 4 x 6 inches / 100 x 150 mm and name it clearly).
This governs printing for your user account — and some applications cheerfully override or ignore it with their own remembered settings.
Menu two — Printing Defaults: same printer, but click Printer Properties instead, then the Advanced tab → Printing Defaults button. A dialog opens that looks identical to Preferences — same tabs, same fields.
It is not the same menu. This is the administrator-level default: the master copy that Preferences, new user accounts, and freshly-installed applications all inherit from.
Set 4x6 here, and it becomes the printer's constitutional default rather than a personal suggestion.
Set both to 4x6, Defaults first, and the "keeps reverting" problem dies permanently.
Why this works: Windows layers printer settings — Defaults at the foundation, Preferences per user, application dialogs on top — and each layer can shadow the one below. Setting only Preferences leaves the foundation saying Letter, so anything that reads from the foundation (new apps, other user accounts, some updates) resurrects Letter like a horror-movie villain.
Setting Defaults fixes the foundation itself. Almost nobody finds this button because it hides behind an Advanced tab inside a different properties window — and the dialog's identical appearance convinces people they've already done it.
Fifteen years in, showing customers this button remains one of my most reliable "wait, THAT existed?" moments.
Mac: The Print Dialog and the Preset Trick
macOS keeps paper size in the print dialog itself: File → Print, find Paper Size, choose 4x6 (often listed as 4x6 or 100x150 mm — with the correct Munbyn driver installed, the proper sizes appear; if you're seeing only generic sizes, your driver is wrong, which is its own fix). Need a custom entry?
Paper Size → Manage Custom Sizes → create 4 x 6 inches with zero margins and name it.
Then the trick that saves you forever: with paper size, orientation, and any scaling set correctly, open the Presets dropdown at the top of the print dialog and Save Current Settings as Preset — name it "Munbyn 4x6 Labels." From then on, printing a label is: pick the preset, click Print.
Why this works: macOS print settings are chosen per-job, which is flexible and forgetful. A preset bottles your entire correct configuration into one dropdown choice — the Mac equivalent of Windows' Printing Defaults, hiding politely in plain sight.
Chrome and Chromebook: Decoding w288h432
Chrome's print dialog (Ctrl+P) carries its own paper size list, and on Chromebooks especially, the 4x6 option often wears a disguise: "oe w288h432."
The decoder: Chrome measures paper in points, at 72 points per inch. 288 ÷ 72 = 4 inches wide. 432 ÷ 72 = 6 inches tall. w288h432 is exactly 4x6. Select it, open More settings, set Scale to 100 / default (not fit) and Margins to none, and print.
Why this works: the label was never missing — it was mislabeled, and one division problem turns the scariest option in the dialog into the obviously correct one. Chrome remembers your last-used settings per destination, which mostly helps — but remember it also remembers Letter after you print a packing slip, so glance at the size line whenever you've printed documents in between.
The Layer You Can't Set in Software
One reminder that belongs in every size article: the printer's own calibration is the physical fourth layer. Software declares the size; calibration is how the printer measures it.
Load four or more connected labels, hold FEED until one beep, release, hands off — with every new roll. A printer that hasn't measured its labels will misplace prints no matter how unanimously your software says 4x6.
Why this works: settings tell the printer what you intend; calibration tells it what's physically loaded. Positioning needs both, and only one of them lives in a menu.
When to Call a Professional
Size problems are solvable at the desk in nearly every case, so escalate only when the layers check out and reality still disagrees: if a self-test page (hold FEED during power-on) shows a stored label size that never matches a ruler no matter how often you calibrate, the gap sensor is suspect — that's a Munbyn support conversation with the self-test attached.
And if labels print correct-size from one computer but not another with identical settings, suspect the driver install on the failing machine: remove, reinstall for your exact model and DPI, and set Printing Defaults before anything else.
Beyond those two cases, the answer is on this page — go layer by layer.
FAQ
Why does my Munbyn keep resetting to Letter size in Windows?
You set Printing Preferences but not Printing Defaults — the hidden admin-level menu behind Printer Properties → Advanced → Printing Defaults. Set 4x6 there and the setting finally sticks.
What is "oe w288h432" in Chrome's print dialog?
That's 4x6 in points: 288 and 432 divided by 72 points-per-inch. It's the size you want for shipping labels on Chromebooks.
How do I save 4x6 settings permanently on a Mac?
Configure the print dialog once — paper size, margins, scale — then save it as a Preset. One dropdown choice recalls everything for every future label.
I set 4x6 everywhere and labels still print wrong. What's left?
The physical layer: calibrate the printer (4+ connected labels, hold FEED to one beep) and verify the stored size on a self-test page matches a ruler on your actual labels.
Munbyn label size settings 4x6 stop being a recurring battle the moment you know all the hiding spots: Printing Defaults on Windows (not just Preferences), a saved Preset on Mac, the w288h432 alias in Chrome — and a fresh calibration underneath it all. Set each layer once, the permanent way, and "wrong size" retires from your vocabulary along with every re-printed label it used to cost you.
