


The MegaTank Air Lock Problem
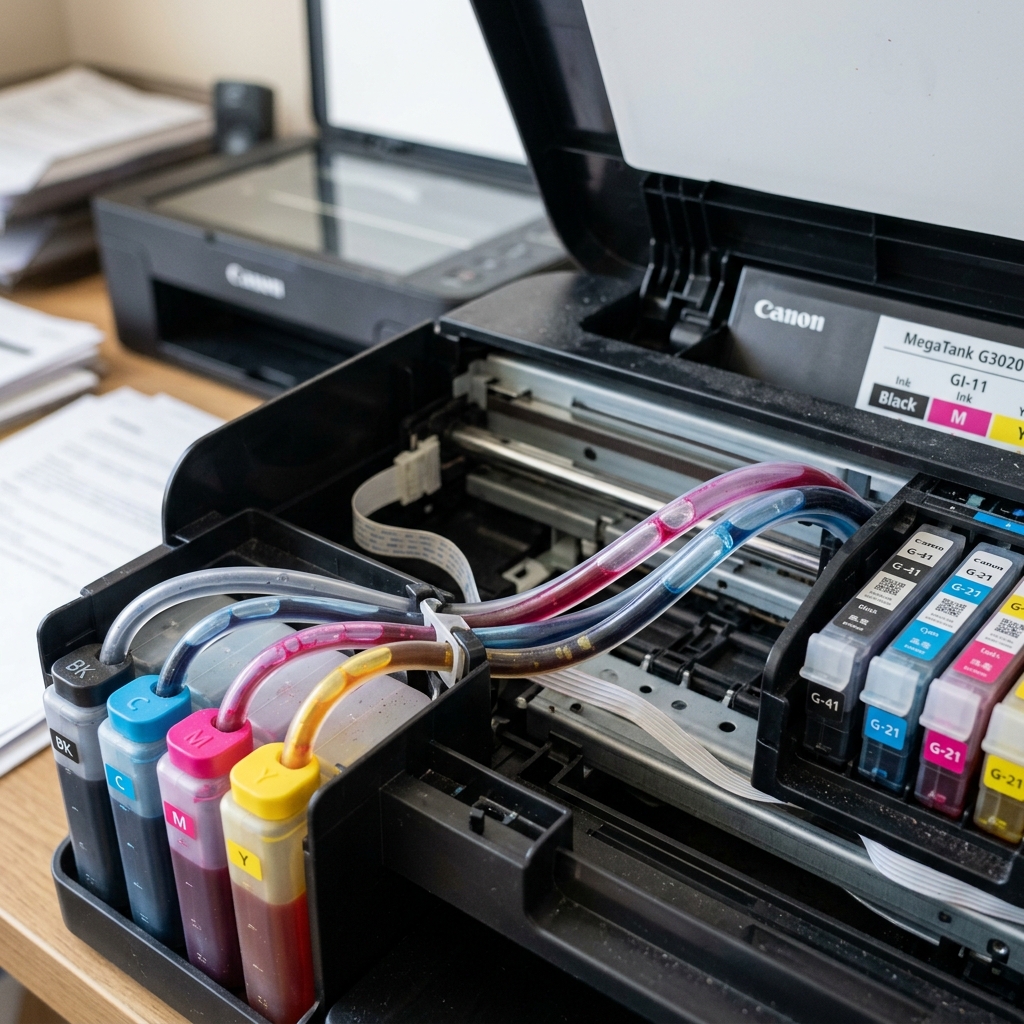
Canon MegaTank printers (such as the G2260, G3200, G4210, and others in the G-series) save you a fortune on ink by using refillable tanks instead of cartridges. However, this system relies on long, clear silicone tubes to carry ink from the tanks at the front of the printer to the moving printhead carriage.
If you lift the top cover of your printer and look at those tubes, they should be solid black, cyan, magenta, and yellow. If you see large gaps of clear space, or if the tubes are completely empty, your printer has an air lock.
Because ink cannot flow through air, the printhead starves. This results in prints that are streaky, faded, missing a specific color, or completely blank.
Cause 1: Letting the Tanks Run Dry
The most common way air enters the system is by letting the physical ink tanks drop below the bottom line. The pump sucks in air instead of ink. Never let your MegaTank ink levels drop below the lower limit line.
Fix 1: The 'Ink Flush' (System Cleaning)
A standard "Head Cleaning" from the printer menu is not strong enough to pull air out of the tubes. You must use the heavy-duty Ink Flush (sometimes called System Cleaning or Deep Cleaning, depending on your model).
Warning: An Ink Flush consumes a massive amount of ink. Ensure your tanks are at least 50% full before starting, or you risk damaging the printer.
- On the printer's screen (or via the Canon software on your computer), go to Setup > Maintenance.
- Select Ink Flush .
- Choose All Colors (or select just Black or Color if only one tube is empty).
- Confirm the prompt. The printer will make loud pumping noises for 10 to 12 minutes.
Once it finishes, open the cover and check the tubes. They should be completely solid with ink again. Print a nozzle check pattern to confirm.
Fix 2: The Printhead Soak
If the tubes are solid with ink, but the printer is still printing blank pages or streaky lines, the printhead itself is clogged.
Unlike standard cartridges, MegaTank printheads (often labeled 'C' and 'B' for Color and Black) can be removed and cleaned manually.
- Open the cover. Wait for the carriage to center.
- Crucial Step: Before doing anything, open the blue ink tank caps at the front of the printer. This closes the internal valves. If you don't do this, all the ink in the tubes will immediately drain backward into the tanks when you remove the printhead.
- Lift the blue locking cover over the printheads.
- Remove the problem printhead (B or C).
- Soak the bottom nozzle plate in 1 cm of warm distilled water for 15 minutes.
- Dry it completely, reinstall it, close the blue locking cover, and close the ink tank caps.
- Run one standard cleaning cycle and print a test page.
Why Air Bubbles Form in Canon MegaTank Ink Delivery Tubes
Canon MegaTank continuous ink supply system (CISS) printers (G1200, G2200, G3200, G4200, G5020, G6020, G7020, GX6020, GX7020) utilize flexible silicone tubing to siphon ink from the large body-mounted ink reservoirs to the moving printheads. Air pockets enter the tubes if the printer is left unused for months, if the tank valves are left open, or if the printer is transported without locking the transportation ink valve.
Step-by-Step Ink System Flush (Purging Air from Tubes)
- Verify Ink Levels Are at Least 50% Full:
An Ink Flush consumes a substantial volume of liquid ink to pull fluid through the entire tube length. All ink tanks MUST be filled to at least 50% capacity before executing an Ink Flush. Running an Ink Flush with low tanks will draw more air into the system.
- Check the Mechanical Ink Transport Valves:
On models equipped with a physical ink transportation switch (e.g., G-series), ensure the valve is set to the PRINT / UNLOCKED position. If locked, the ink flow is physically pinched off.
- Executing the Dedicated Ink Flush Routine:
- On LCD Models: Go to Setup (Gear) > Maintenance > Ink Flush (or System Cleaning). Confirm OK.
- On Keypad / Non-Screen Models: Press the Maintenance (Wrench/Pliers) button until a capital letter
Pappears on the single-digit LED. Press the Black or Color Start button. - The printer will execute an intensive 8-to-10 minute automated purge cycle. You will visually observe ink advancing through the clear tubes, pushing all air bubbles out into the waste box.
- Print a Nozzle Check Sheet to Confirm:
After the flush completes, print a Nozzle Check Pattern. All PGBK grid lines and C/M/Y color blocks should be 100% solid and gap-free.
Frequently Asked Questions
How often can I run an Ink Flush on a Canon MegaTank?
An Ink Flush should only be executed once every 6 to 12 months when large air gaps are visible. Running frequent Ink Flushes rapidly fills the waste ink absorber box, leading to Error 5B00.
Can tiny 1-inch air bubbles in the tubes be ignored?
Small isolated air bubbles under 1 inch (2.5 cm) typically purge themselves during standard automated maintenance cycles and do not affect print quality as long as the printhead sub-tank remains primed.
