


The Quick Answer
Over time, paper dust, thermal coating, and label adhesive build up on your Bixolon print head, causing faded or streaky output. Here is the step-by-step process for cleaning it safely.
Regular print head cleaning is the single most important maintenance task for a Bixolon printer. A clean print head produces crisp receipts and labels, prints faster (indirectly, by reducing the density needed for legibility), and lasts significantly longer.
A neglected one gradually degrades in quality — often so slowly you don't notice until output is genuinely bad.
Here's how to do it correctly, plus the specific things that damage print heads that a lot of guides don't warn you about.
Why Clean the Print Head
Thermal print heads work by heating specific dot positions to burn text and images onto thermal paper. Over time, three things build up on the head surface:
- Paper dust — every roll of thermal paper sheds microscopic paper fibers as it feeds through the mechanism
- Thermal coating residue — some of the heat-sensitive coating from the paper transfers to the print head
- Adhesive residue (on label printers) — the adhesive from labels migrates to the head over time
All three insulate the print head from the paper, meaning the head has to work harder to produce the same output darkness. The result: gradually fading print, streaks, and dropped dots.
Cleaning removes this buildup and restores original print quality.
How Often to Clean
Cleaning frequency depends heavily on use:
- High-volume retail/restaurant environments (hundreds of receipts per day) — every 2 to 4 weeks
- Moderate use (dozens of receipts per day) — every 2 to 3 months
- Light use (a few receipts per day) — every 6 months or when quality noticeably degrades
- Label printers, especially with heavy adhesive labels — more often; every 2 weeks in heavy use
Signs it's time to clean, regardless of schedule:
- Print is noticeably faded compared to when the printer was new
- Vertical streaks or lines appear in the printed output
- Some dots consistently drop out, creating patterns of missing content
- You've had to increase print density settings to maintain legibility
- Recent paper jam or roll change
If output quality is already dropping, cleaning is overdue.
Materials You Actually Need
Only three things:
- Isopropyl alcohol (IPA) — 90% or higher concentration works best. 70% works but is less effective at dissolving residue.
- Cotton swab or lint-free cloth — cotton swabs are best for reaching the print head in tight spaces
- The printer, powered off
Do NOT use:
- Paper towels — they leave fibers behind
- Regular household cleaning wipes — many contain surfactants or oils that damage the print head
- Water — thermal print heads must not get wet
- Abrasive materials of any kind — including "gentle" scrubbing pads
- Metal tools of any kind for scraping
- Automotive or industrial solvents (acetone, brake cleaner, WD-40, etc.)
Using anything from that list can permanently damage the print head, and print head replacement is expensive.
The Cleaning Procedure
Step 1: Power Off and Wait
Turn off the printer completely. If it was recently printing, wait 5 to 10 minutes for the print head to cool. Cleaning a hot print head is a burn hazard, and the alcohol will evaporate too quickly to do its job.
Step 2: Open the Cover and Remove Paper
Open the printer cover fully. Take out the paper roll and set it aside. This gives you clear access to the print head area and prevents the alcohol from contacting your paper roll.
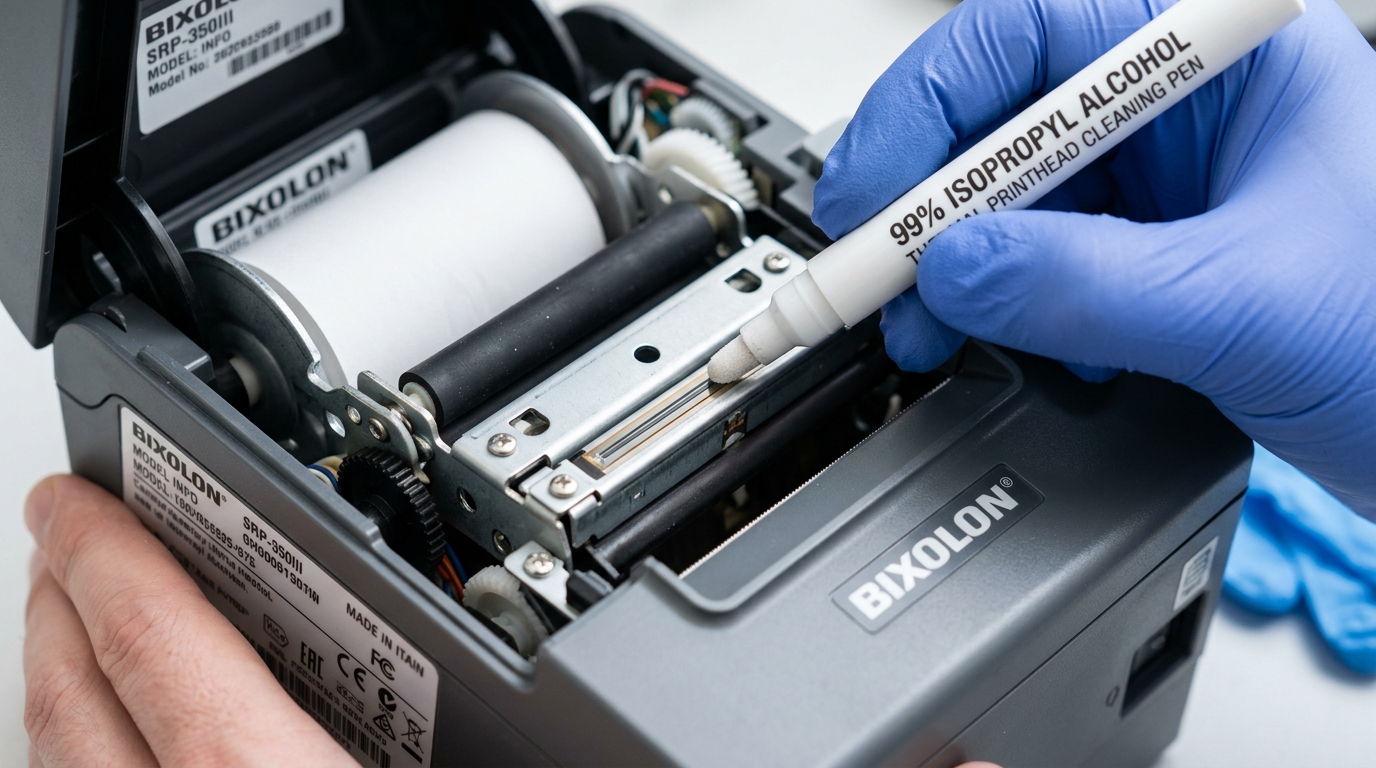
Step 3: Locate the Print Head
On most Bixolon receipt printers, the print head is directly above where the paper feeds — a horizontal strip running the width of the paper path. It's usually black or dark colored, sometimes with a metallic backing. On label printers, the head is in a similar position but often larger.
If you're unsure, consult your model's manual for the print head location diagram.
Step 4: Dampen (Don't Soak) the Swab
Put a small amount of isopropyl alcohol on the cotton swab — enough to dampen it thoroughly but not enough to drip. The swab should be moist, not dripping wet.
Step 5: Clean Gently
Wipe the print head surface gently in one direction — usually along the width of the head, not perpendicular to it. Use light pressure. The alcohol does the work of dissolving residue; you don't need to scrub.
Look at the swab afterward — it will typically show discoloration where residue transferred from the head. This confirms you're cleaning effectively.
For stubborn buildup, use multiple passes with a fresh swab each time rather than heavy pressure on one swab.
Step 6: Clean the Roller Too
While you have the printer open, clean the platen roller (the rubber roller that presses paper against the print head). Adhesive residue and paper dust accumulate here as well, and a dirty roller causes feed issues even after the print head is clean.
Wipe the roller with a slightly-damp cloth or swab, rotating the roller manually as you go so you reach the entire circumference.
Step 7: Let It Dry
Let the print head air-dry for at least 60 seconds before reloading paper. Reloading paper onto a wet head can transfer alcohol onto the thermal coating, causing streaks in your first few prints.
Step 8: Reload Paper and Test
Reload the paper roll, close the cover firmly, and print a test page (or run a self-test). Output should be visibly crisper and darker than before cleaning.
What About Cleaning the Sensors?
While you have the printer open, quickly clean any exposed sensors as well. These are usually small clear or reflective components in the paper path.
Gently wipe them with a dry lint-free cloth or a very lightly dampened swab. Dust on sensors causes paper-out errors even when paper is loaded, or (on label printers) failed calibration. This 10-second addition to your cleaning routine prevents a lot of subtle issues.
Cleaning Kits and Pens
Some vendors sell dedicated thermal print head cleaning kits or "cleaning pens." These are:
- Convenient (isopropyl alcohol in a controlled applicator)
- Generally safe (as long as they're specifically for thermal print heads, not general electronics)
- Not strictly necessary (a cotton swab and IPA does the same job)
If you prefer the convenience, they're fine. If you'd rather just use standard IPA and cotton swabs, that works equally well.
Warning: don't use cleaning products marketed for inkjet or laser printers — those chemistries are different and can damage thermal print heads.
Signs Cleaning Wasn't Enough
If you've cleaned thoroughly and print quality still isn't restored, the issue may be beyond simple cleaning:
- Consistent dropped dots in the same position across prints — a specific dot on the print head has failed. This is not user-fixable; the print head needs replacement.
- Faded print on one side of the receipt only — uneven pressure between print head and roller. Check that the cover latches evenly at both sides.
- Print density is at maximum and output is still faint — the print head has degraded from age. Aging thermal print heads gradually lose the ability to reach full darkness even at maximum settings.
- Diagonal streaking — usually a mechanical alignment issue rather than a cleaning issue.
In these cases, contact Bixolon support for evaluation.
Preventing Future Buildup
A few habits that reduce how often you need to clean:
- Use quality thermal paper. Cheap thermal paper generates more dust and leaves more residue on the print head. The savings on paper don't offset the extra wear.
- Keep the environment reasonably clean. Printers in dusty environments (auto shops, warehouses) need more frequent cleaning than those in clean environments.
- Don't touch the print head with fingers. Skin oils leave residue that attracts dust.
- Close the cover when not in use. Especially in dusty environments, this keeps airborne particles out of the mechanism.
- Replace paper rolls promptly rather than running them until empty. Very short remaining paper (down to the core) creates uneven feed pressure and can accelerate wear.
Print Head Life Expectations
Bixolon thermal print heads are typically rated for tens of millions of pulses — meaning years of normal use. Regular cleaning extends this significantly. Neglect can shorten it dramatically.
If you're getting less than a couple of years of life out of print heads in normal use, environmental factors (dust, humidity, paper quality) or cleaning habits are likely accelerating wear more than they need to.
